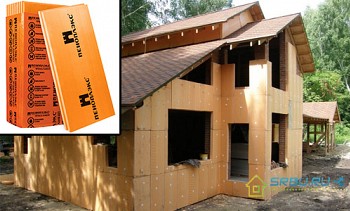
After reading this article, you can find out how it is easier and faster to warm your house from the outside. It discusses in detail all the stages of work on thermal insulation, as well as gives tips on choosing the right material. In particular, we will consider how to make insulation of the walls with foam with your own hands. It will cost inexpensively, and the effect will give a very tangible. We will tell you in detail about this method.
Cooking the surface of the walls
In order for the thermal insulation to turn out to be of high quality and last for a long time, it is necessary to prepare the insulated surface well. This process is quite long, and it will take a lot of effort. But the result is worth the effort and time.
If you are warming a new home, then you do not need to perform some points.
#1. The first step is to remove everything that may interfere with work from the exterior walls. These are drainpipes, ventilation grilles, air conditioners, spotlights and wires. If the brick house is quite old, then on its facade there may be decorations framing the cornices and windows. They will have to sacrifice, carefully knocking down.
#2. In the event that there is plaster on the walls, we will check its strength - with a rattling surface. We check all irregularities and deviations with a plumb line, rule or cord of sufficient length. We mark all errors in small, so as not to miss a single flaw. As a rule, when checking it turns out that the walls are far from ideal. They are not only not very even, but in some places the stucco is based on “honest word”. Do not take up warming if you find these shortcomings. First remove these pieces of plaster, and then work with a chisel, knocking down concrete flows and excess mortar between the bricks.
#3. If the facade was painted with oil paint, then it cannot remain on it. In this case, you have to peel the paint. Due to it, the adhesive properties of the surface are reduced. Well, everyone knows about the fact that mold must be removed without fail, grease and rust, as well as salt deposits.
#4. If there are sufficiently large irregularities and cracks on the walls (more than 2 millimeters), then they must be primed. For this, a deep penetration primer is used, wielding with a special brush called a mackerel. It will make this work faster and more accurate. When the primer dries well, you can apply cement putty for outdoor work and putty cracks.
#5. In the case when the irregularities are very large - more than 1.5 centimeters - we also first primed them. And then we put the beacons on which we apply the plaster composition.
#6. The walls are covered with a brick primer once, from cellular concrete 2 times. You can cover with a large brush or roller.
Sometimes part of the communications is left on the surface of the wall, covering them with a heater. In order not to damage them, hammering dowels for attaching expanded polystyrene, it is necessary to draw up a detailed plan for their location.
We fasten the starting profile
Having studied the project, we calculate the location of the lower boundary of the walls, which should be insulated with foam. Now we take the hydraulic level, measuring this boundary at all external and internal corners of the house. We pull the cord along these points. It is along this line that we have to establish the starting profile, on which the bottom row of plates of heat-insulating material will be held. Otherwise, until the glue dries, the plates can move.
The size of the starting strip is chosen according to the width of our heat insulator.We fasten it with six-mm dowel-nails, placing them every 30 or 35 centimeters. Hammered nails serve as a bursting element for dowels, on which washers should be worn. The joints of the starting bar in the corners of the house are made either with an oblique cut, or using an angular connector. So that temperature fluctuations do not deform the structure, we place plastic connecting elements on the ends between the base profiles. FROMoverlapping profiles is not allowed.

To ensure safety, we check the level of fastening of the starting profile.
We glue the insulation
Knead the glue
So that the glue does not thicken too much and does not dry out, it must be used all over for an hour and a half or two. So we make the right amount of adhesive mixture right on the spot. To do this, take a large plastic bucket and pour water into it. Then slowly pour the adhesive into it. To prevent lumps, put a mixer nozzle on the drill, turn it on at low speed and stir the mixture until there are no lumps left. We wait 5 minutes for the glue to swell, then turn on the drill for 2 minutes and mix. If after some time the glue has thickened a little, you just need to mix it again without adding to its water.
Apply adhesive to foam boards
According to the technology of wall insulation with foam from the outside, you can apply glue to the insulation in different ways. It all depends on how smooth the walls are at our house.
Method 1 - It is used when surface drops reach 1.5 centimeters. In this case, apply the adhesive mixture on all sides of the foam plate, 2 cm back from the edge. The same thickness (2 centimeters) should be a layer of glue. So that the slabs do not lag behind in the central part of the slab, glue beacons with a diameter of about 10 centimeters are evenly laid in this place (with an area of 0.5 square meters) 5-7 times.

An example of applying glue.
Method 2 - used when wall irregularities are less than 1 centimeter. Along the perimeter of the plates, as well as in their central part, we apply glue strips with a width of 3 to 4 centimeters. As a result, half to 60% of the surface should be coated with the adhesive. When the insulation is pressed against the wall, the glue will be distributed and occupy the entire space.
Important: to avoid air traffic jams, never make adhesive strips solid. They should be dotted.
Method 3 - It is used when the walls are almost even and the errors are not more than 5 millimeters. In this case, we arm ourselves with a special notched trowel, applying glue to them on the entire base of the plates. The size of the comb tooth is centimeter per centimeter.
Rules for installing insulation on the walls
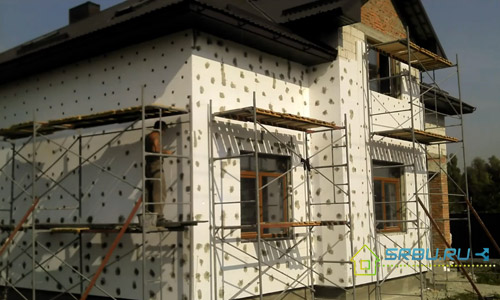
After the glue is applied, you can not hesitate. Within 20 minutes, all plates must be glued in place. First, we apply polystyrene foam plates, having slightly shifted them away from the place where they need to be glued. This distance should be 2 to 3 centimeters. Then, with the help of a building rule or a half-heater, we press the insulation to neighboring plates. The glue that will protrude from the inside of the foam and in the corners should be removed immediately.

We apply the sheet with an offset and press it to the adjacent one.
The correct installation of each foam plate is checked using the level. We also use control cords and the rule, determining all deviations from the plane.

Each sheet is checked by level.
Plates should be laid tightly, at a distance of no more than 2 millimeters from each other. If larger gaps occur, they must be repaired. To do this, take either construction foam, or long and narrow pieces of foam. There should be no glue in the joints, and the difference in thickness at the joints is allowed no more than 3 millimeters.
Important: if you move the plates until the glue has hardened, then they can stick poorly. Therefore, when it becomes necessary to correct some shortcomings, it is better to remove the stove. Having removed a layer of adhesive mixture from it, we spread fresh glue and put the sheet back in place.
When installing the insulation, we work from the bottom up, starting from the basement profile. We pay special attention to the lowest row of plates, which will be decisive. The easiest way to do this is to put the first and last plates, and between them pull the cord, attaching it to the top of the sheets. On this cord and expose the remaining foam boards. Spread the next row with offset joints. It should be at least 20 centimeters. However, it is even better to put the rows of insulation in a checkerboard pattern, making an offset in half of the plate.

The joints of the foam should be overlapped, for this they are glued with an offset.
When laying the plates, we carefully look at how their joints relate to the openings for windows and doors. It is impossible that they pass along the same vertical line with slopes. Optimally, if the joint passes either under the opening, or above it. At the same time, the technology for warming the facades with foam provides that the displacement should be at least 20 centimeters.
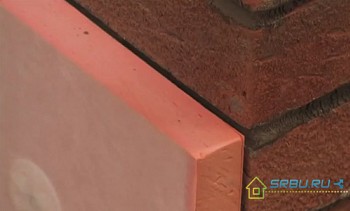
There is such an option: the wall is made of one material, and then part of another material is attached. For example, brick, OSB or foam concrete are connected. The joint of two adjacent insulation boards should be located at least 10 centimeters from the border of these materials. And if the walls have protrusions or indentations that must be insulated, then these places are also blocked by a heat insulator by no less than 10 centimeters.
In the corners of the house, both inside and outside, the plates are connected by teeth, i.e. with dressing. In order not to form a long seam vertically causing cracks, the heater needs to enter an adjacent wall. At the corners and on the slopes of the foam plate are laid with a margin that should allow for dressing. As soon as the glue at the corner is seized, the sticking-out surplus slabs must be cut off. To cut the foam neatly, take a thin file with frequent teeth or a wide knife. It is necessary to cut under a ruler or square made of metal.

In the corners of the plate should be bandaged together.
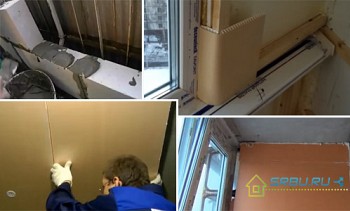
When insulating slopes, we mount insulation sheets close to window and door openings. To do this, you need a polyurethane foam tape or an adjacent profile. If tape is used, then it is glued directly to the door frame. When a heater adjoins it, it is compressed, becoming thinner by about a third. By warming a window located on the facade, a heater is placed on its frame by 2 centimeters, no less. Pre-paste with polyurethane tape the entire window opening.
If there is a deformation seam on the wall at the location of the insulation, a gap is made in size from 1 to 1.2 centimeters. We insert a tourniquet of foamed polyethylene into this gap with effort, squeezing it by a third.
We fix insulation with dowels
When the glue dries (usually this happens after 3 days), you can proceed to the final fixing of the insulation. To do this, use flexible plastic dowels with a wide perforated hat in the form of an umbrella. They are fixed with a driving nail or a twisting pin. Nails can be metal or plastic. To prevent bridges of cold, it is better to choose the option with plastic nails. The length of the dowel is determined by the thickness of the heat insulator and the material from which the walls are made. The dowel must be 5 centimeters in concrete, 9 centimeters in brick, and 12 centimeters for cellular blocks.
Important: dowels with a metal core inside should not be used. This is fraught with the appearance of bridges of cold.
We fix the expansion bolt shield in all corners of a plate, and also in the center. For 1 square meter there are from 6 to 8 dowels. Near the slopes of doors and windows, at the corners and near the base of the fastener, you will need more fasteners. From the edges of the plates they should retreat by 20 centimeters. How much specifically additional dowels to take, and at what distance from each other to fix them, depends on several factors. This, in particular, the size of the sheets of the insulator, the size of the house, the strength of the wind and the quality of the dowels.
Before using the fasteners, we make holes for it with a punch.

The drilling depth should be 1 or 1.5 centimeters greater than the length of the dowel.
After cleaning the holes from the dust, we hammer in the spacer nails with a rubber hammer. If not pins are used, but pins, then they are screwed in with a screwdriver. The dowel caps should not stick out much above the insulation plane. This distance can be no more than a millimeter.
You may find the following materials useful:
- How to choose a puncher - criteria for choosing a puncher for home or permanent work.
- How to drill concrete, metal, tile and wood.
Do not forget that you must observe the perpendicularity of the fasteners relative to the surface of the walls. From time to time, we check how firmly the dowels hold, carefully trying to tear them off.
We lay the reinforcing layer
Installation of auxiliary reinforcing mesh
In order to prevent cracks in the corners of the window and door openings, pieces of reinforcing mesh of size 20 by 30 centimeters should be glued to these places. This reinforcing mesh is mounted exactly the same as the base layer for reinforcement.
When insulating the facades with polystyrene in the lower part, up to two meters high, it is necessary to lay an additional layer of reinforcing mesh. It will protect the wall from destruction.
Install perforated corners
To strengthen the corners of the house, as well as slopes and decorative elements, corners with perforation are used. They are made of plastic or aluminum, and pieces of reinforcing mesh are attached to their edges. To fix the corners, they are smeared with glue (including the net), and then pressed with a spatula to the insulation. Pre-cut corners. The glue that protrudes through the mesh and perforations must be smoothed. In the corners, we connect the profiles closely together, cutting the grid and shelves at an angle of 45 degrees.

Glued corner.
Installation of the main reinforcing layer
When the additional layer dries and all the corners are firmly fixed, you can fix the main reinforcement layer. For this, a special facade mesh made of fiberglass is used. It is resistant to alkali and does not stretch. A strip of such a grid with a width of 5 centimeters can withstand a load of up to 1.25 kilonewton.
To stick this grid and protect the thermal insulation, use a special solution. It does not have the same composition as the adhesive mixture, but it is prepared in about the same way.
Before reinforcing, the foam boards must be sanded. This will allow to smooth out irregularities at the joints of the insulation boards. Grind the foam with a grater and large sandpaper. After that, we clean the surface of the insulation well and apply the solution with a layer of 2 millimeters.
The reinforcing mesh is cut into pieces, the size of which corresponds to the height of the wall. The solution is applied to the surface of the walls vertically with a layer equal to the width of the grid. To do this, use a grater or metal grater. It is convenient to remove excess glue with a notched trowel to form grooves. Then we apply the mesh to the wall, recessing it in the solution and pressing it with a grater or smooth spatula.

After leveling, the mesh should not be visible on the surface.
Smooth the grid neatly, from the middle to the edges. The excess glue is distributed on the plane of the wall.
Important: we do not pull the net strongly, we do not press it against the thermal insulation. Its place is in the middle between the wall and the insulation.
As soon as the grid is glued, we do not wait for the solution to dry and apply another layer of it, but at the same time leave a free edge of 10 cm. Its thickness is the same as the previous one - 2 millimeters. On the free edge of a width of 10 centimeters, we impose a second strip of mesh. The top layer of the solution should completely cover the mesh, it should not peek out from under it. After that, all of the above actions are repeated with the second strip of the grid. The stripes should overlap each other by 10 centimeters.
We look forward to tomorrow, and in the morning it is already possible to fill up irregularities with putty. It’s okay that it has not dried completely yet.But if the bumps are large enough, then you have to wait for drying, and then additionally apply a layer of glue.
Useful tips for thermal insulation of external walls with foam
#1. Remember that wall insulation from the outside with foam should be done at plus temperature, not lower than 5 degrees and not higher than 25 degrees. Humidity can be up to 80 percent. It is not allowed to expose the insulation to solar radiation, as well as leave it in the rain and wind. This applies to all stages of work.
#2. With strong scaffolding or scaffolding, it should be possible to reach any part of the wall, as well as to the side surfaces. To make it convenient to work, scaffoldings are mounted 20 or 30 centimeters from the walls.
#3. We close the doors and windows with plastic wrap, securing it with masking tape. You should also close the brackets, communications passing outside the building. We will protect the blind area and porch with cardboard or the same film. After the painting is done, remove the tape.
#4. If the foam insulation on the wall has been without reinforcement for a long time, it will turn yellow and begin to “dust”. This yellowness must be removed with an emery cloth.
#5. If experience is not enough, start work from the wall that is least noticeable. Or you can start to insulate the simplest surface. Gradually, the technology will be developed.
#6. In the event that the insulation has to be suspended for the winter, provide for the installation of reinforcing layers. Parapets and bevels will be reliably closed if special protective elements made of metal are installed. Do not forget about window tides.
#7. When planning work, try to make continuous all the "wet" stages of work on one wall. This is especially true for reinforcement and decoration.
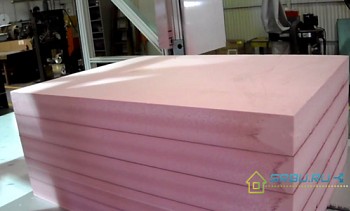
For this method of insulation, only suitable materials must be used. It is necessary to take polystyrene foam, which has a density of at least 25 kilograms per cubic meter. Never glue either it or the mesh for reinforcing with tile adhesive. Use only special solutions, and then the insulation of the external walls with foam will last a long time will bring the desired result.