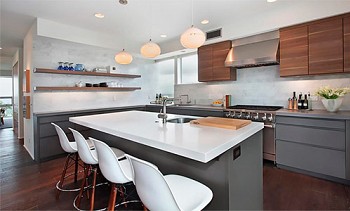
The cozy kitchen, from which it pleasantly draws the smell of warm pies or fragrant coffee, like a magnet, attracts all households. To make this room beautiful, stylish and modern, we will equip it by making repairs to your liking. Let's talk about where to start repairing the kitchen and what nuances should be taken into account.

Content:
- Designing your dream kitchen
- Video: Arrangement of the working area of the kitchen
- Materials: what and how much
- Breaking - not building, but have to work hard
- We carry out the necessary communications
- We decorate the ceiling, walls, floor - go from top to bottom
- Video: How to cheaply and practically decorate walls in the kitchen
- We fix the baseboards
- We hang a new door
- We put a sink, we bring furniture and household appliances
- Video: Kitchen repair steps
Designing your dream kitchen
In order to visualize how the arranged furniture and household appliances will look like, the first thing to do is draw a three-dimensional drawing. On it we will depict everything that will fit in our updated kitchen, putting down the dimensions of each item.
To do this, first we measure all the furniture, stove, sink, noting the location of pipes, air vents, batteries, windowsill, sockets. After that, we move on to measuring the refrigerator, microwave, dishwasher, TV and other household appliances. Do not forget to measure these devices with the doors open (especially for the microwave and refrigerator).
Now it remains to consider the placement of all that we have measured. If you plan to purchase a new kitchen set, in the drawing we dock it with a stove, sink and built-in appliances. We determine the size of the "apron", the number and size of drawers, the location of the handles on them. We plan backlighting, open niches, cornices, the number of glass doors.
It is imperative to foresee and mark those places where sockets for connecting household appliances should be located.
Video: Arrangement of the working area of the kitchen
Materials: what and how much
Having decided on the design and color scheme, you can make a list of the necessary materials. They will need a lot: paint for the ceiling and walls, putty, glue, cement mixes, linoleum, various facing materials and so on. You may have to purchase new sockets and other electrical equipment, as well as elements for plumbing and ventilation. If you need to change the window, consider this.
It will be best to make a detailed list with the number of materials needed for repair, taking into account all the little things. Then, having familiarized ourselves with the prices, we make a preliminary estimate in order to know what expenses are ahead. This is important - where to start repairing a kitchen with your own hands, if not taking into account financial costs?
Breaking - not building, but have to work hard
Now comes the dirtiest stage of repair - we need to get rid of all that is superfluous. First you need to take out all the household appliances, a gas or electric stove, as well as all the furniture, except the one that is built in, from the kitchen. However, most likely, these pieces of furniture will have to be disassembled. Next, we remove the old tile from the walls, tear off the skirting board, remove the floor covering.
If the ceiling is whitewashed, then you have to work fairly, thoroughly washing its surface. However, the paint is also not removed very easily, so it is better to immediately treat the painted surfaces with a special wash. It is necessary to work with it carefully, in protective clothing and glasses - this suspension is very caustic. By the way, it will be easier to remove old wallpapers if you moisten them with cold water before removing them.
In the event that a redevelopment is supposed, it is necessary to demolish the old partitions, as well as remove the door.If the window has an unsightly appearance and easily passes both air and various insects, you will have to remove its box with a frame. The garbage from all these works will be collected more than one bag - what to do, without this in any way during repair. But, having finished the unpleasant cleaning process, it will finally be possible to start creating a new kitchen.
We carry out the necessary communications
Of all the necessary communications, it is necessary to start with electricians. After all, if the outlets are located in uncomfortable places, using household appliances will be very problematic. We will need sockets in the following places: in the working area, for connecting a microwave, refrigerator, TV, hood and stove. It is also a good idea to provide an additional outlet for local lighting. It is best if a professional electrician takes care of all the work.
Now mount the ventilation system. In this case, it is necessary to provide for a good hood, which we mount 60-70 centimeters above the stove. Old ventilation pipes and fans should be removed and replaced with new ones. Forced ventilation system removes many problems, so often choose it.
As for the water supply and sewage system, it is preferable to make it with pipes made of metal-plastic or polypropylene. They are durable, lightweight, easy to install, and are not afraid of temperature extremes. After all pipes are laid, it is necessary to install cranes. Then gas hoses are brought.

Variant of wiring and installation of ventilation.
Photo - oneill-electrical.co.uk
We decorate the ceiling, walls, floor - go from top to bottom
So, we start from the ceiling. It can be made hinged from drywall or plastic, stretched or just painted. In the latter case, it is preferable to choose a coloring composition that is not afraid of water. Before painting, the ceiling must be leveled, and it must be painted only after the putty layer has dried. In the case of a stretch ceiling, one should not forget that it is not installed before, but after the walls are finished.
Now we need to align the walls. Isogypsum or satengips are well suited for this. Wallpaper is better to choose washable - because soot and fat will settle on them. The wallpaper for painting looks very beautiful in the kitchen, in addition, they are quite practical. The place near the sink and above the stove is usually laid out with tiles. However, quite often tiles are laid on the entire surface of the walls. Below you can find a cheap, but at the same time practical way of decorating the walls in the kitchen.
Video: How to cheaply and practically decorate walls in the kitchen
Then we level the floor, for which we take a self-leveling mixture or make a cement-sand mixture and fill the screed. If the floor is wooden, then, if necessary, replace some of its elements and align. If you plan to make a warm floor, prepare it, first leveling the surface with a screed. Then we lay the heating elements, in accordance with the instructions that are attached to them. Then fill them with a solution, after which we make another screed. We lay tiles, linoleum, laminate or other flooring.
We fix the baseboards
For the kitchen, it will be plastic or metal. A plinth made of wood is not very practical, because without additional coating it does not like moisture and does not wash so well. In contrast, the plastic baseboard does not mind wet cleaning, and in addition, it fits perfectly to linoleum. A skirting board made of metal (aluminum or stainless steel) also showed good results in the kitchen.
The standard length of any baseboard is two and a half meters. To calculate how many pieces are needed, add a couple of meters to the perimeter of the kitchen and divide by two and a half. By the number of angles we get corner elements. Cutting a plastic baseboard is best with a miter saw. Mount it, starting from the door or from the corner. Holes are drilled in the walls for this.
A very convenient element is the baseboard, which is fixed between the countertop and the wall. It is called a kitchen skirting board.By installing it, you can not worry that something will fall into the slot near the countertop or water will spill. There is another type of baseboard - ceiling, called a baguette. It is placed in order to emphasize the design. It is mounted after finishing the ceiling and walls.
We hang a new door
If it’s already decided to do everything in the kitchen in a new way, then you just can’t do without replacing the door. Depending on the design, it can be wooden, glass or with glass inserts. Now there are many options for their design - stained glass, fusing, sandblasting drawings. But glass doors require careful maintenance. But the doors with a laminated coating are cheaper and very practical for the kitchen.
As for the design, here you can also dream up. In addition to the usual hinged door, it is quite possible to use a sliding option. It will look beautiful, and also save a lot of space. It is not so difficult to install such a door yourself - because it contains all the necessary details.
We put a sink, we bring furniture and household appliances
The repair is almost completed - the matter is left to the small. We install kitchen furniture according to the sketch drawn at the very beginning. Now you need to mount the sink. The best sink - stainless steel. Its cardboard packaging is a template for embedding a sink in a countertop. We work on it, outlining the contour, and then cutting a hole with a jigsaw. We install a sink, fixing it with a self-tapping screw in an interference fit.
It remains to connect household appliances. In the case of a refrigerator, a microwave and a dishwasher, there will be no difficulties - just install them in the designated places and then plug them into the sockets (which we provided in advance). If in the kitchen there will be a washing machine, it is necessary to connect it to the plumbing system and sewage.
So, thinking about where to start repairs in the kitchen, one should not be afraid of difficulties. We must sit down at the table and begin to draw. Her - the kitchen, where it will be joyful to come, and the food in which will become many times tastier. Go for it!
And lastly, you can watch an interesting video about the stages of repairing a kitchen.
Video: Kitchen repair steps