Independent puttying of the ceiling is a very laborious work and requires certain skills. That is why many prefer to trust this team of professionals to this stage of work. However, following the instructions given in this article, anyone with minimal construction skills can putty the ceiling with their own hands.

Necessary tools and materials
Before starting work, make sure that you have everything at hand that you may need during the work.
Tools:
- spatulas of different sizes (at least two - narrow and wide);
- metal halter (about a half meter long);
- primer roller;
- convenient basin for breeding a dry mixture;
- construction mixer or drill head for quick and high-quality mixing of putty.

A list of tools that may come in handy when performing putty.
When choosing the type of dry mix, you should carefully read the recommendations on the packaging. Putty is usually used when it is necessary to smooth out small differences (up to 50 mm), if the differences are too large, the surface of the ceiling must first be plastered. However, putty "Rotband" allows you to eliminate differences of more than 50 mm. For wet rooms there is Putonit VX putty; in dry rooms you can use glue-based mixtures, for example Betonit LR or Betonit KR.
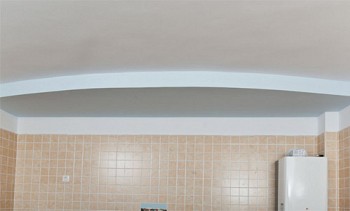
Ceiling preparation and cleaning
If the ceiling plates are laid evenly, it is enough to remove the remains of wallpaper, glue and / or whitewash from the ceiling. To remove whitewash or wallpaper, the surface of the ceiling should be moistened with water using a sponge. As soon as the removable layer of whitewash or wallpaper is saturated, it can be easily removed with a spatula. You do not need to wet large surfaces at a time, as they can dry quickly. This is best done step by step, wetting and cleaning small sections of the stream, for example meter per meter.

An example of removing soaked whitewash with a spatula.
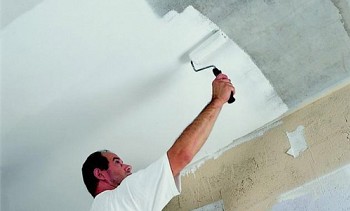
For better adhesion of the putty to the ceiling, it is necessary to cover the surface with a primer mixture. The primer should be applied to the ceiling in two layers. The first is parallel to the wall with the window, the second is perpendicular to it. We apply the primer evenly, without leaving smudges or traces of the brush or roller. The brush should touch the ceiling with the tips of the pile. We hold the brush at an angle of 60-70 degrees to the ceiling, while during operation the brush should be rotated around the axis, allowing it to wear evenly on all sides. The optimum result is given by a primer with a roller. It is better to take the roller with a short pile, to prime the surface without pressing hard on the tool.
If the ceiling has sufficiently strong differences and steps, then before the start of the putty, in some cases it will be necessary to plaster it to eliminate the most significant irregularities, then, after complete drying, prime it.
Puttying sequence
Knead the dry mixture
This work is best done using a special mixer or nozzle on a drill. Using such a tool will allow you to get a homogeneous mass without lumps. Add water to the dry mixture should be a little, trying to eventually get a mass with the density of sour cream.

Kneading and puttying.
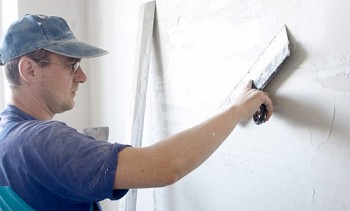
Putty putty on the ceiling
The puttying process is exactly the same for all types of puttying. Scoop a little mixture with a small spatula and evenly distribute it on the surface of a wide spatula. The mixture is then applied with a wide spatula to the ceiling as thin and uniform as possible. The remainder of the mixture from the wide spatula is removed narrow back into the basin. We continue to do this procedure until the entire ceiling is puttied with the first layer.

Putting the first layer of putty.
After the first layer has completely dried, it is necessary to remove all irregularities that rise above the main layer. Sagging can be removed with a spatula or sandpaper. After sanding, dust remains, which can affect the quality of the second layer. Therefore, the use of a wide spatula to align defects is more appropriate.
Number of layers
It is all the more, the more uneven the ceiling. With each layer applied, strive to level the surface horizontally, imposing more mixture on uneven areas. Each subsequent layer can be applied only after the previous one has completely dried.
Last layer
The finish layer should be thinner than all previous ones. The overlay must be applied quickly, preventing the mixture from drying out at the edges. Using a wide spatula, apply a layer of putty and in the next movement we remove all unnecessary, with effort pressing the spatula to the surface of the ceiling. In this case, it is better to hold the tool almost perpendicular to the work surface. With proper application of the top coat, subsequent sanding of the surface may not even be necessary.
Final finish
If the ceiling is prepared for wallpapering, finishing sanding can be omitted. If it is planned to paint the ceiling, we will give it perfect smoothness by treating it with a fine sandpaper, after drying the putty, highlighting and revealing irregularities with the help of a carrying lamp. You can resort to the help of a grinding machine.

Grinding of a puttied surface.
Features of plastering plasterboard ceilings
The main feature of the plasterboard ceiling putty is that it is not necessary to level the surface. Putty is applied only to give the ceiling a uniform smoothness. First of all, the seams of the drywall sheets should be aligned. Typically, the ends of the drywall sheets have an oblique cut, which facilitates the alignment of the joints. If there is no such chamfer at the edges of the sheets, you should prepare the edges of the drywall yourself, cutting off the chamfer with a clerical knife at an angle of 45 degrees.
After that, all seams and joints are pasted over with a fiberglass mesh. It is self-adhesive, so gluing it will not be difficult. It is better to prime the seams beforehand to get rid of dust. We put the putty on the seam with a narrow spatula, then immediately level it with a wide one, trying to fill the seam with the mixture with these two movements and level it.
Hats of self-tapping screws are puttied cross to cross, this allows you to fill the entire fastener head with a mixture. After drying the joints, sand them, primer the entire surface of the ceiling and apply the finishing layer of putty.
Video: Putty plasterboard joints
Features of the putty of the ceiling for painting
Most of the work has already been done, the ceiling pleases with its even smooth surface, you can start painting. At this stage, many are faced with an unexpected and very unpleasant problem. During painting, pieces of putty may adhere to the roller, which break away from the ceiling, forming defects on it. Attempts to rectify the situation and stick putty into place, as a rule, give even more deplorable results. How to protect yourself from this problem?
1. For finishing, you should use waterproof putty, which will not get wet from the water contained in the paint and firmly hold on the ceiling. If the usual putty is already purchased, you can use a water-repellent primer to dilute the putty mixture.In this case, do not add the primer directly to the dry mixture, but first dilute it in water.
The mixture thus prepared should be stirred periodically with a mixer so that it does not harden and does not form lumps. Use this mixture should be faster, because three hours after preparation, it will become unusable.
2. With a waterproof primer, you can also simply coat the finished ceiling before painting. This will also prevent the putty layer from lagging behind the surface.
3. When painting, do not press hard on the roller and try not to drive it too many times in the same place.
Video: Ceiling putty for painting
You can get some tips and recommendations regarding putty by watching the following video.
Video: Puttying the ceiling