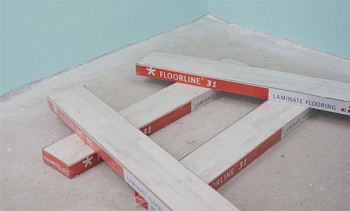
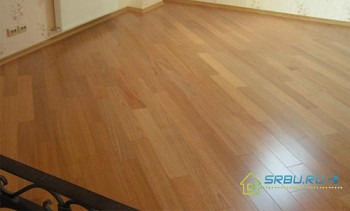
Floors made of modern materials look beautiful, they are easy to clean and environmentally friendly. But when laying them, the basic rules should be followed. And the most important of them is leveling the foundation, which simply must be strong and reliable. Take, for example, a laminate flooring - everyone wants to level the floor under the laminate quickly and cheaply.
We’ll immediately warn you that it will not work very cheaply - the materials needed for such work do not differ in low prices. But the speed and excellent quality of the alignment will be guaranteed. The floor from the laminate will turn out well. Naturally, provided that the base meets the necessary requirements.

Content:
What surfaces can a laminate be laid on - requirements for the base on the laminate side
The basis for the laminated coating should not have large irregularities. A height difference of not more than 2.5 millimeters per one meter (linear) of the base is allowed. To check this, take a rail two meters long, a level or a rule and measure in different directions. If the resulting result does not exceed 1.5 millimeters, then it is quite possible to do with the substrate - it will perfectly smooth out the existing error.
If the base all the time has large bulges and depressions, then it must be leveled very carefully. Otherwise, very soon cracks and skews will appear at the joints between the laminated boards. This will happen because when walking on an uneven floor, the joints of the castle type will not withstand the loads. Indeed, in places of depressions, the surface will be especially vulnerable, because under the laminated coating there will be a void. The bumps are also not good - with a sufficiently large load, they can push through a layer of laminate, or the locks will open again.
Concrete base: leveling methods
If we have in front of us an ordinary rough concrete floor, then an ideal surface, to put it mildly, can not be expected. After all, this is usually the wrong side of the smooth concrete slabs of the ceiling of the apartment from the bottom. And the wrong side is not obliged to shine with either beauty or smoothness. Well, we will consider how uneven our foundation is, and in accordance with this we will choose a way to correct it. For this, we list below all the methods of leveling concrete floors that are most appropriate today.
Grinding - simple and cheap
If there is only a slight leveling of the surface, then it makes sense to grind it. You can do it yourself by renting a grinder, or you can entrust the repairmen with this. If the room is small (for example, a nursery or an office), and there is very little work to be done, then the floor is perfectly sanded with sandpaper - it will smooth out small irregularities. This is the simplest and most economical way, but it is suitable only for a more or less even floor.
Self-leveling mix - fast and efficient
If the base has tubercles and depressions, the differences in height of which are up to 5 millimeters, then polishing is no longer necessary. In this case, bulk floor technology can be applied. With this method, leveling the floor under the laminate with your own hands is done quickly, and the result is impressive. Therefore, even a sufficiently high price of the necessary materials is not a decisive factor. In order to understand the procedure, we will consider in detail all the stages of work.
Step 1. The first thing, of course, is to clean the room. The floor must be clean, without the slightest trace of dust and debris - otherwise the necessary adhesion will not work.
Step 2 Now we glue together the large tubercles, and coat the gaps with glue for the tile - it is best suited for these purposes. However, if one is not at hand, it is quite possible to get by with diluted cement.

Cracks in an old concrete base can be repaired with any suitable, inexpensive sealant.
Step 3 Next, we treat the surface with a deep penetration primer - this will further strengthen the base.
Step 4 We dilute the self-leveling mixture according to the instructions. It is usually printed on the packaging. At the same time, we first pour water into the container (about two-thirds of the volume), then gradually add the dry contents of the bag. To mix the solution, we will use a special mixer designed for construction work. Lumps of dry mix slowly begin to “melt”, and the solution eventually changes its color. This means that its manufacture has reached the stage of completion.
Step 5 As for the proportions, you will have to determine them empirically. By the way, it depends on whether we want to fill in a thick or thin layer for alignment. A mixture with a density of fifteen percent sour cream is suitable for obtaining a thin leveling layer - in this case it is not necessary to talk about ideal smoothness. However, such a base is quite suitable for a laminate, so there is no need to complicate anything - you can make a mixture of such a consistency.

Mixing and preparing the mixture.
Step 6 Now gently pour the prepared solution onto the base. If there is a point on the floor located above the others, then we start from it - so things will go faster.

And to help the solution spread throughout the floor at a good speed, we will help it with a spatula. After that, take a studded roller made of plastic and roll it over the poured mixture, contributing to its alignment and squeezing out from under it the air that got there. So the floor will turn out smoother, and there will be no small holes from air bubbles on its surface.

Spreading the mixture with a needle roller.
Step 7 We will have patience and wait until the mixture sets well. It’s not worth going to the base in a day — several days should pass to strengthen it.
Video: Parquet floor leveling
Cement screed - a tribute to tradition
If the surface of the base is very problematic, then a good old screed made of sand and cement will help level the floor under the laminate. To do this, you can use either a ready-made dry mixture, or prepare it yourself. In the latter case, we take sand three times more than cement, and prepare a solution. You need just enough water to make the mass consistency like fat sour cream.
Step 1. Using the building level (laser or water), we measure out the necessary marking, according to which we put marks on the walls.
Step 2 Then we install special lighthouse rails on the floor. Please note that the floor must not be wet or dirty.
Step 3 Between the rails we put the solution, leveling it with a special rail or rule (the rule is a special tool for leveling the mixture).

An example of a screed on the layout.
Step 4 When 2 hours have passed, you need to grout the cement mixture using wood trowels. And after 24 hours, the guide rails can also be pulled out. At the same time, the holes remaining after them should be covered with the same cement mortar, smoothing the surface well in these places.

Screed surface mashing.
Remember that such a screed dries to full hardening for a long time - almost a month. More precisely, 28 days - that is how much time it will take 2 times a day to moisten the base, protect it from the likelihood of a draft and cover it with a film. But such alignment will cost very cheaply - cement and sand have low prices.
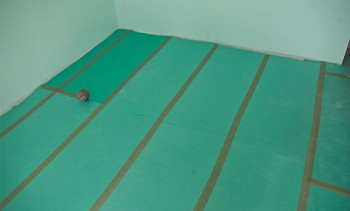
Keep in mind that for laying a laminate, such an indicator as the percentage of moisture in the sand-cement screed should not be higher than 5. Before the flooring of the substrate on the concrete base, a PVC film is necessarily coated for better waterproofing.
Video: How to make a floor screed
How can I level the floor from wood
We use plywood or chipboard
Very often to remove the old wooden flooring is an ungrateful and time-consuming task, which does not justify itself. So why not just lay a few plywood sheets or chipboards on top of the old wood floor?
Step 1. Aligning the wooden floor under the laminate in this way, you should not rush. Otherwise, you can later regret what you did by discovering cracks or crevices in the new floor. Therefore, you must first check whether the boards that make up the old floor are strong enough. Who knows - maybe they are already completely rotten or badly shaken and bend. All problem boards must be replaced.
Step 2 Now it is necessary to lay the bars or strips of plywood that will serve us as a lag for sheets of plywood or chipboard. If you have the opportunity to raise the height of the floor by 40 - 50 mm, then as a log it is best to use wooden blocks of 50/60 mm or 40/80 mm in size. If it is not possible to raise the floor height to such a distance, then strips of plywood 5-7 cm wide can be used as a lag.
Before laying the log, you need to find the highest place on the floor and start laying with it. Logs need to be laid perpendicular to how the boards go on the floor.
We put the first lag and in those meta where it does not lie on the floor, we put chips in, adjust it to the level and fasten it with screws. The next lag must be laid in parallel, at a distance of 40 - 50 cm, and adjusted in level not only along it but also in relation to the neighboring lag.
After all the logs are laid, you need to lay the cross-sections between them at a distance of 80 - 100 cm and adjust them in level as well.

Step 3 After laying all the lags, it's time to put the sheets of plywood or chipboard. Plywood for these needs is suitable at least 10 mm thick. You can open sheets of plywood or particleboard as you prefer. Each stacked sheet is screwed along the perimeter, along the lag. In view of the poor environmental friendliness of the non-laminated particleboard, it is best to paint after laying it.

Try to stack plywood sheets so that each edge rests on the logs.
Recycle machine
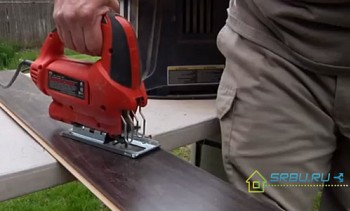
There is such a hand tool called a loop. With it, you can align the base of the tree, scraping its upper layer, only this is a very long process. It will be much faster if you use a looping machine. The main thing is to make sure that the knives of this machine do not get on a nail in the floor - hammer all the nails and screws first deeper. To do this, take a dobnik and drown their hats.
Using a looping machine, the top layer of the wooden surface will be removed, and as a result we will get a smooth floor, called a rough floor. We remove dust and garbage from it - now you can lay the laminate.
But to carry out such a complicated operation in order to then cover this floor with a substrate and a laminate is not rational in my opinion. Despite the fact that it is very difficult and even not possible to level the floor so strongly curved!
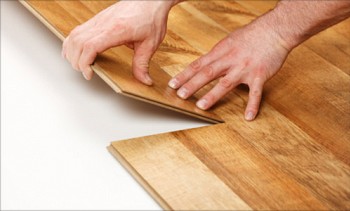
Video: How to lay a laminate on an old floor