In this article, we will tell you how to install a skirting board and give tips that will help you achieve a professional result of your work. The plinth performs several functions at once: firstly, it closes the joint between the floor covering and the wall, secondly, it protects the base of the walls from mechanical stress, thirdly, it carries a decorative load, provided, of course, that the installation work .
The skirting board comes in a wide variety of colors, patterns and materials, so it will not be difficult for you to choose the most suitable according to your tastes and needs. The baseboard material will largely determine the sequence of your actions for its installation. The most common materials for the manufacture of skirting boards are wood, MDF and plastic - these will be discussed in our article.
How to install a plastic baseboard
The plastic baseboard has a dual function: it improves the appearance of the walls, hiding their curvature and other imperfections, and protects the base of the walls from all types of influences. In most cases, the plastic baseboard is attached directly to the walls, not to the floor, as it is very flexible and designed to hide the curvature of the wall.
If you want to install a plastic baseboard, you have two options: either using a good glue, glue the baseboard to the walls of the room, or attach it with screws. We recommend that you choose the first option for drywall walls and the second option for brick walls.
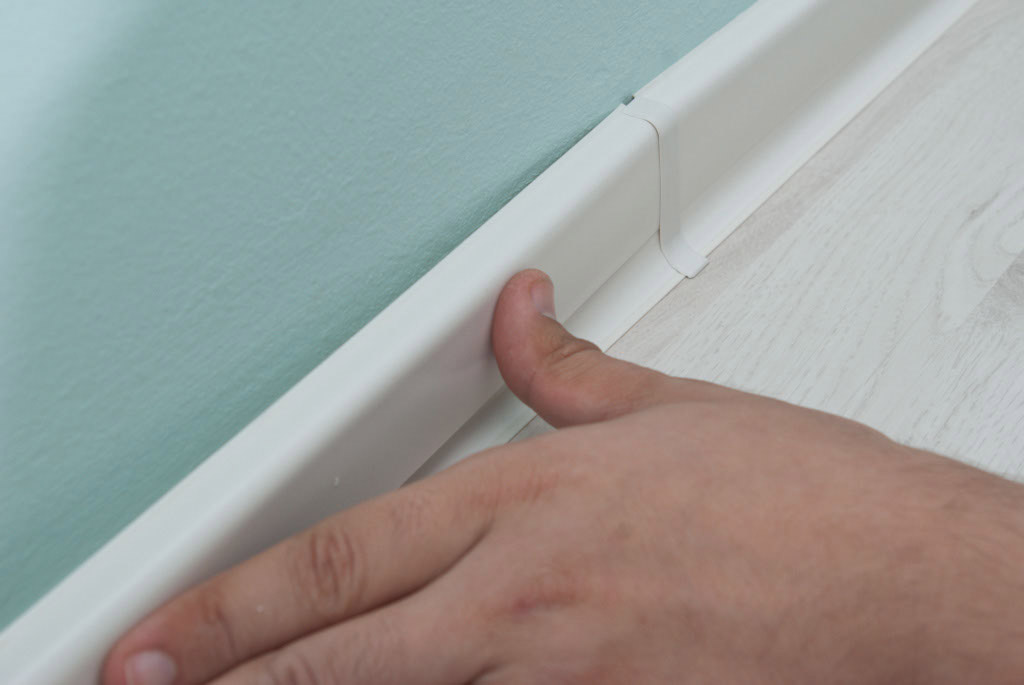
If you want to install a plastic baseboard on drywall, you must determine the places where you have to screw the screws. Make sure that there is no gap between the baseboard and the wall, however, as between the baseboard and the floor. If you need to install the baseboard on a brick wall, you must drill holes every 40 cm, insert the dowels and fix the baseboard with screws. We recommend that you use a quality impact drill to make proper holes in the brick walls.
To install a plastic baseboard, you need the following:
| Materials: | Tools: |
|---|---|
| The plinth is plastic. | Miter box or angle cutting machine. |
| Accessories for plastic skirting (connecting elements, angles, plugs). | Hacksaw. |
| Dowels and screws. | Drill and drill. |
| Roulette, pencil, square. | |
| Heterogeneity detector. | |
| A vacuum cleaner. | |
| Protective gloves, glasses. |
Tips:
- Use a vacuum cleaner to remove dust and other residues after drilling holes in the wall.
To make precise cuts you will need a miter box and a hacksaw. In addition, in this project we will show you how to fix plastic skirting boards to concrete walls, therefore, you will need to buy screws, dowels and other necessary accessories (it is assumed that you already have a drill). We chose this path when implementing our project, but this does not mean at all that you must act in the same way.
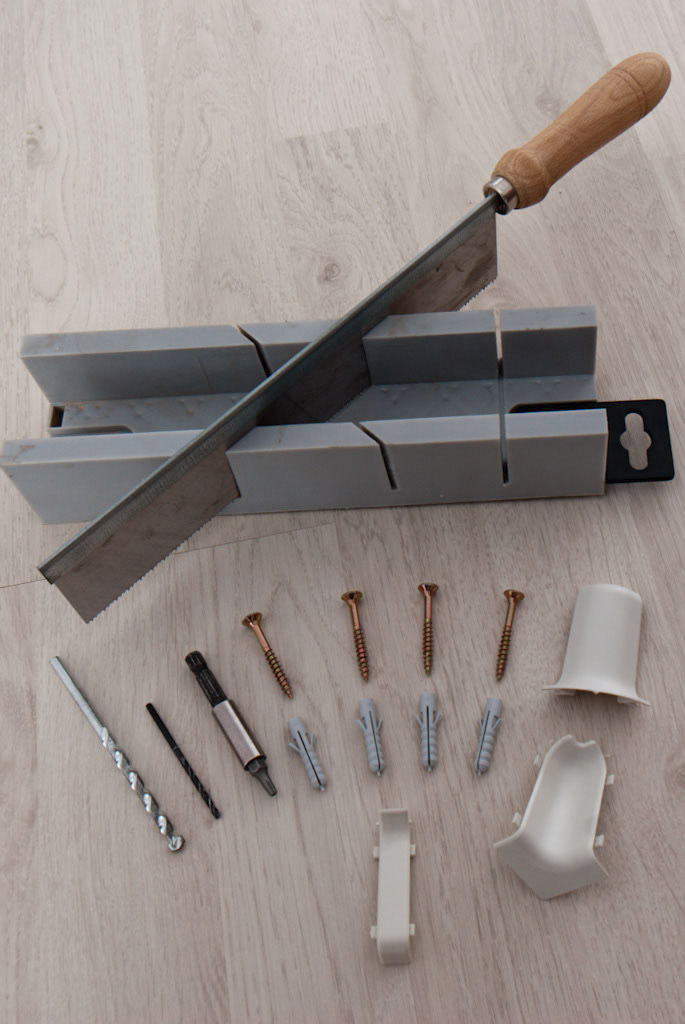
Tools and supplies needed to install a plastic baseboard.
First you need to measure the perimeter of your room to determine the required length of the baseboard. Remember to add 5-10% to the waste when cutting. Plastic skirting comes in a wide variety of shapes and colors, so it is best to pay attention to this aspect before placing your final order.
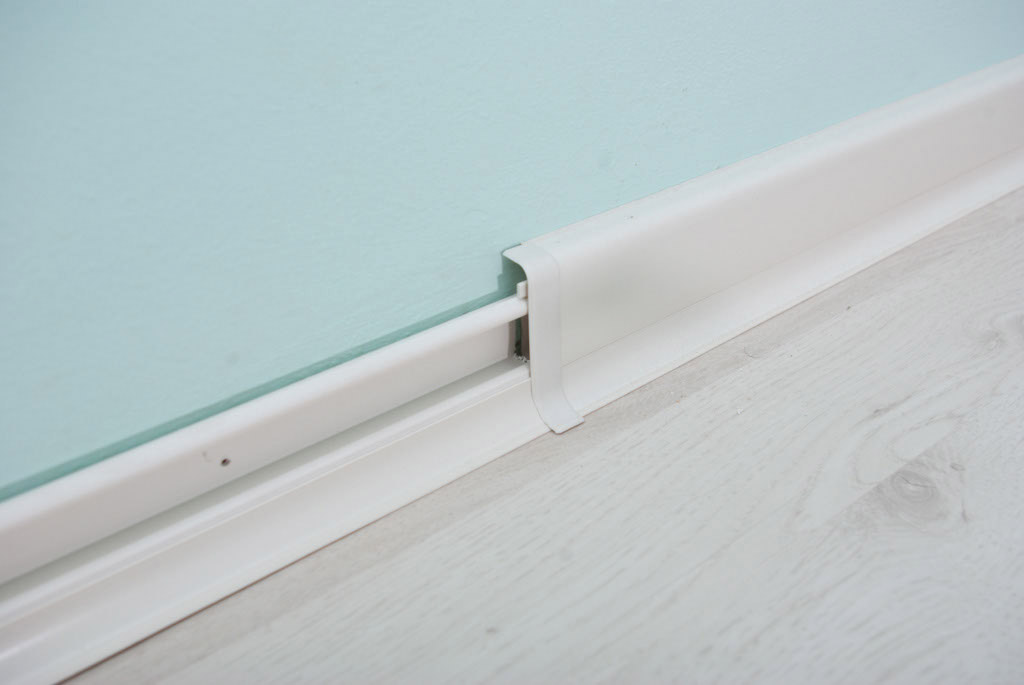
Tip: If you want to hide wires or cables, buy a baseboard with a special cable channel. The baseboard of this model consists of two parts - a body in which you can hide the wiring, and a masking cover.
Start the installation of the skirting board from the most remote corner of the room, installing solid pieces in the most visible places of the room. In most cases, these seemingly insignificant details make the project more successful, so pay attention to them during work.
If you do not want to use glue to fix the baseboard, you must fix the bar with screws every 25-40 cm, after drilling holes in the wall and inserting dowels.
Installing a plastic baseboard.
To do this, you will need a drill and small drills. You must place the baseboard in the correct place, making sure that there are no gaps between it and the floor, and drill holes through the back of the baseboard every 25 cm.
Tip: You do not need to drill deep holes in the wall at this stage - you just have to use a drill to mark the places where you will need to install dowels.
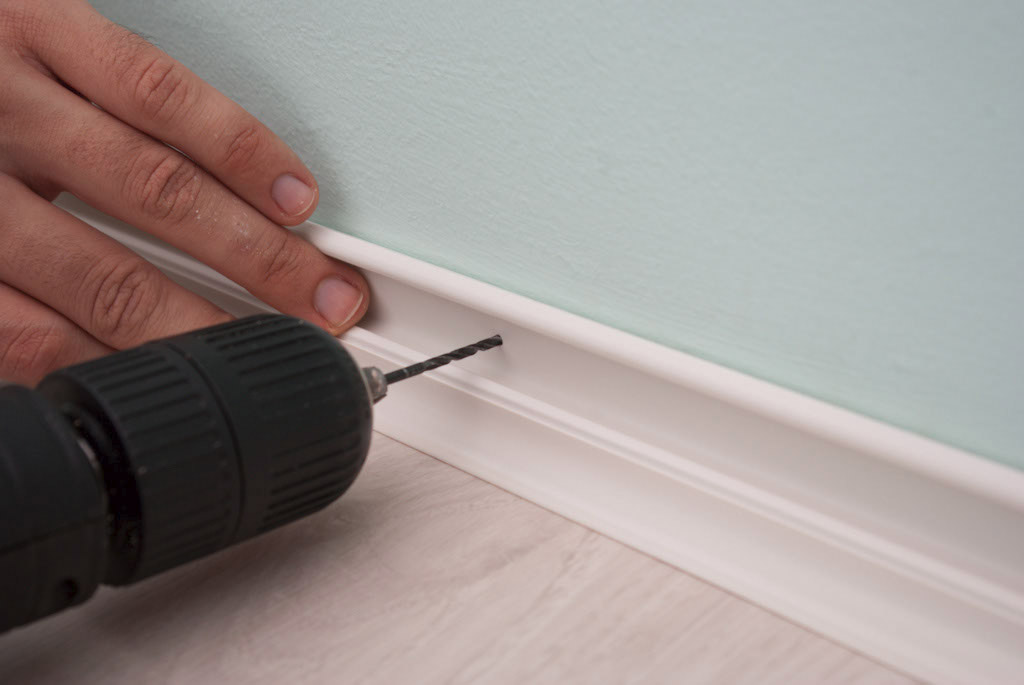
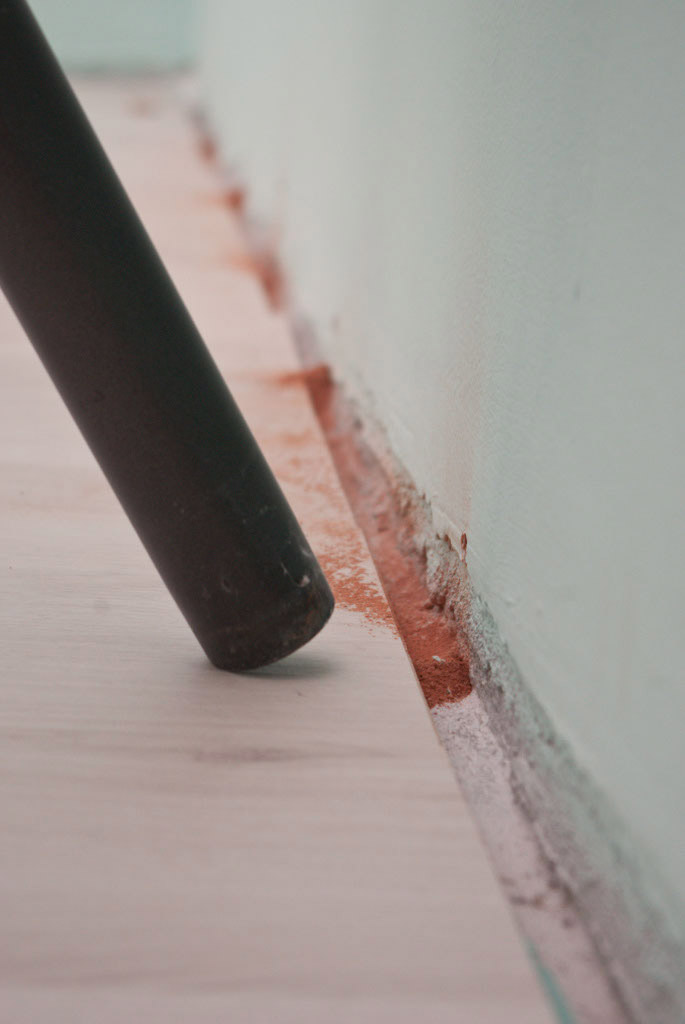
Drilling holes through the wall of a plastic baseboard.
Now, laying the baseboard aside, enlarge the holes with a drill of a larger diameter, the size of which corresponds to the size of the plastic dowels. Remember that if you have to drill a concrete or brick wall, you should use drills designed specifically for these purposes. In addition, in order to obtain holes in such materials, it is better to use a hammer drill having a torque control function.
Tip: If your walls are made of drywall, you can screw the screws directly, without first drilling holes, at the locations of the frame racks.

Drilling holes in the wall.
Having finished drilling, you must use a vacuum cleaner to remove all dust and brick / concrete chips formed during the operation of the drill. This moment is of great importance for your project, otherwise you will not be able to properly align, and therefore, correctly install the baseboard.
Tip: It’s better to drill all the necessary holes along the wall, and only then start cleaning - this will allow you to speed up the process. If you go to this step, it means that things are going just fine with you, and you are on the way to completing the work.
Cleaning of debris remaining after drilling.
Now you have to insert plastic dowels into the holes, then to fix the skirting board using self-tapping screws. To do this, you will need a wooden or rubber mallet. Make sure that the dowels are completely recessed in the wall, their edge should be flush with the surface of the wall.
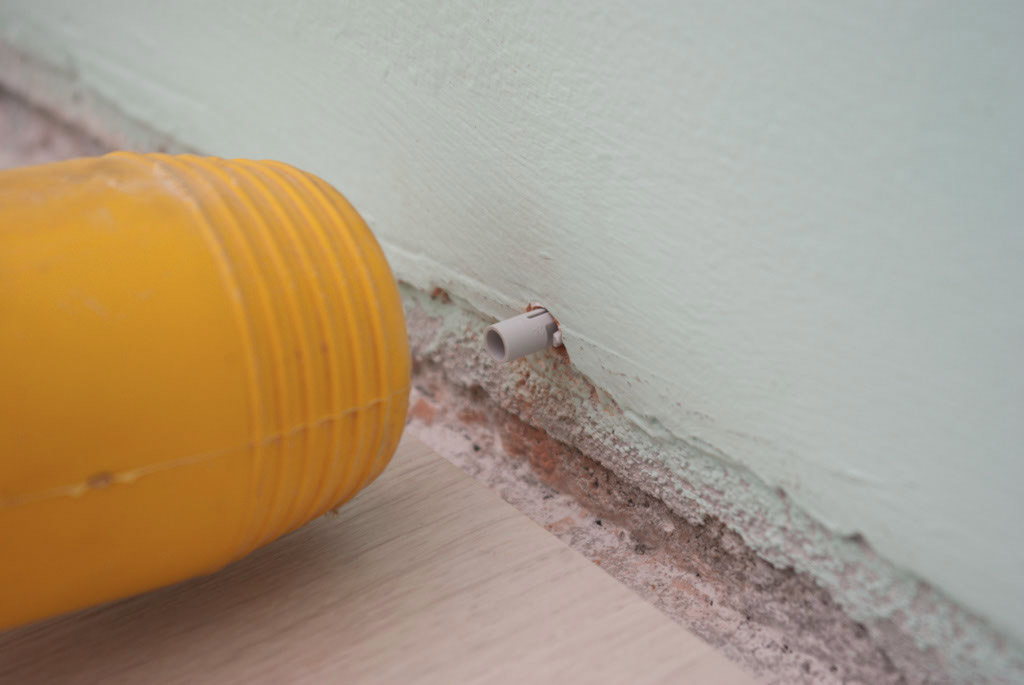
Installation of plastic dowels.
Finally, you can proceed to fixing the baseboard itself using self-tapping screws. You can use a screwdriver to speed up the process.
Tip: Do not tighten the self-tapping screws too much, but at the same time they should not remain completely twisted. In the first case, you risk damaging the baseboard, in the second - there will be a gap between the wall and the baseboard.
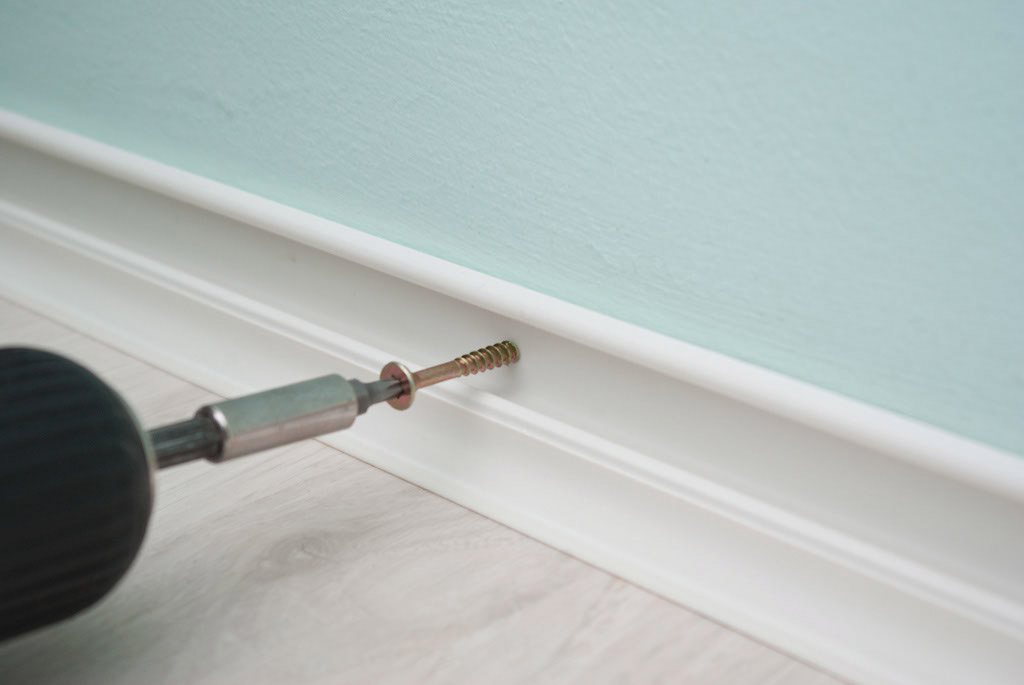
Fixing the skirting board using self-tapping screws.
After fixing the baseboard, you just have to close its decorative cover. If you need to place any wires inside the baseboard, you can postpone this operation until you finish the whole project.
Tip: When inserting the baseboard cover, do not use too much force, as you can easily damage it. Although these skirting boards are designed to protect walls, they can withstand far from all effects.
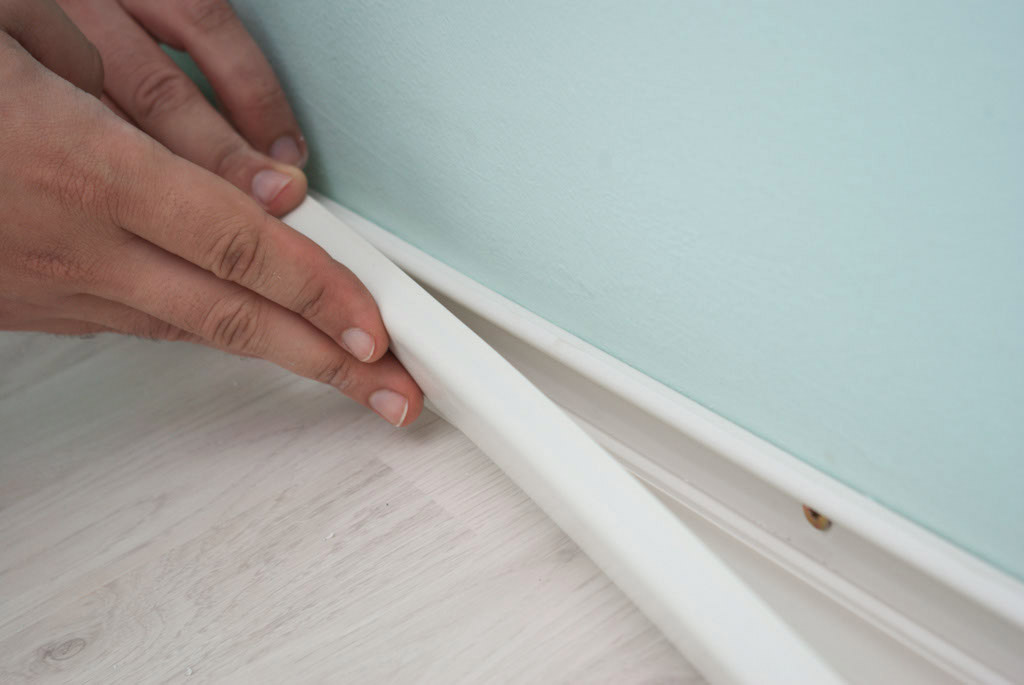
Installing the skirting cover mask.
If the baseboard is shorter than the wall, you must connect the two slats with a special plastic connector.
Tip: You should take this aspect into account at the planning stage of work, and try to arrange the skirting so that the connecting elements are in the least visible places.
The connection of two fragments of the plinth.
Installing the skirting board in the corners of the room is a bit more difficult, so you need to focus to do the job in a professional manner.
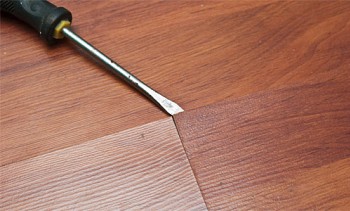
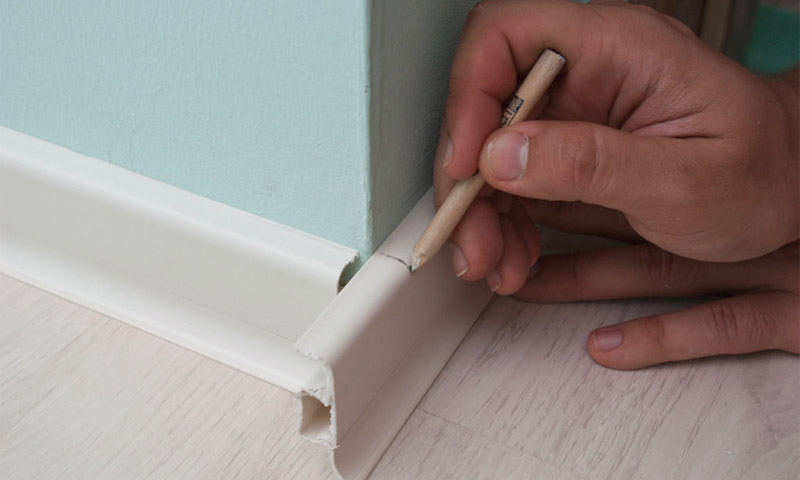
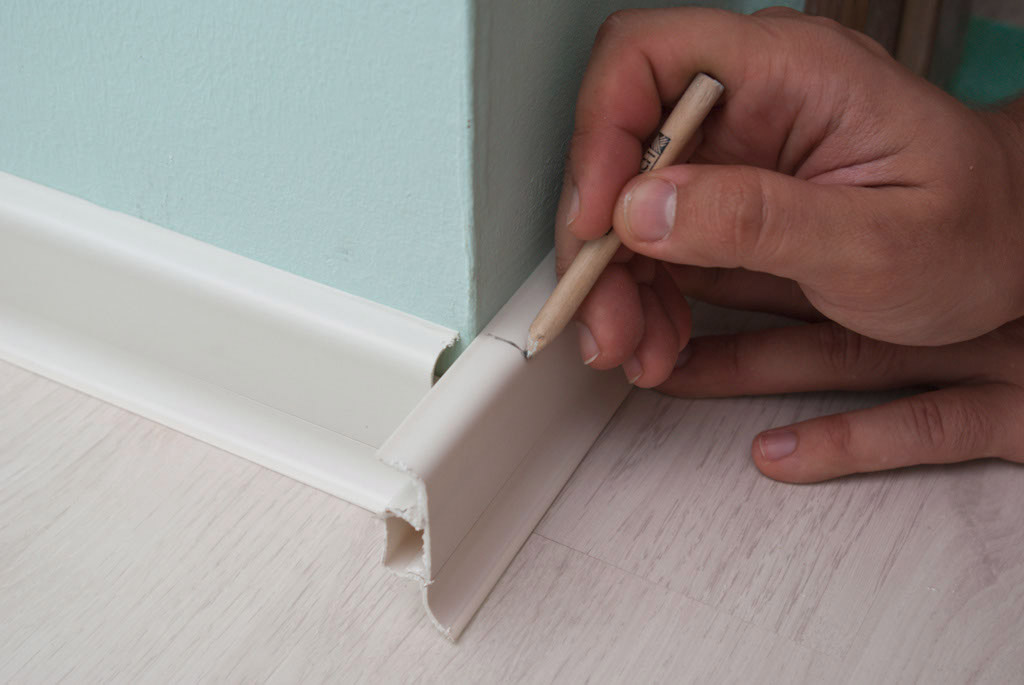
The first thing you have to do is mark the cut line with a pencil. This is a more than understandable operation, so there is no need to dwell on this point in detail.

Marking the cut line.
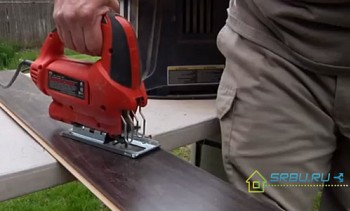
Then it is necessary to saw off a fragment of the baseboard of the required length, using a miter box and a hacksaw. If you wish, you can use an angle cutting machine for this purpose, but first you need to make sure that it has the appropriate blade for cutting plastic products, otherwise you will not get a quality cut.
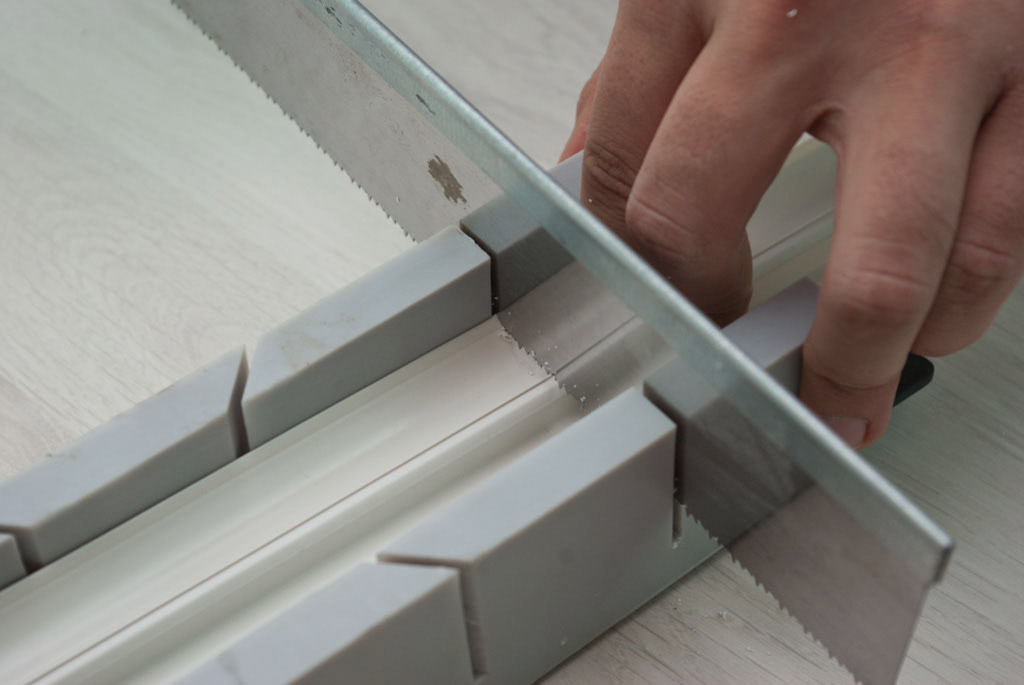
Sawing off a plastic baseboard.
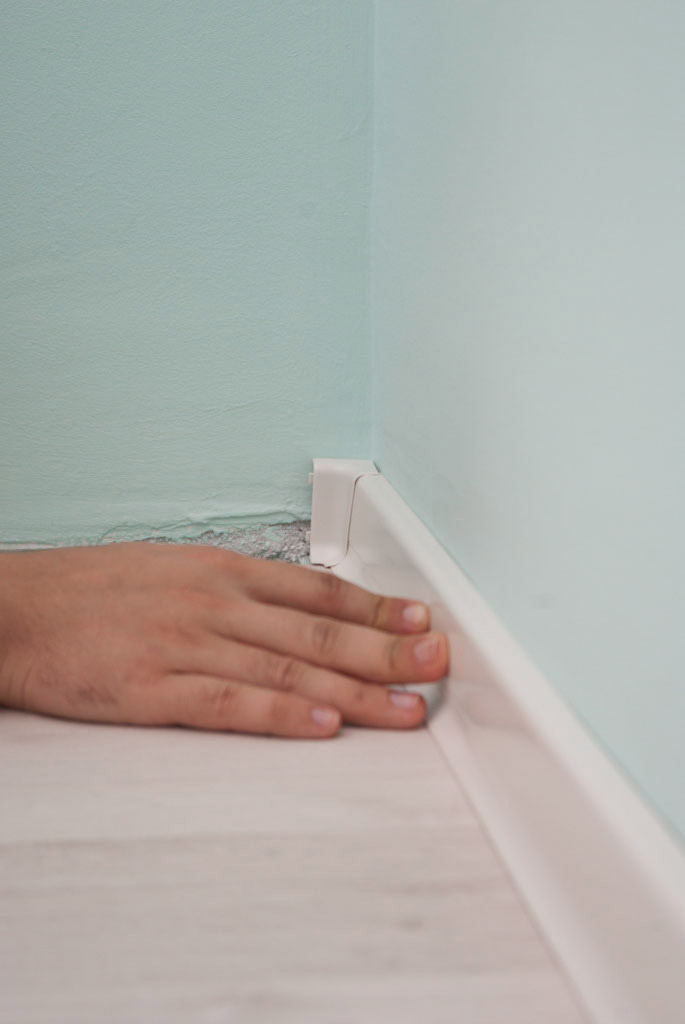
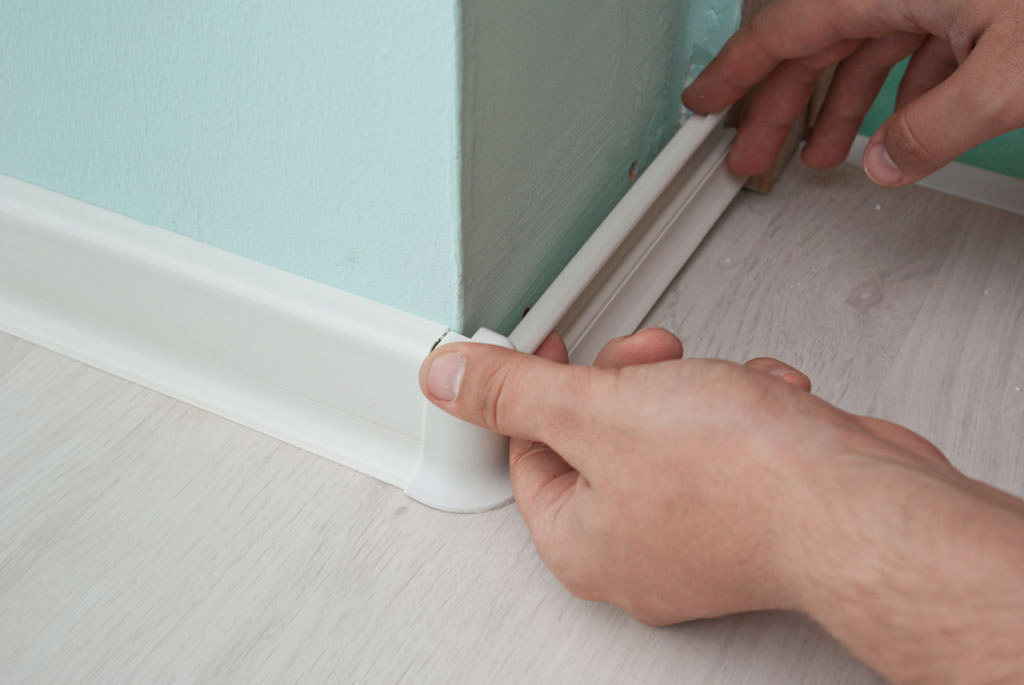
Next you must take measurements on the other side of the corner. Just mark a clearly visible line drank.
The formation of the outer corner.
Fixing the baseboard to the wall is the same as you did on straight sections of the wall. This means that you must drill holes every 25 cm, insert plastic dowels and then fasten the baseboard using self-tapping screws. After installing the sawn off fragments of the plinth in place, connect them using a special plastic corner.
Installation of a decorative plastic corner.
After you have installed all the fragments of the plastic baseboard, you must reinsert the cover. In principle, this operation can be handled without any special problems. It is only necessary to make sure that no gaps remain between the joints of the baseboard between the baseboard cover and the plastic fittings.
The connection of two fragments of the plinth.
Remember that the installation of plastic skirting boards is not difficult and does not require large expenses, but it can radically change the look of your home if you use the right materials and tools and follow our instructions.
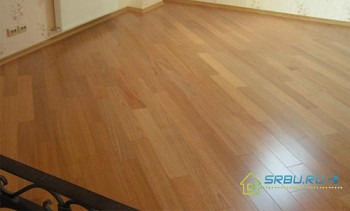
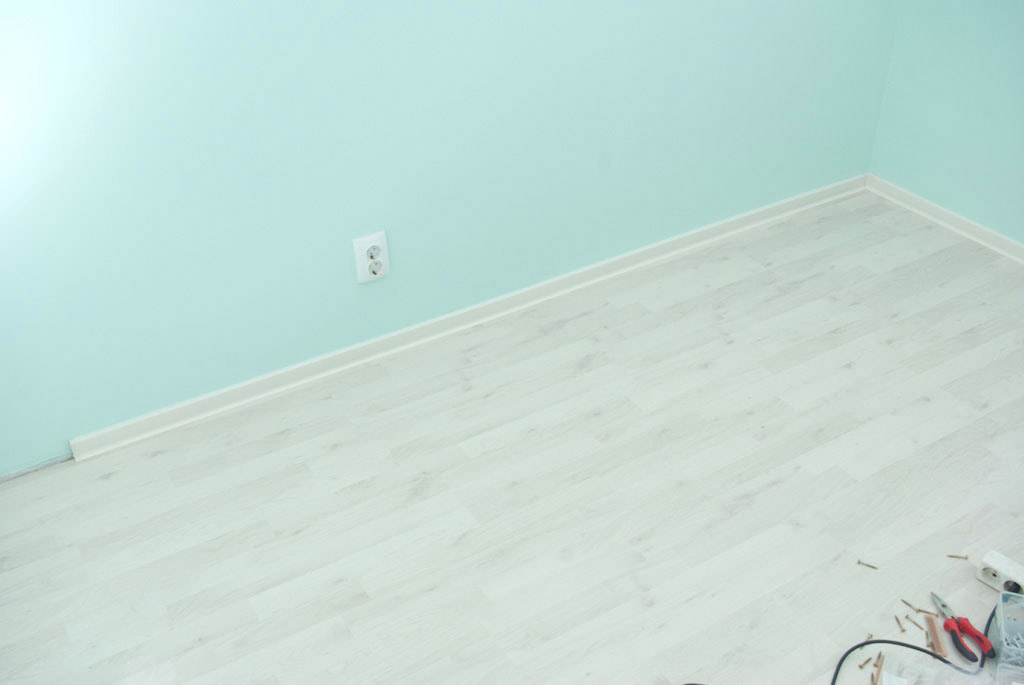 Installed plastic baseboard.
How to install a skirting board made of wood or MDF
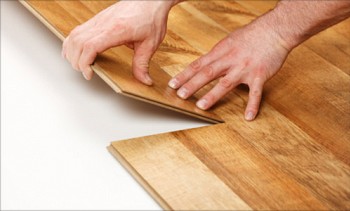
We recommend starting the installation of the baseboard with the longest wall of the room. If the baseboard is longer than the wall, you will have to saw off a piece of the right size. If it is shorter than the wall, you will need to connect two or more skirting boards. In this case, you should know that their joint must be oblique. This type of joint requires cutting the ends of the skirting boards at an angle of 45 ° with their subsequent joining with decorative nails or glue. Cutting at an angle of 45º can be done using a miter box.
To give the already installed baseboard a neat appearance, it is necessary to fill in all the cracks in the internal and external corners, the gaps between the baseboard and the wall, and the holes from nails and self-tapping screws with wood putty, then polish the surfaces on which the putty was applied and, if necessary, repeat the procedure. If you want to protect the flooring (in some cases, you may need to fill the gap between the baseboard and the floor), you should use masking tape, which is removed at the end of the work.
To install the skirting boards with your own hands, you will need the following:
| Materials: | Tools: |
|---|---|
| Skirting board. | Miter box or angle cutting machine. |
| Decorative (finishing) nails. | hacksaw; |
| Filling on wood. | drill and drill; |
| Joiner glue (in some cases). | roulette; |
| Masking tape. | level; |
| a vacuum cleaner. |
Tips:
- Measure the perimeter of the room and add to the resulting figure 10% on the waste when cutting.
- Use the miter box to create internal and external corner joints.
- If you need to make a saw cut at a non-standard angle, use waste material. On them you can practice, make a few trial cuts until you find the right way.
How to cut a skirting board of the required size at a certain angle
Use the miter box to get a precise cut. Without it, it is impossible to perform quality work on installing the baseboard in the area of the internal or external corners of the room. Place the baseboard in the miter box and, holding it firmly, saw it at a 45 ° angle with a hacksaw. After you finish sawing the skirting board, use medium-sized sandpaper to sand the cut.
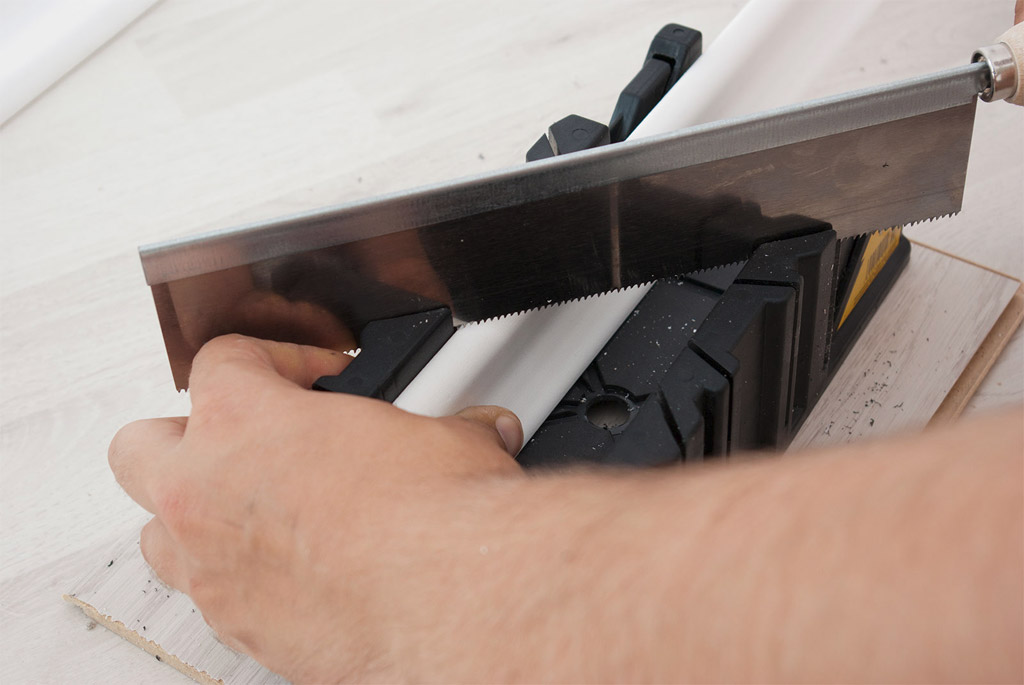
Sawing the skirting board using a miter box.
If you want to install skirting boards in the inner corner of the room, you must make a connection at an angle of 45 ° or an overlapped seam. The latter requires the use of special tools and experience, so we do not recommend it to beginners "homemade." To connect at an angle, you must know the exact angle between the walls. To form a standard angle of 90 °, each of the two plinths to be joined is typically sawed at a 45 ° angle.
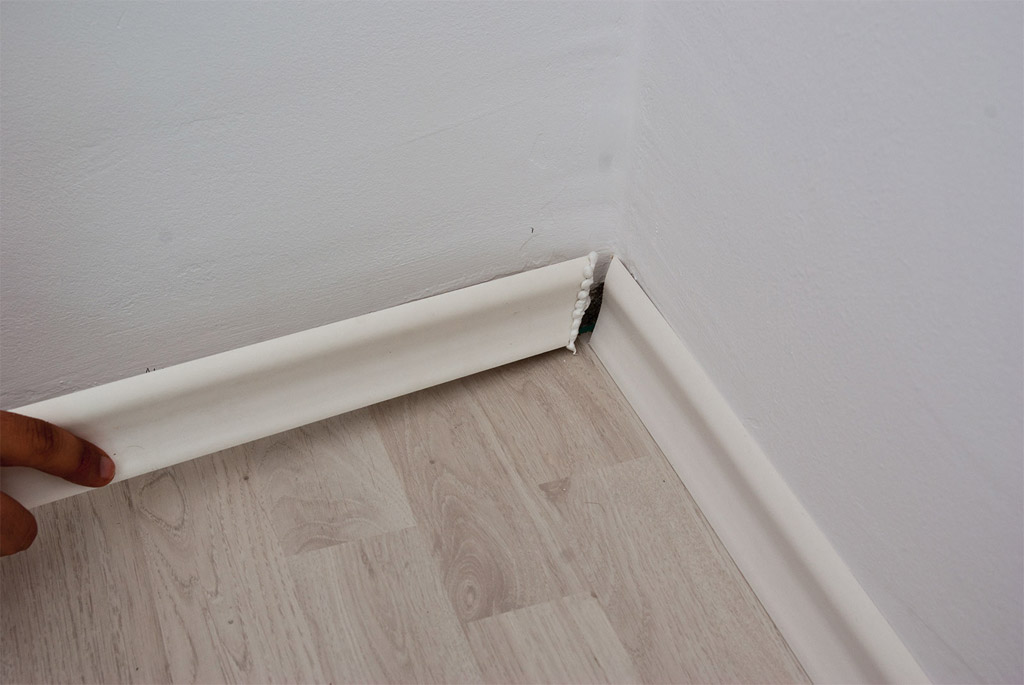
Skirting board in the corner.
How to dock a skirting board if its length is insufficient
Measure the baseboard of the required length, and it is better to take measurements not once, but two or three times, because any mistake can lead to wasted material. If you need to install two or more skirting boards along one wall, you will have to arrange their joint, as shown in the figure. Use the miter box to saw off the ends of the plinth at an angle of 45º.

Oblique joint of two skirting boards.
Methods for fixing the baseboard itself
To fix the baseboard, you can use several options: decorative nails, glue or metal clips. Metal fasteners are included with MDF skirting boards.
To fix wooden skirting boards, hammer in the carnations with a hammer, being careful not to damage the skirting board during the process. We recommend that you use a heterogeneity detector to make sure that you drive nails out of the void.
Tip: Use the dugout to drown the nail head in the tree. After you finish the work, putty putty on all the holes from the nails and possible gaps between the wall and the baseboard.
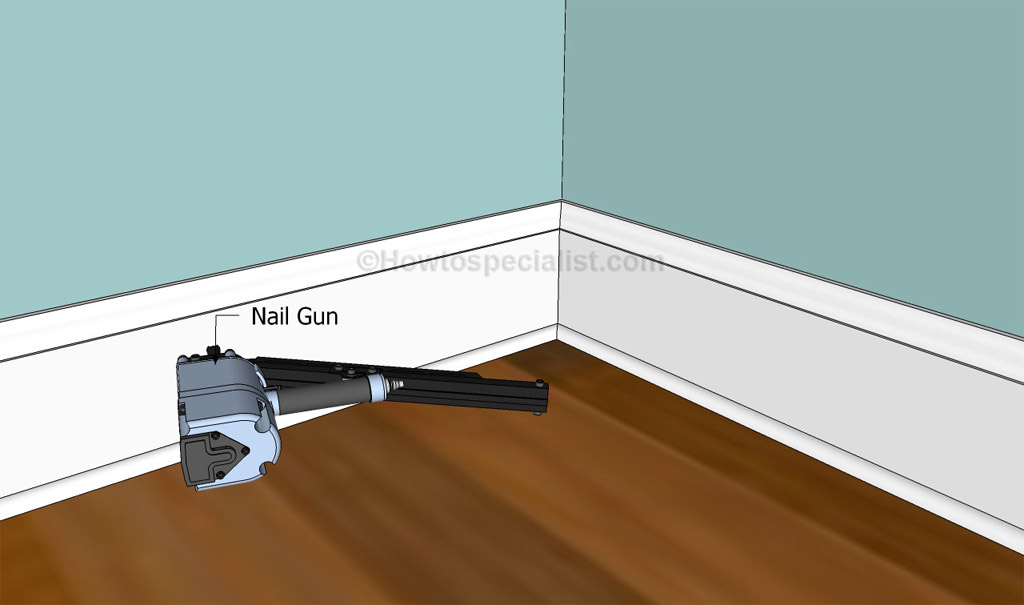
Plinth installation using a pneumatic hammer.
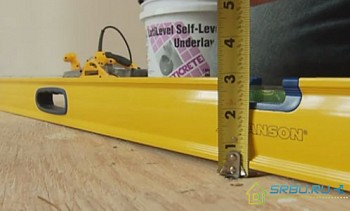
As we already mentioned, there are skirting boards that are not mounted on nails, but are fixed in special clamps (brackets). Such fastening is usually preferable when you are dealing with concrete walls. To install the baseboard correctly, the clamps must be fixed at the same level, and for this you should use the water or laser level. Even a small mistake can lead to poor results, so take the time to take all the steps with extreme care.
It is necessary to mark with a pencil the places where you will drill holes, leaving about 30 cm between the marks. Drill holes using an impact drill or hammer drill. Use a vacuum cleaner to clean the surface of dust and concrete / brick chips. Insert the dowels into the holes. The next step is to fasten the clamps using self-tapping screws screwed into the dowels. The last operation we performed using a screwdriver with torque control, but you can use a conventional screwdriver, although it will require more time and effort.
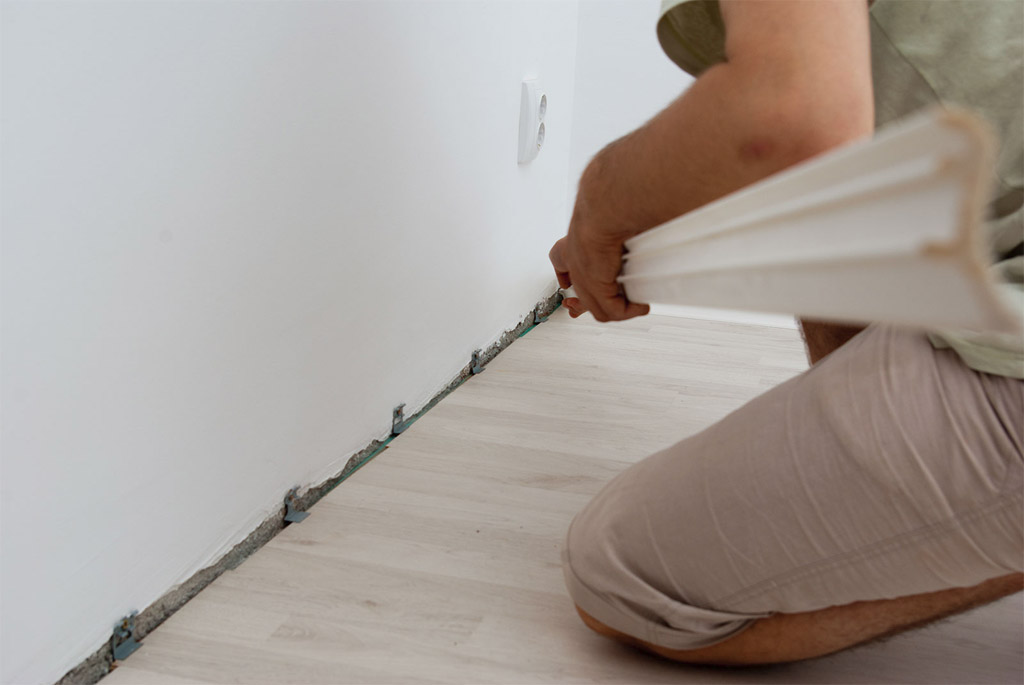
Fixing the baseboard to the clamps.
External corner design
Joining two skirting boards around the outside corner is easy enough if you use the right tools and techniques. Saw off the ends of two fragments of the plinth at an angle of 45º. If there is a slight gap between the connected pieces of the baseboard as a result of a slight deviation of the corner of the room from the straight line, you can fill it with putty. Remove excess material with a damp cloth.
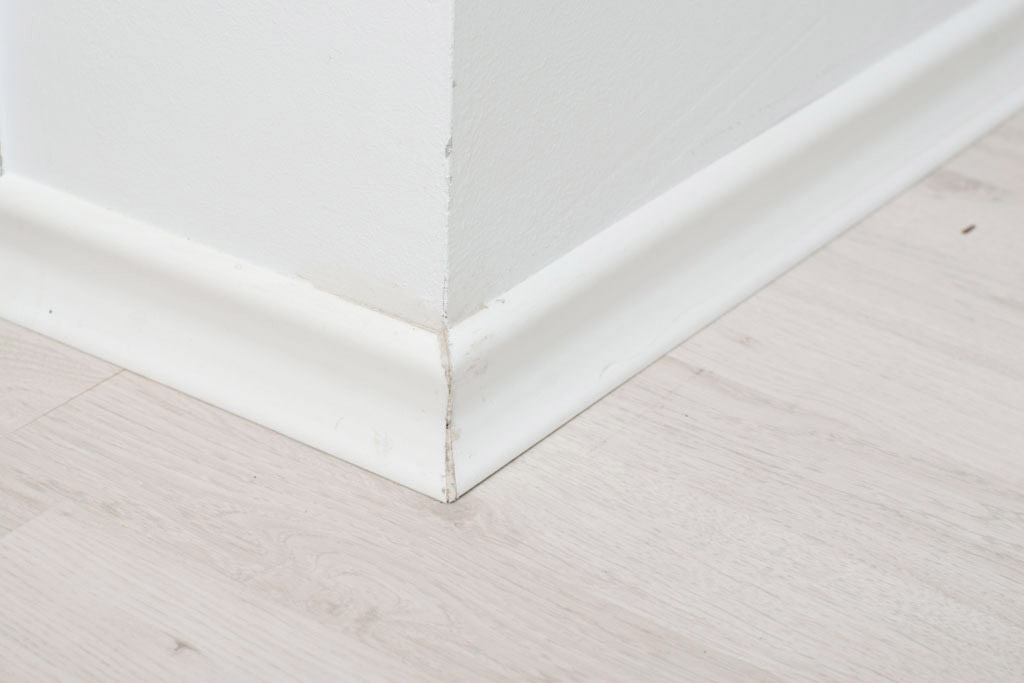
Outside corner.