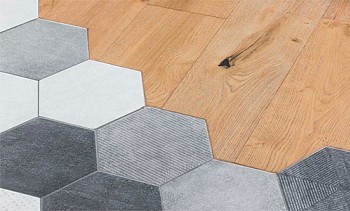
Laminate today lay almost everything. Therefore, it, laid on the floor, looks quite standard and monotonous. However, there is one way with which you can make even cheap varieties of laminated boards to sparkle with novelty. This is laying the laminate diagonally – it will make your apartment exclusive and original.
How much laminate do we need
The classic way of laying a laminated coating - board to board - requires very simple calculations of the amount of material. It is necessary to take the area of the room and divide it into the area of one parquet floor. Rounding this number to the nearest whole, we get the number of floorboards we need. With this method of waste disposal, we will practically not have it.
Here - see the picture:

In the first row you need to lay out all the whole boards. The last one will have to be cut a little.
In the second row, the first thing we put is this cut piece. He has a lock on the right side to connect to the next floorboard. Next, lay out all the other whole boards, and cut the last one again.
The third and all subsequent rows are laid out in the same way. At the very beginning of each row should be a cut piece.
When laying the laminate diagonally with your own hands, the calculation of the amount of material is slightly different.
Look at the picture:

The principle is almost the same as with classic styling. Only the excess pieces will be cut off on both sides of the row, and not one, but two. The shape of these pieces will also change - they will become triangular.
Laying the laminate at an angle of 45 degrees, we will move from angle A to angle C. Cut pieces, folded in two, will be squares. The size of their sides is equal to the width of one floorboard. This will be the remains of the material.
Then we move from corner C to corner B. In this case, the residue will not work anymore - we will saw off the pieces of the laminate, which are extreme on the left side. The angle is the same - 45 degrees. After the angle B is passed, again you have to cut the material on each side of the row. Triangles folded together will make squares whose sides are equal to the width of the board. Therefore, we calculate the area of the material as follows: add the area of all the scraps to the area of the room. And we calculate this value by squaring the width of the laminate board into a square, and then multiplying this value by the number of rows with residues. The number of these rows is the sum of X1 and X2 (see figure):

Knowing the geometry, we see that two equal triangles - BDF and CAE - are rectangular and equilateral. A square with the sides of the speaker has a diagonal, the size of which is the sum of X1 and X2. Given that the square root of 2 is 1.42, we get:
X1 + X2 = 1.42 AC;
Now we divide the sum of X1 and X2 by the width of one board - we get the number of rows of the laminate;
The surplus area will be equal to the width of one board multiplied by 1.42 AC.
So:
The number of laminate boards will be equal to the sum of the total area of the laminated coating and additional squares divided by the area of one board.
The number of laminate boards is equal to the sum of the following values divided by the area of one board: (AC × CD) + (board width × 1.42 AC).
For example, there is a room 7 by 9 meters. The length of the board is 1 meter, and its width is 10 centimeters. We calculate the required number of floorboards.
Room area = 7 × 9 = 63 m².
Surplus area = (1.42 × 7 × 0.1) = 0.994 m².
The area of one board = 0.1 × 1 = 0.1 m².
(63 + 0.994) / 0.1 = 640 pieces.
So many laminate boards we need for a diagonal laying method.
In this way, you can calculate how many floorboards you need if the laying angle is different from 45 degrees. But it should be understood that this will entail a greater consumption of material.After all, there will be much more waste. Therefore, when deciding how to lay the laminate on a diagonal, it is better to stop at an angle of 45 degrees.
What tools do we need
We need:
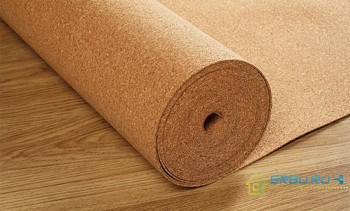
- The substrate is sheet or roll. Its area is equal to the area of the room.
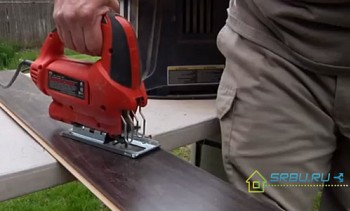
- An electric jigsaw with small frequent teeth (either a hacksaw) or a circular saw.
- Rubber mallet or hammer.
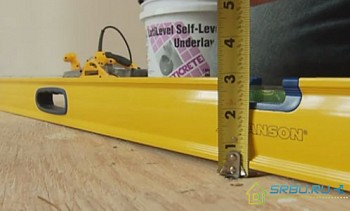
- Joiner's square with a clear ruler.
- Knife - wallpaper or clerical.
- Roulette with a pencil.
- A roll of adhesive tape.

We lay the laminate on the system
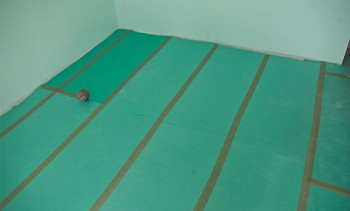
1. We remove dust, dirt and debris. Then proceed to the growth of the substrate. If it is in the form of sheets, then we put them so that the seams turn out with a run. Each seam must be well glued using adhesive tape for this. In the case of a rolled substrate, its strips must be rolled around the room. The substrate should reach the wall itself, if on the way there are radiator pipes it needs to be cut, see the figure:

2. The laminate itself must be laid from one of the corners of the room.

If there will be heating pipes along the way, carefully bend around them.
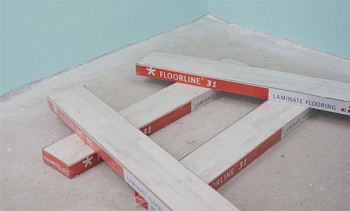
3. Laminate is not laid close to the walls. Therefore, we need special wedges. However, in this capacity trimming of laminated boards may well serve. After all, their thickness just gives the desired clearance.

In order for the cropping angle to be even, you need to make a template at 45 degrees or use a square to mark the board.
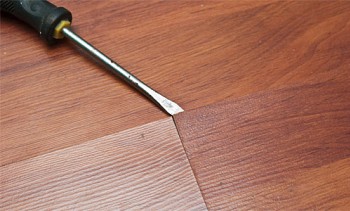
4. The initial rows consist of only one trapezoid-shaped board. Its top is equal to the lower part of the trapezoid located above it. We measure everything with the help of a tape measure and a square (or template), mark the cut lines with a pencil. Then we take a jigsaw or a hacksaw to saw off the excess. When there will be not one board, but several, in a row, we are cutting off excess pieces from the leftmost of them. Then we glue all the boards of the row, and also attach (so far loosely) it to the previous row.

We measure how much you need to cut off on the right. Do not forget to leave a gap against the wall for the wedge.
We measure this distance on the next floorboard and cut off the desired piece.
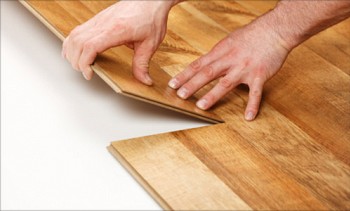
5. We disconnect the loosely connected upper and lower rows, and then attach the right piece. Now it is already possible to connect the rows properly, by tapping the connection.

In order not to damage the laminate board, we lay a piece of laminate or a special tip between the mallet and it.
6. We put the rows according to this scheme, gradually approaching the corner of the room. In the corner we need to change the direction in which an extra piece of the board will be cut off. There are no more differences - we act according to the scheme.
7. And now we get to the corner, which is the opposite of the one from which the laying was started. There was a small piece left. Carefully marking it, put it in the right place.
Well, our exclusive laminate flooring is ready. So now you know how to lay the laminate diagonally. Nothing complicated, a little cost, and the result is impressive.
Video: Laying the laminate diagonally