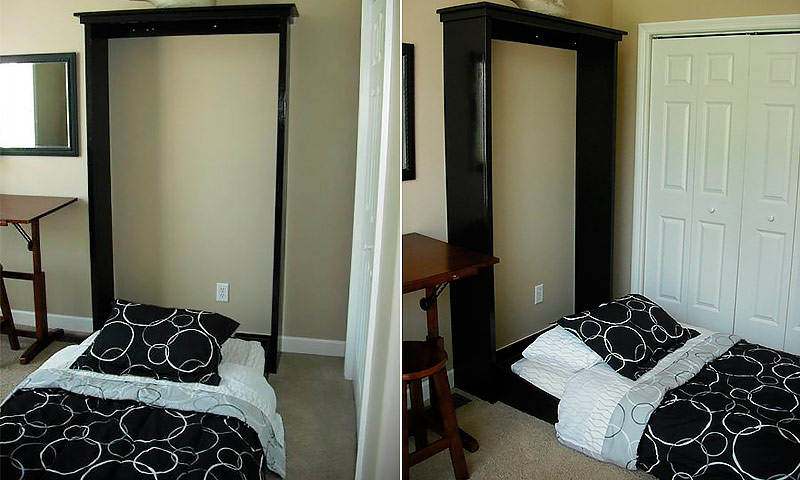
Do you need a sleeping place for guests, but you do not have a separate guest room? Do you have to accommodate guests for an overnight stay in a children's room, where another bed will be clearly superfluous? Today we will tell you how to make a folding bed. A bed that will not take up much space and will not be striking: in the assembled state, it looks like an ordinary closet. You will not need any special equipment or specific skills. Just follow our instructions.
Content:
Necessary materials, tools, cutting and design of the bed
Materials:
- sheet of plywood or MDF 12 mm thick (1 pc.);
- boards 2.5 × 30 × 240 cm (3 pcs.);
- board 2.5 × 20 × 240 cm (1 pc.);
- board 2.5 × 10 × 240 cm (1 pc.);
- board 2.5 × 7.5 × 240 cm (1 pc.);
- boards 2.5 × 5 × 240 cm (3 pcs.);
- decorative strips 6 mm thick;
- 50 mm screws;
- 50 mm nails;
- 30 mm nails;
- 15 mm hardwood nails;
- glue;
- wood putty;
- sandpaper;
- hinges (powerful door hinges or special hinges for folding beds);
- heavy-duty magnetic latch that can hold the bed in a raised position and prevent it from tipping over;
- hinges with a closer for a slow lowering of a bed in horizontal position.
Tools:
- roulette;
- square;
- pencil;
- a hammer (can be replaced by a gun for hammering parquet nails with a dumper);
- protective glasses;
- Kreg Jig - a device for drilling holes for oblique flush connection;
- drill;
- a circular saw;
- gun for hammering parquet nails;
- eccentric grinding machine.
A few general comments:
- Work on a clean, flat surface.
- Follow proper precautions, use personal protective equipment.
- Using a square, check after each step whether the construction angles deviate from 90 degrees.
- Use quality undeformed lumber.
- Before screwing in the screws, drill the guide holes and countersink them.
- Starting to make a do-it-yourself folding bed, study the drawings presented here.
Nesting list
For the "Box"
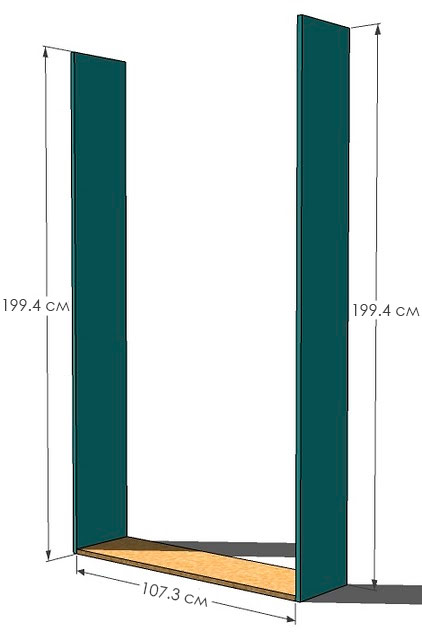
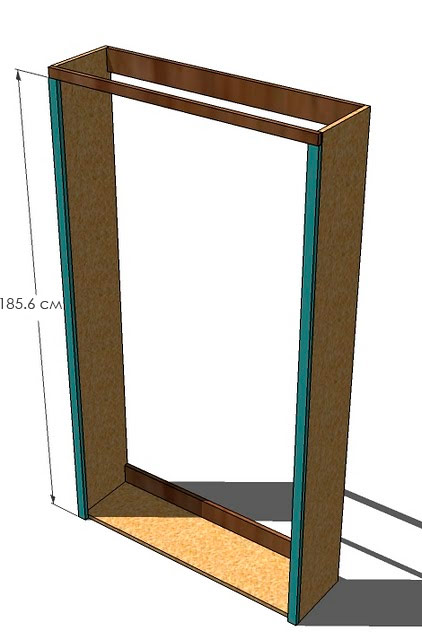
- 2.5 × 30 × 199.4 cm (2 pcs.) - side walls
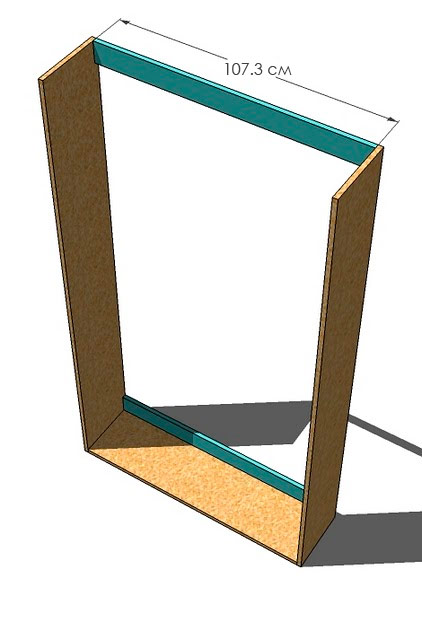
- 2.5 × 30 × 107.3 cm (1 pc.) - bottom
- 2.5 × 10 × 107.3 cm (2 pcs.) - rear cross members
- 2.5 × 5 × 111.1 cm (1 pc.) - front cross member
- 2.5 × 5 × 195.6 cm (2 pcs.) - decoration of the front side of the box, vertical sides
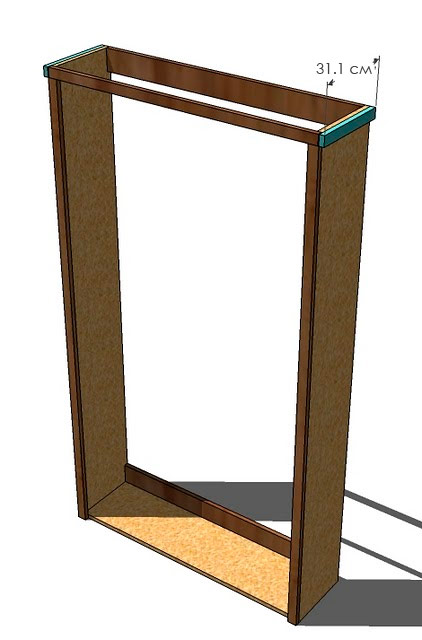
- 2.5 × 5 × 31.1 cm (2 pcs.) - decoration of the side walls of the box, the upper part
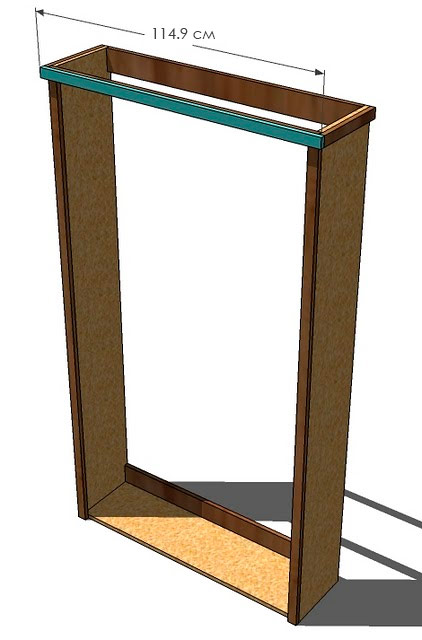
- 2.5 × 5 × 114.9 (1 pc.) - the front side of the box, the upper part
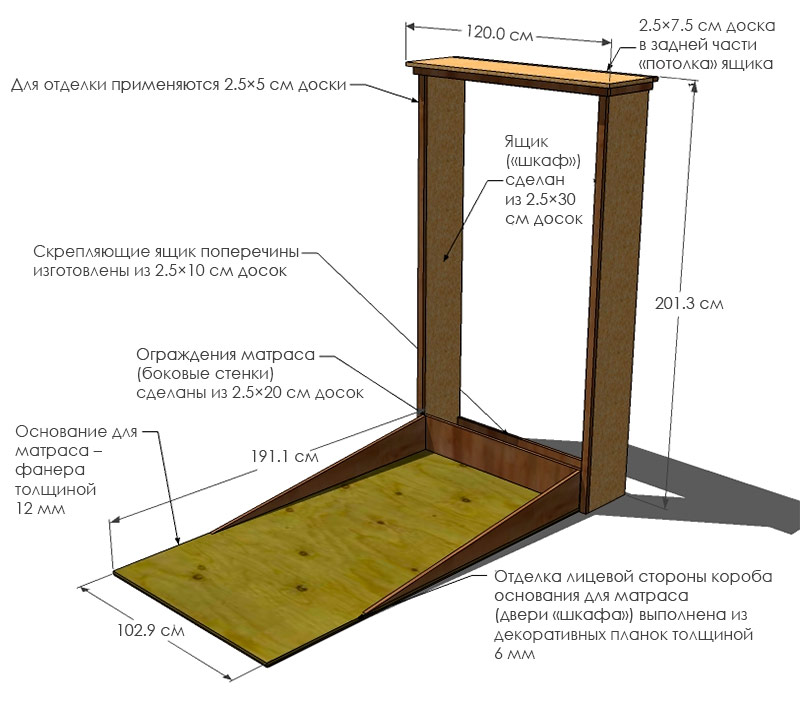
- 2.5 × 7.5 × 120.0 cm (1 pc.) - the back of the "ceiling"
- 2.5 × 30 × 120.0 cm (1 pc.) - front of the “ceiling”
For the "Bed"
- 6 mm thick plywood × 102.9 × 191.1 cm (1 pc.) - bottom
- 2.5 × 20 × 102.9 cm (1 pc.) - back wall
- 2.5 × 20 × 139.7 cm (1 pc.) - side walls (cut the board diagonally, as shown in the plan, to get two parts)
- Front trim using 6 mm thick rails as you wish
Assembly of all elements of the bed
Step 1: Building the frame of the box.
Using 50 mm screws and glue, attach the side walls to the bottom.
Step 2: The rear cross members.
Fasten the box with the crossbars located in its upper and lower parts. Connect the bottom not only to the side walls, but also to the bottom. Use 50 mm screws and glue.

Step 3: Front cross member.
Pull off the box walls with another cross member located at the top of the front side. For its fastening you will need 50 mm screws and glue.
Step 4: Finishing the front side of the drawer.
Using 50 mm nails and glue, fix the decorative strips to the front ends of the side walls. The outer edges should be flush. Additionally attach these slats to the bottom of the drawer and to the front cross member.
Step 5: Finish the side walls of the drawer.
Fix decorative strips in the upper part of the side walls (their upper edges should be flush) using 30 mm nails and glue.
Step 6: Decorate the top of the front side.
Fasten the front upper trim with 30 mm nails and glue. Alignment is carried out on the top edge. Additionally secure the bar by driving 50 mm nails through its edges into the side walls.
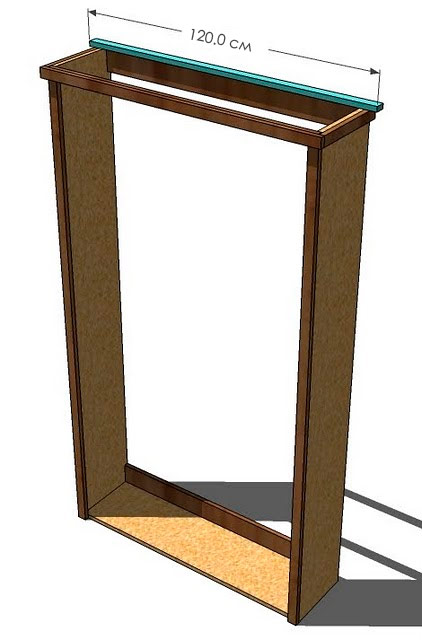
Step 7: The back of the “ceiling”.
Using 50 mm nails and glue, secure the back of the “ceiling” box. The ends of the strip should evenly extend beyond the side walls (~ 2.5 cm), and its trailing edge should be at the same level with the trailing edges of the side walls.
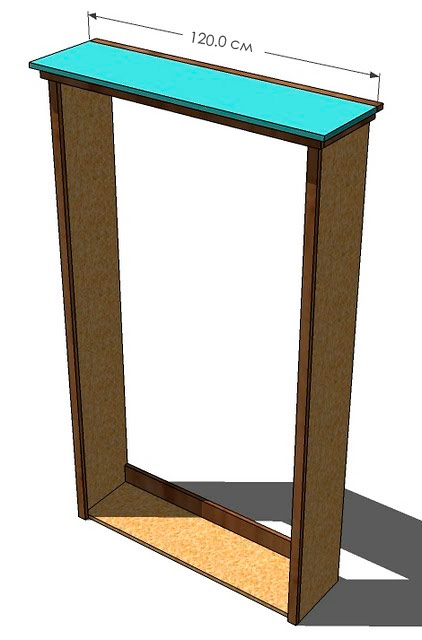
Step 8: The front of the “ceiling”.
Leaving a 2.5 cm canopy on the front and sides, secure the front of the top floor as you did in the previous step.
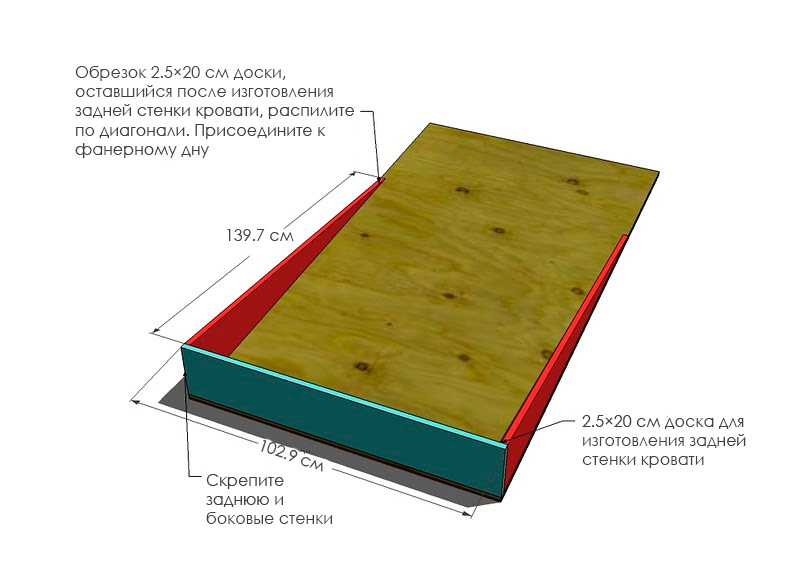
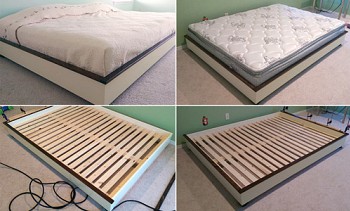
Step 9: Box for the mattress.
Build a mattress box using glue and 50 mm screws to connect the back wall of a 2.5 × 20 cm board to the plywood bottom. Then (again with glue and screws), attach the side walls of the bed, made of diagonal sawn board trim, to the plywood bottom and back wall. You can cut out the side walls with a jigsaw or a circular saw.
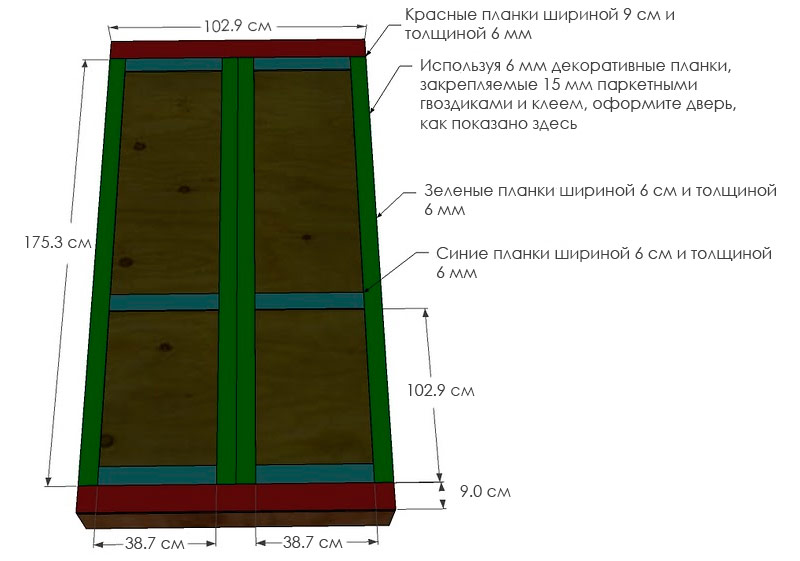
Step 10: Decorating the door.
Think over the layout of the door (the back of the bed) and fix the decorative strips 6 mm thick with glue and 15 mm nails without caps. Dimensions are for the template shown in the figure.
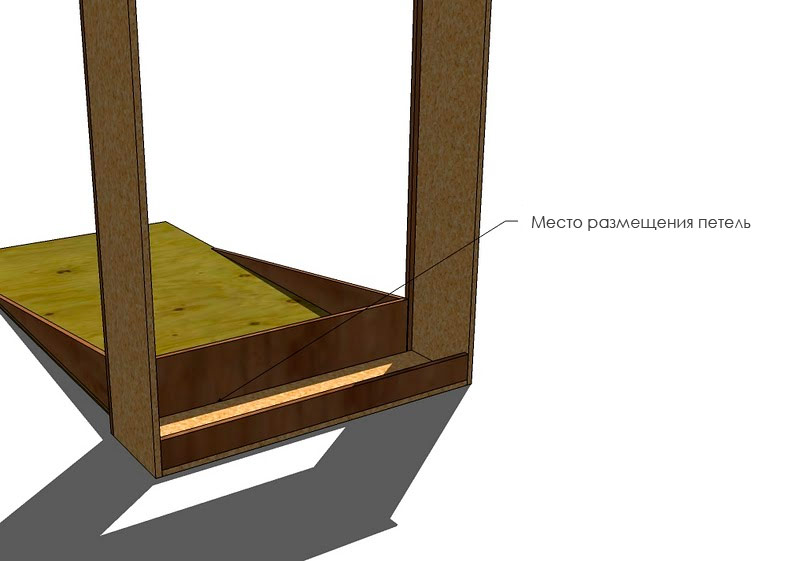
Step 11: Hardware.
Use the hinges to secure the bed (box for the mattress) to the wall "drawer", as shown above. In addition, it is necessary to install magnetic latches that will prevent the "door" from falling when the bed is in the raised position. You can also use the hinges to keep the “door” from falling when folding the bed.
Step 12: Finish.
Fill all holes from nails and self-tapping screws with wood putty and sand the surfaces. If desired, you can paint the structure and / or varnish it.
Step 13: Installation.
It is necessary to fix the “box” by screwing several screws into the wall through the upper and lower rear 2.5 × 10 cm cross-beams. We also recommend attaching a wide elastic strap to the plywood “door” so that the mattress remains in place when the door closes (the bed folds).
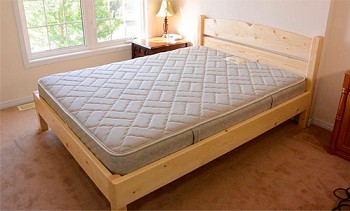
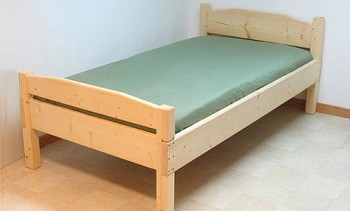
So you made a folding bed with your own hands, designed for a standard single mattress of 100 × 190 cm. Now you don’t have to rack your brains on where to place your late friend or a mother-in-law who came to stay in your cramped apartment.