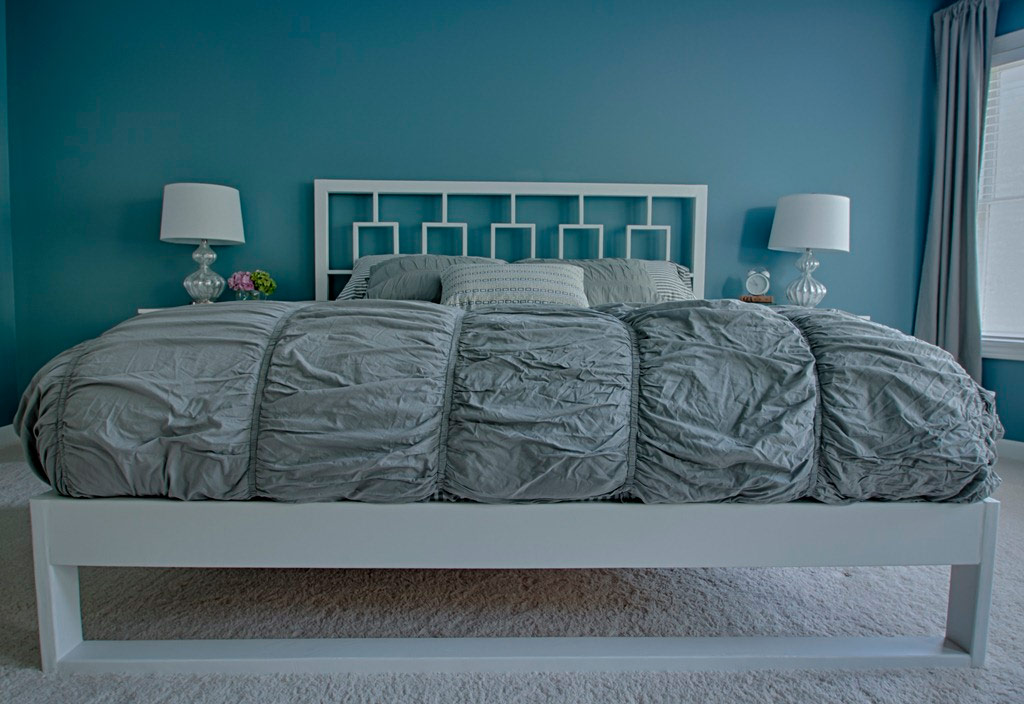
In this article I want to tell how to make a bed frame with my own hands. I recently made one for my bedroom, and my soulmate and I were delighted, rejoicing at the fact that the new bed withstood all the tests.
Materials and dimensions of frame elements
List of purchased lumber:
- 2 boards 5x10 cm 240 cm long
- 4 boards 5x15 cm 240 cm long
- 13 slats 2.5x7.5 cm 240 cm long
- screws for oblique connection up to 40 mm and 60 mm long
- self-tapping screws 60 mm long
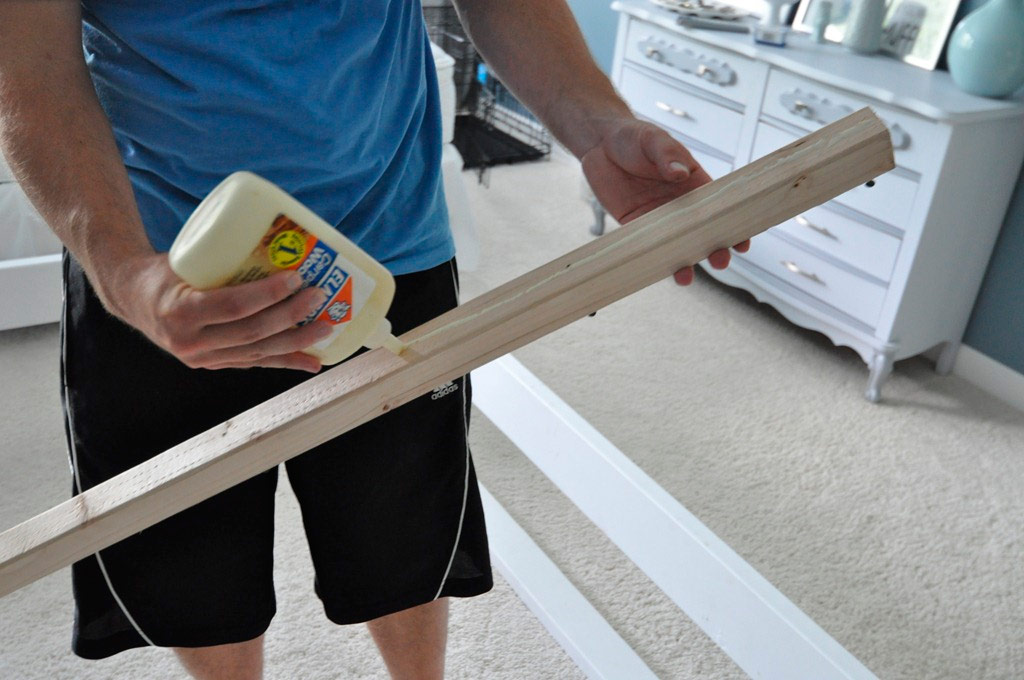
- wood glue
- paint
- wood putty
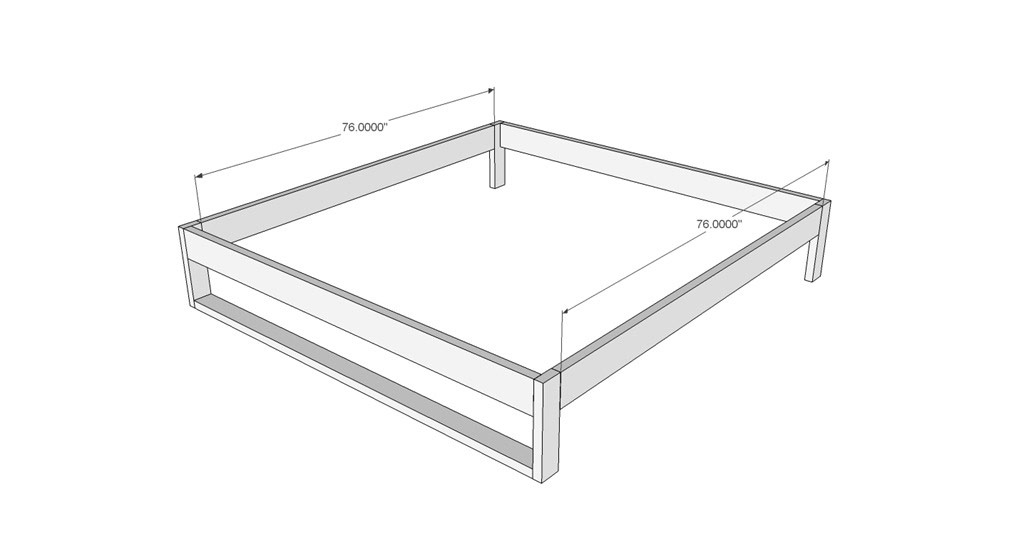
Start work with sawing wood. The dimensions of the prepared structural elements depend on the size of the bed that you plan to make, and this is determined by the size of your mattress. Below are the dimensions of the frame elements for the sizes of mattresses that are produced by foreign companies.
- See the material for more details:What the buyer needs to know about bed sizes
King size (1.9x2 m):
- frame walls - 5x15x190 cm (4 pcs.)
- legs - 5x10x38 cm (4 pcs.)
- rack bottom support - 5x5x200 cm (2 pcs.)
- the lower part of the front "wall" - 5x10x1090 cm
- rack bottom elements - 2.5x7.5x190 cm (13 pcs.)
- central support bar - 5x10x10 cm
- additional (central) leg - 5x10x10 cm
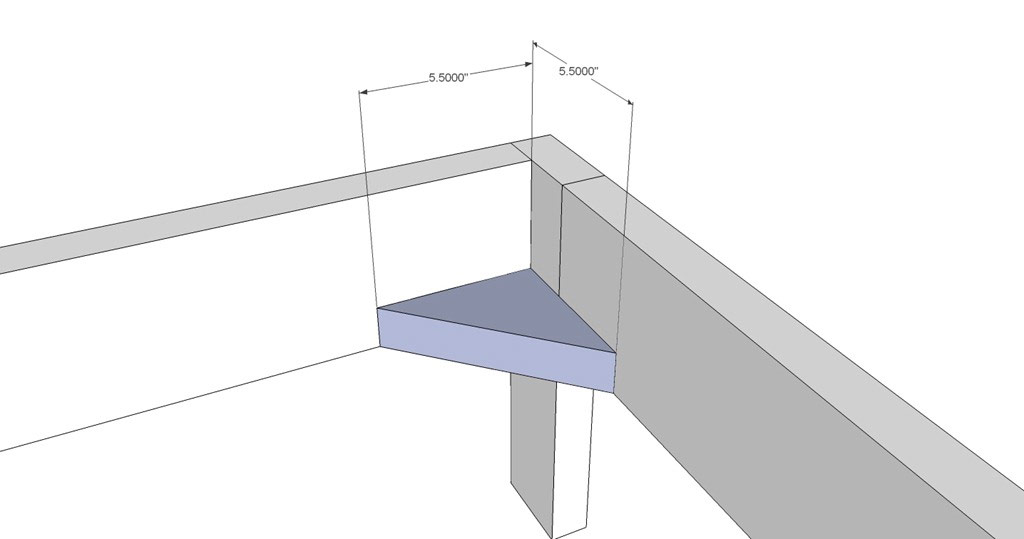
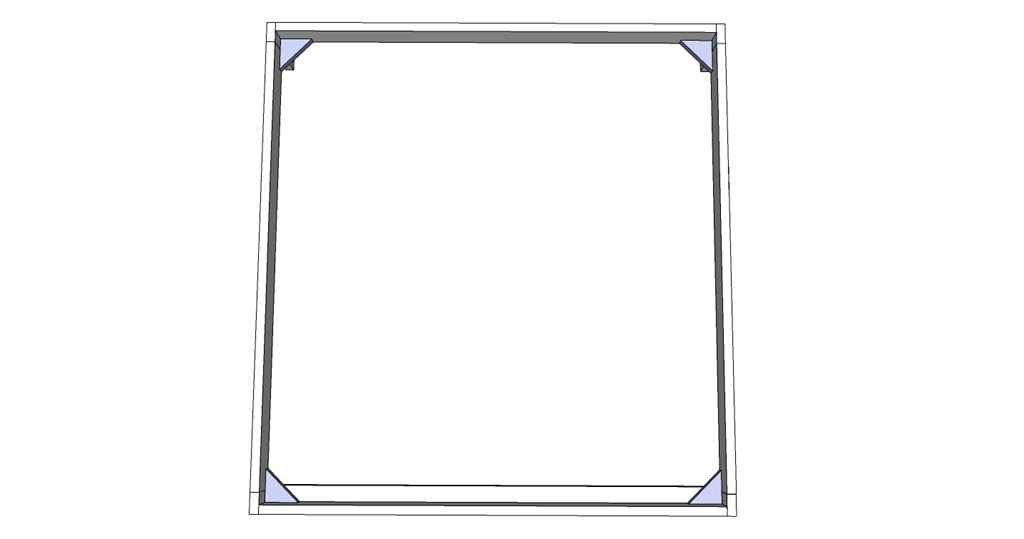
- inserts for corners - cut a rectangular triangle with legs equal to 14 cm from the trim of 5x15 cm of the board.
Queen size (1.5x2 m):
- side walls of the frame - 5x15x190 cm (2 pcs.)
- front and rear walls of the frame - 5x15x150 cm (2 pcs.)
- legs - 5x10x38 cm (4 pcs.)
- rack bottom support - 5x5x200 cm (2 pcs.)
- lower part of the front "wall" - 5x10x1050 cm
- rack bottom elements - 2.5x7.5x150 cm (13 pcs.)
- central support bar - 5x10x10 cm
- additional (central) leg - 5x10x10 cm
- inserts for corners - cut a rectangular triangle with legs equal to 14 cm from the trim of 5x15 cm of the board.
Twin size (1x1.9 m):
- side walls of the frame - 5x15x190 cm (2 pcs.)
- front and rear walls of the frame - 5x15x97.5 cm (2 pcs.)
- legs - 5x10x38 cm (4 pcs.)
- rack bottom support - 5x5x200 cm (2 pcs.)
- lower part of the front “wall” - 5x10x97.5 cm
- rack bottom elements - 2.5x7.5x97.5 cm (13 pcs.)
- central support bar - 5x10x10 cm
- additional (central) leg - not needed
- inserts for corners - cut a rectangular triangle with legs equal to 14 cm from the trim of 5x15 cm of the board.
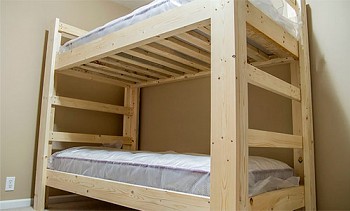
Assembling a bed frame
To make a wooden bed frame with your own hands is much easier than the most indecisive ones might think. In the end, the preparatory phase of the work is completed, the materials are prepared, which means that it is too late to retreat.
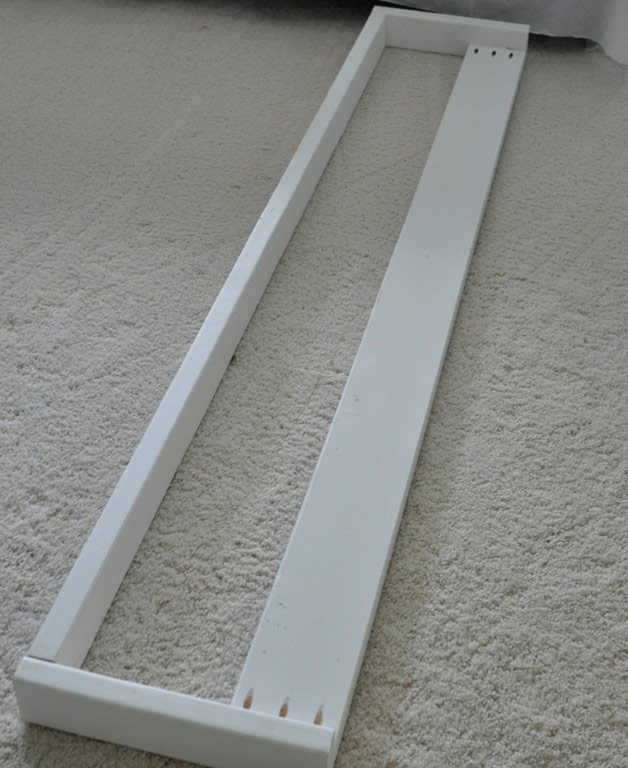
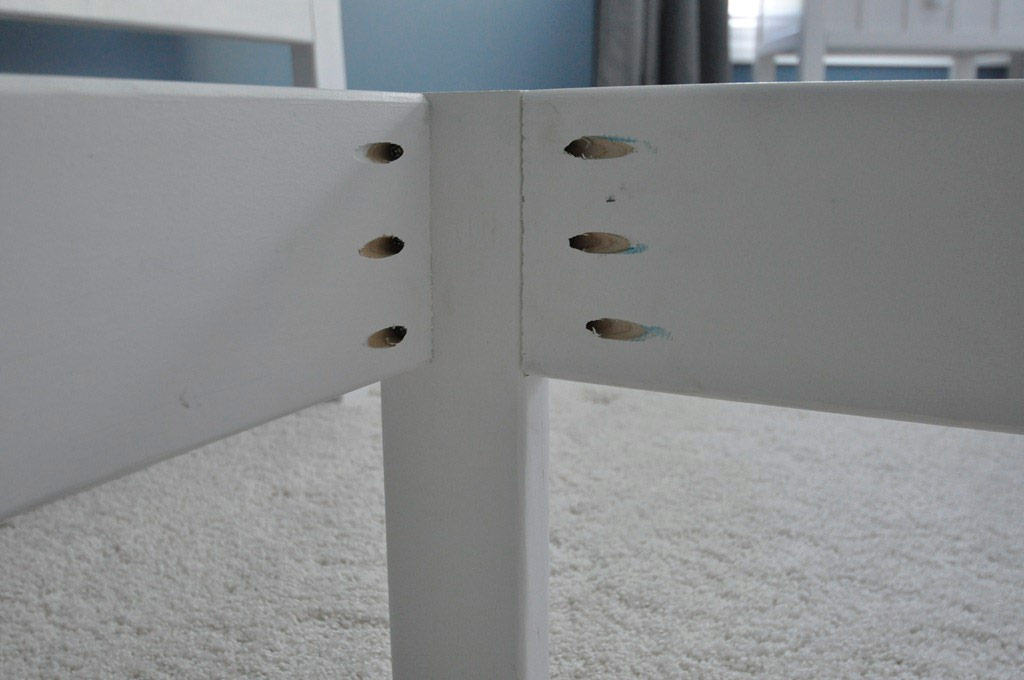
To begin with, you have to assemble the front and rear "walls" of the frame using an oblique flush connection. To do this, you will need a special device that allows you to drill holes at an angle.
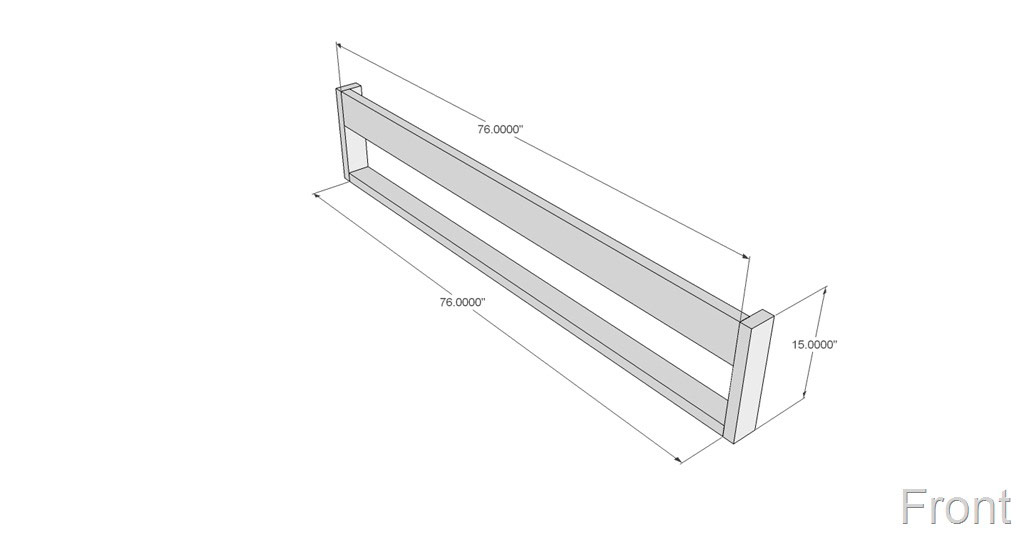
The plan of the front of the bed.
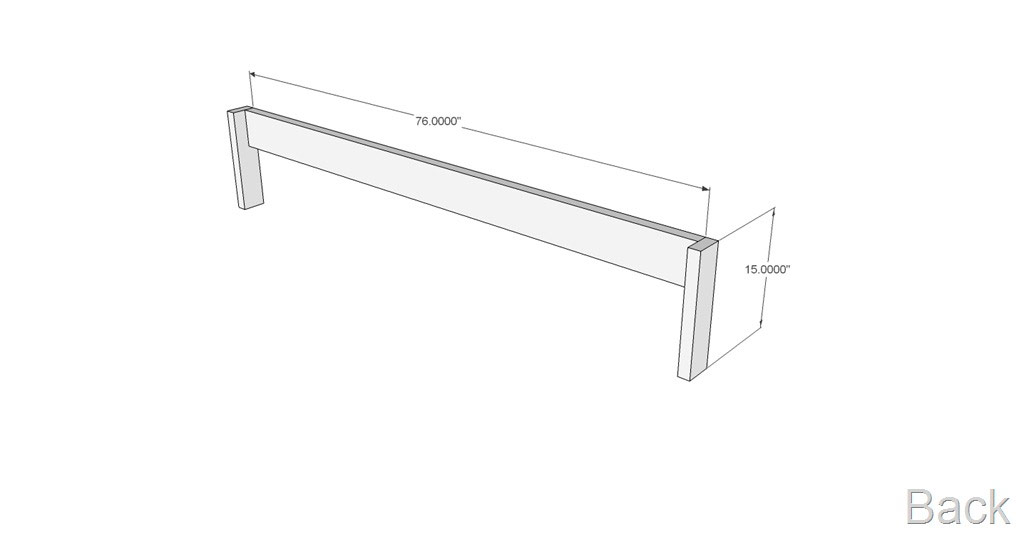
The back of the bed.
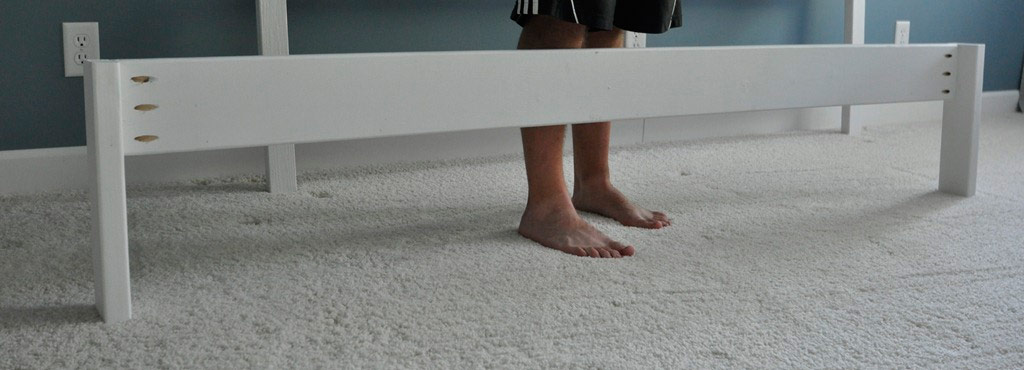
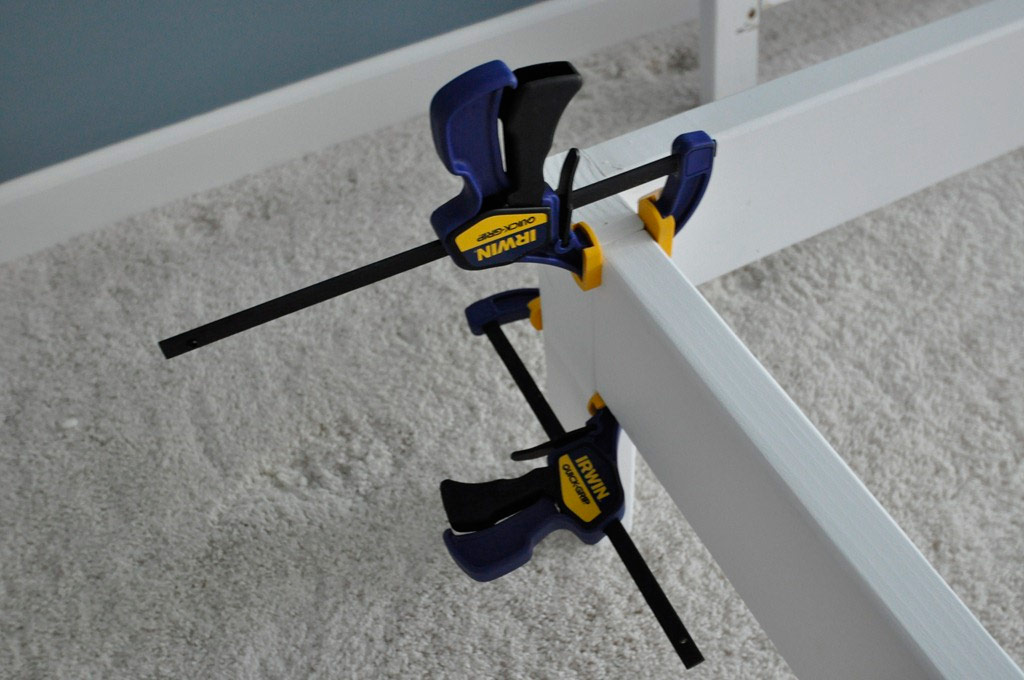
Attach the sidewalls to the front and back sections. Clamps will help fix the boards in the correct position before screwing in the screws.
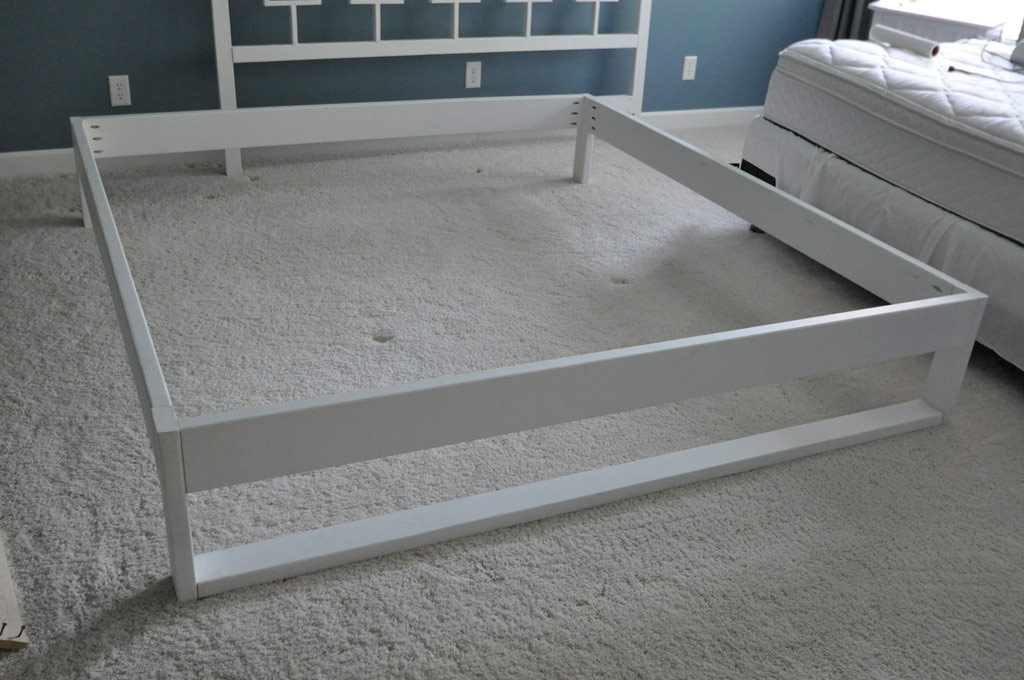
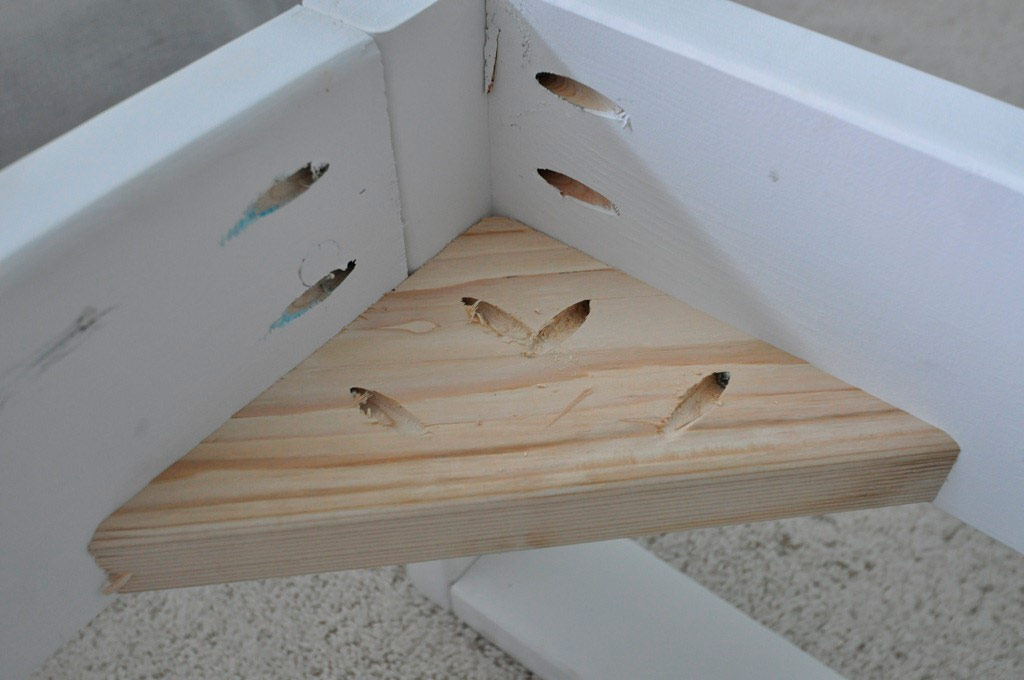
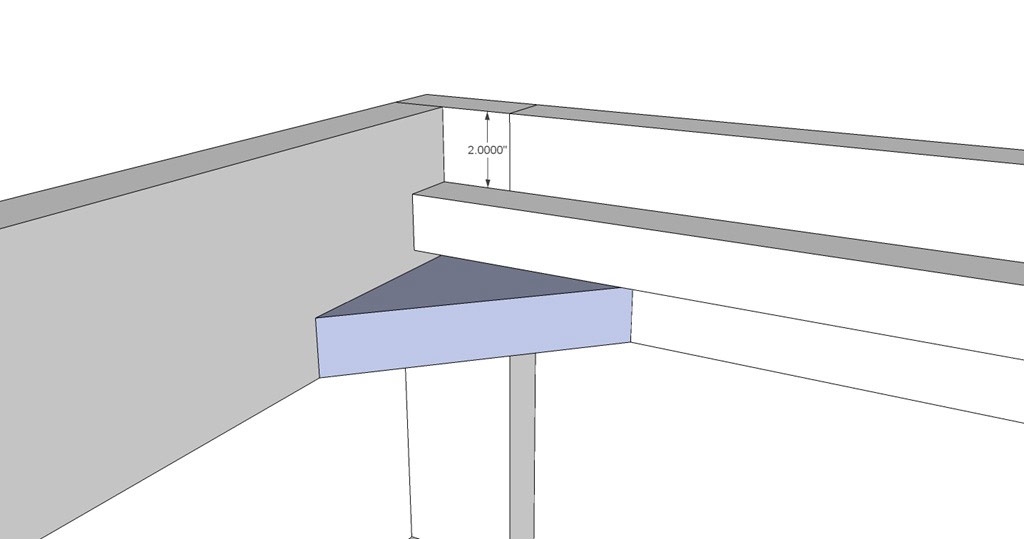
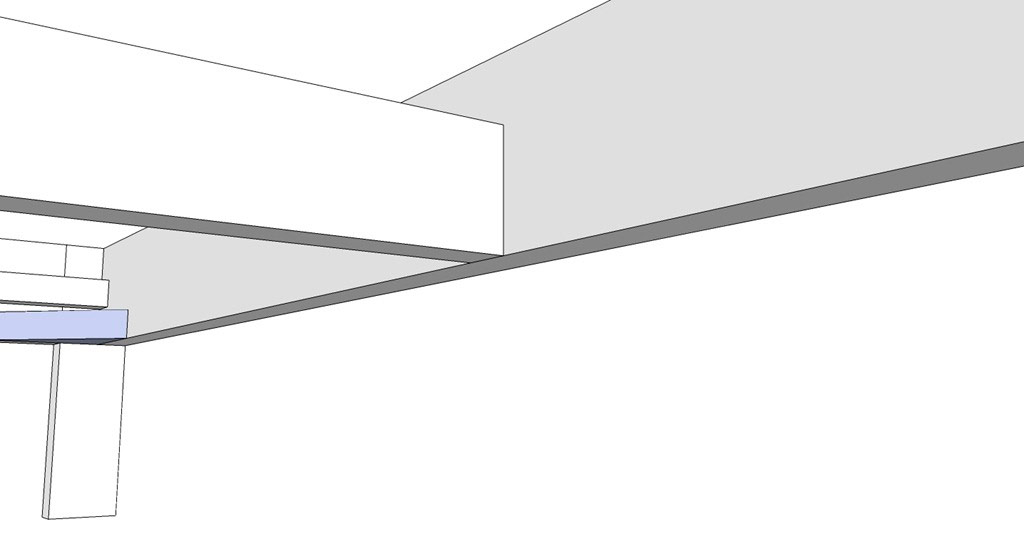
At the bottom of each corner, place triangular inserts to prevent deformation of the structure.
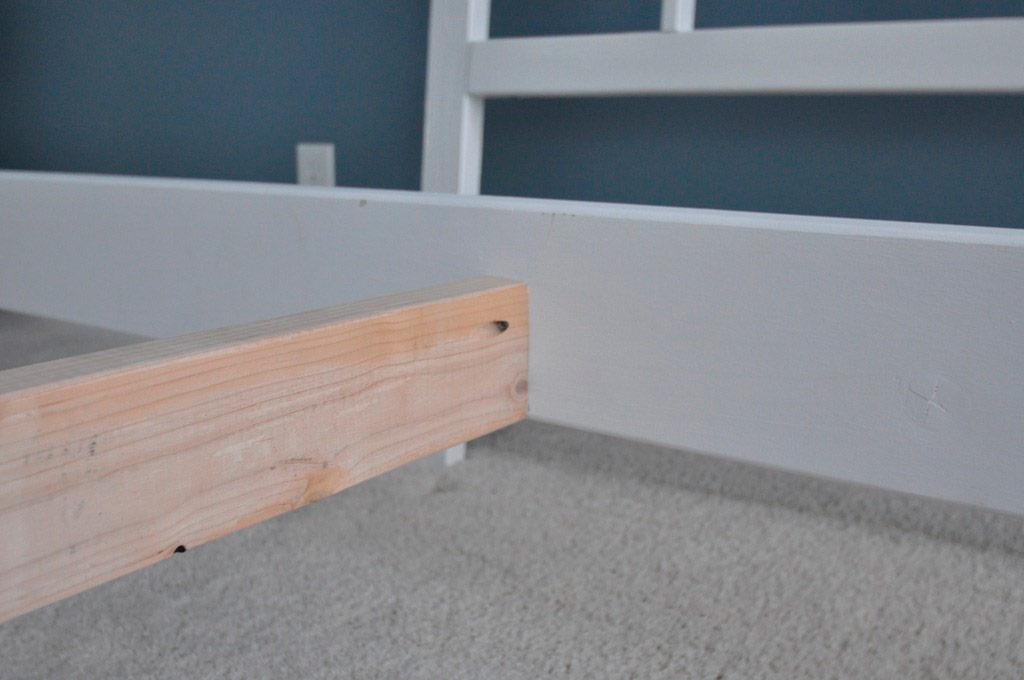
5 cm from the top edge of the side rails, place supports for the rack bottom. Fixing them in the right position will help carpentry glue.
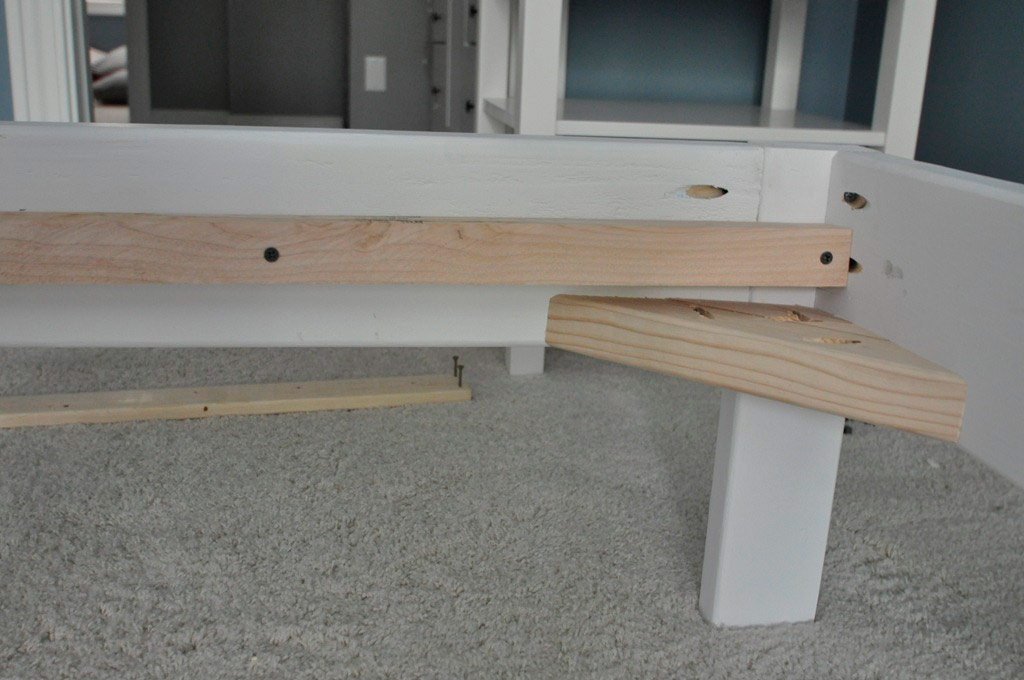
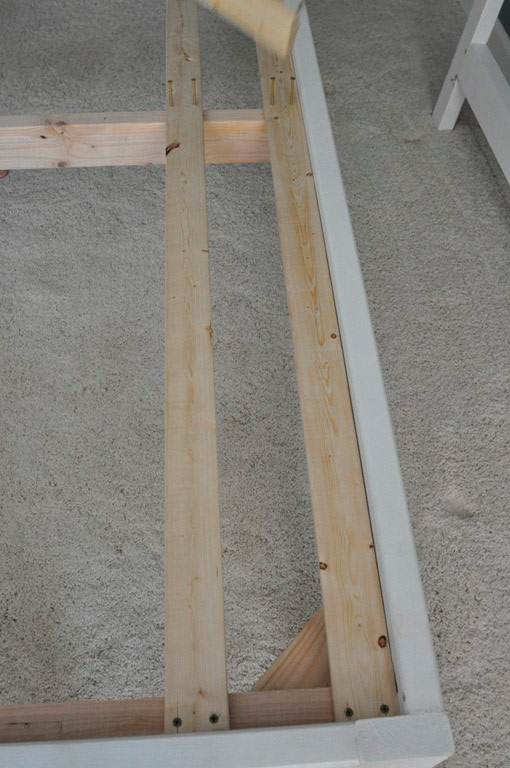
Attach a central support block parallel to the rack bottom supports, and an additional leg to its middle. The latter is recommended only for double beds (King size), although it does not hurt for Queen size. There is no need for an extra leg for twin beds.
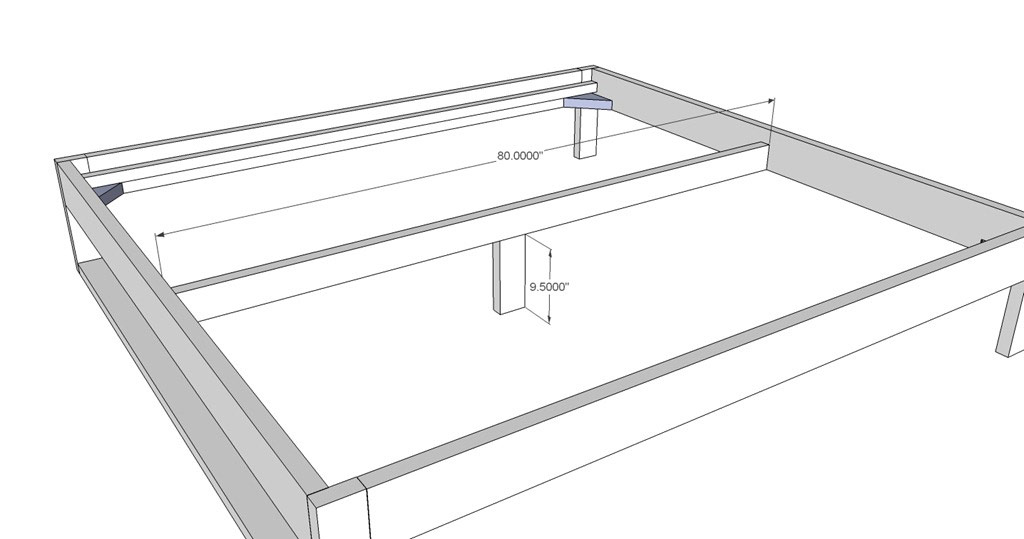
A central support block will connect the middle of the front and rear walls of the frame. Its lower edge should be at the same level with the bottom of the frame, while the upper one will be at the same height as that of the supports for the rack bottom.
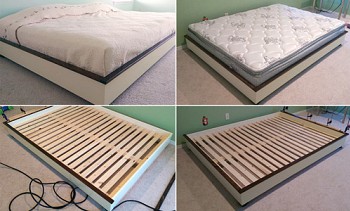
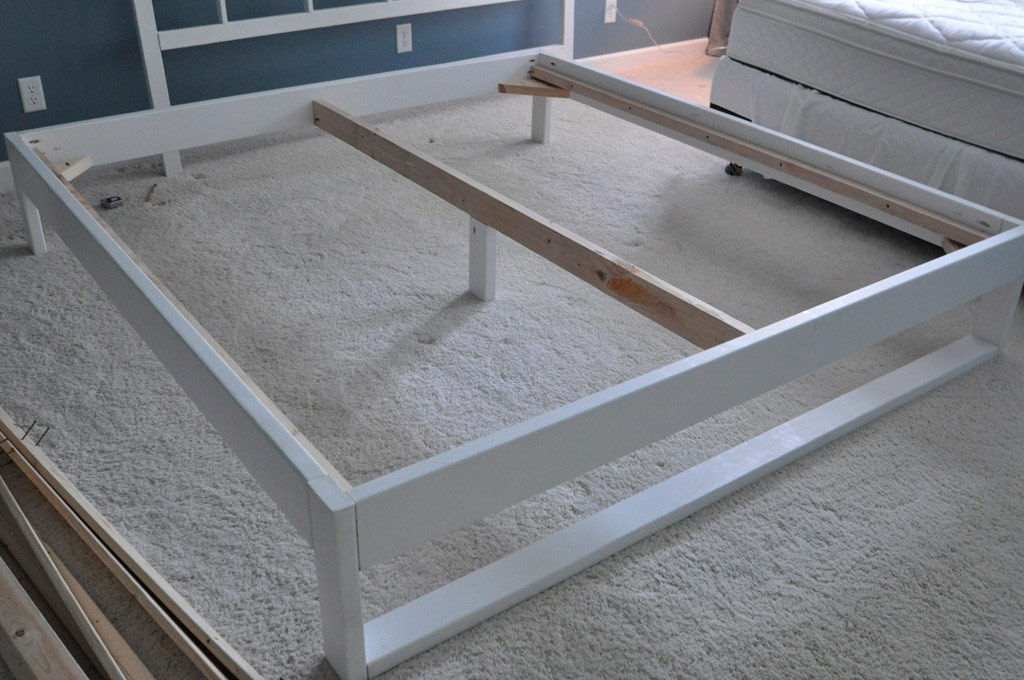
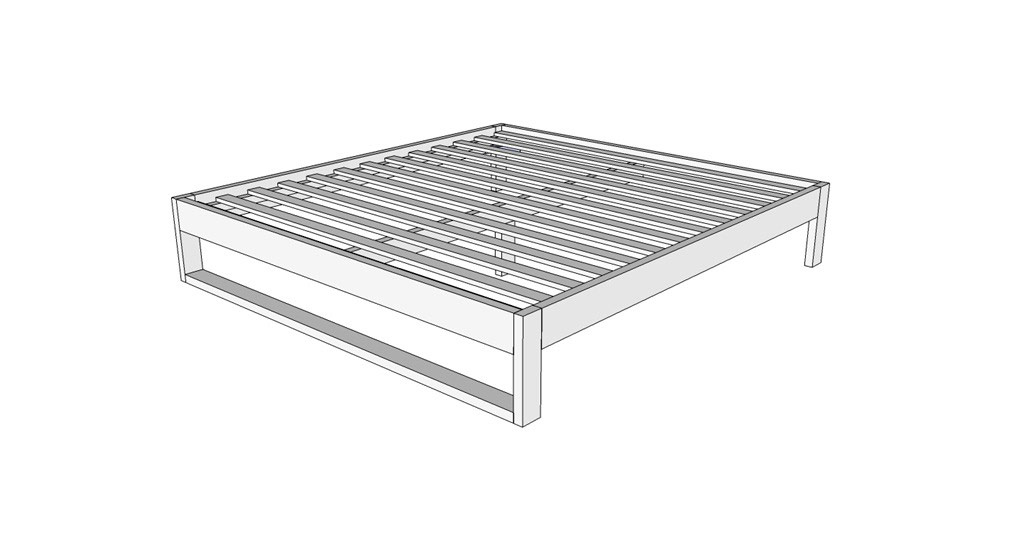
Slatted bed bottom
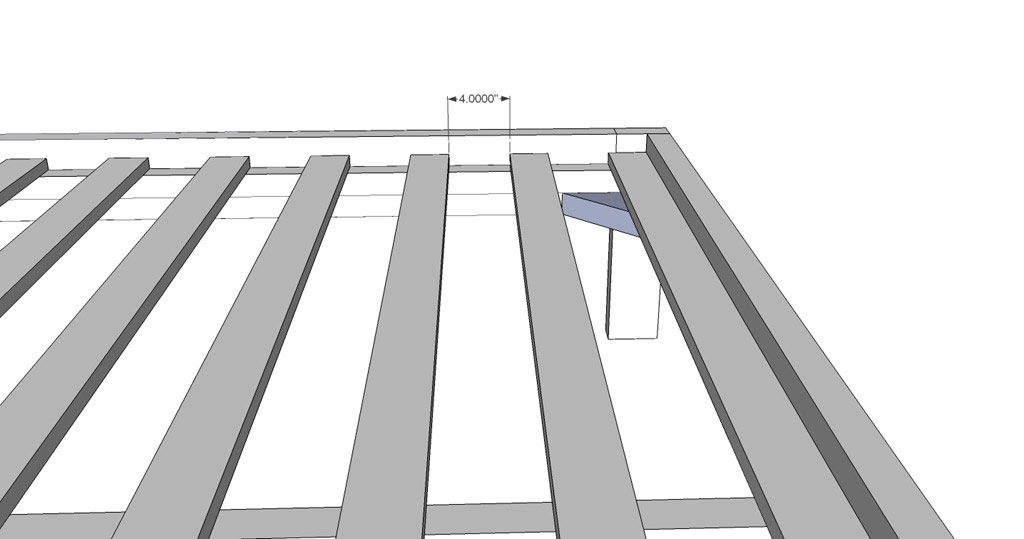
It was the turn of the rack bottom.The first and last rails should be adjacent to the front and rear walls of the frame, the rest should be evenly distributed between them (the distance between the rails will be 10 cm).
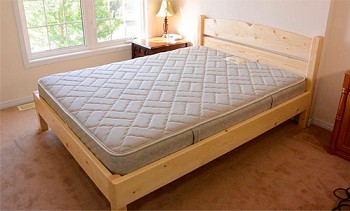
Well, here you are almost done making the bed frame with your own hands. Unfortunately, the time for sleep has not yet arrived. I love to take a nap. I dream that a quiet hour should be made mandatory at the legislative level ... However, I digress ...
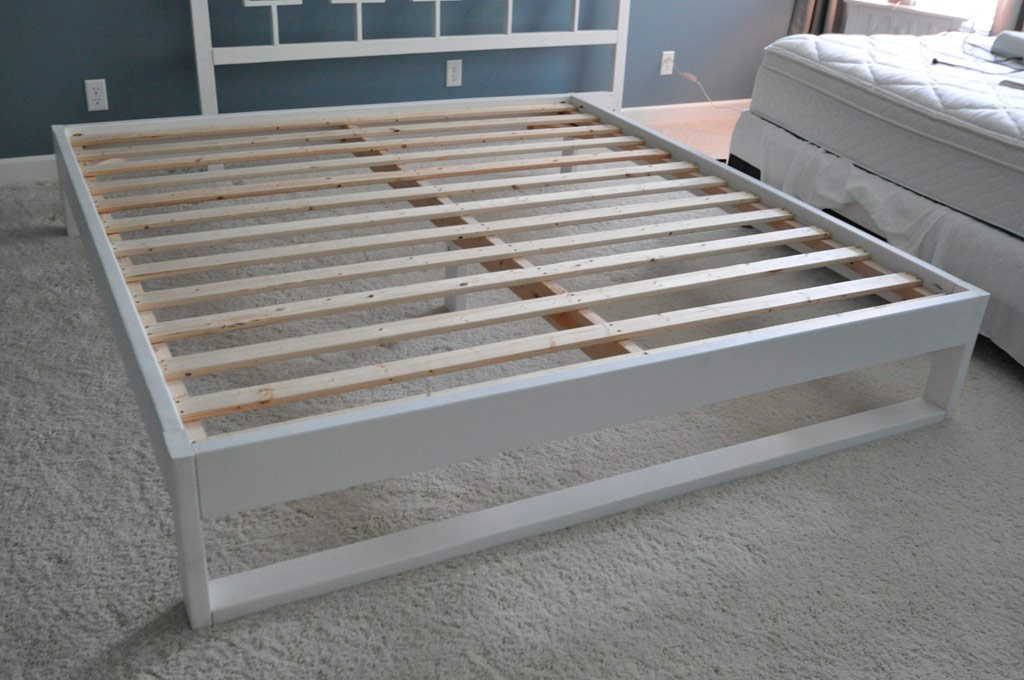
Attach the finished frame to the head. I used a pair of long screws and L-shaped staples for this.
Use wood putty to hide all openings and crevices in the joints. Sand and paint the wooden surface (I applied two coats of paint before assembling the structure and one after).
It remains to put a mattress, lay a sheet and a blanket and enjoy the result of your hard work!