I haven’t picked up tools for a long time, and my hands yearned for work ... Well, then, it is time to make something new. Join me and you, dear readers. This time I will tell you how to make a bed with my own hands.
Before starting to manufacture anything, I always "rummage around" on the Internet in search of what I want, but more often I cannot find anything suitable. Maybe I'm just too picky? I borrow something on one site, something “steal” on another, and so on until a plan ripens in my head, which is, in fact, a hybrid of various network projects. Every great designer is really a big thief!
Before you start reading my instruction manual on how to make a bed, I want you to measure your mattress and make sure that its size is close to 200 × 150 cm. Why is this important? If you cannot find the answer to this question yourself, I will tell you: the mattress should "fit" into the bed frame! If the size of your mattress is slightly different from Queen Size, do not forget to make the necessary adjustments when cutting lumber. In addition, pre-determine the purpose of the bed - whether it will be a standard bed for sleeping or a daybed for a day's rest. It depends on how to do decorative decoration.
Content:
Materials and tools that you will need to create a bed
Materials
Now go to the nearest building materials store (taking a tape measure with you) and purchase the following lumber:
- 4 boards 2.5 × 20 × 240 cm (pine) for the manufacture of a frame;
- 3 boards 5 × 10m240 cm (pine) for the manufacture of support beams;
- 3 boards 2.5 × 5 × 240 (pine) for decorative decoration;
- 1 bar 10 × 10 × 240 cm (fir or pine) for the manufacture of legs;
- 19 boards 2.5 × 7.5 × 240 cm (pine) for making a rack bottom.
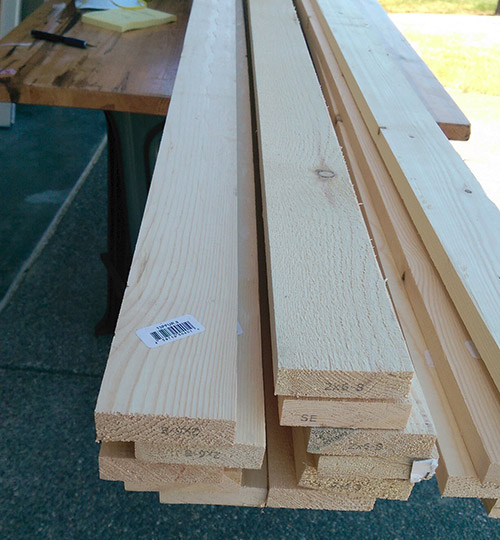
If you go to big shops selling building materials, you will notice that there is wood of various qualities on sale. Choose straight boards with a minimum number of knots (the more knots, the more time and effort you will have to spend on grinding). Of course, high-quality lumber are more expensive, and in this case you will have to look for that very “golden mean”. For example, for the manufacture of frames and decorative finishes, I purchased high-quality materials, for the legs I took second-grade wood, but I bought the racks for the grating the cheapest of those that I could find.
Tools
Necessary tools: (Do not be alarmed by seeing this list! Your investment will pay off very soon, and then save thousands and thousands ...):
- roulette;
- a circular saw;
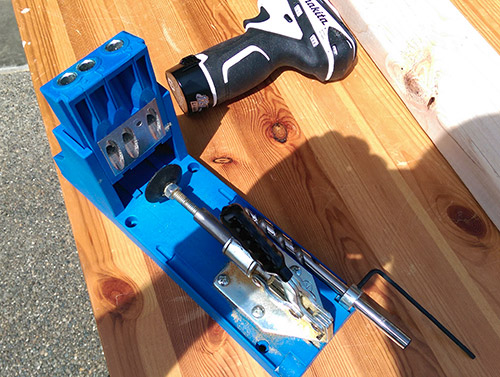
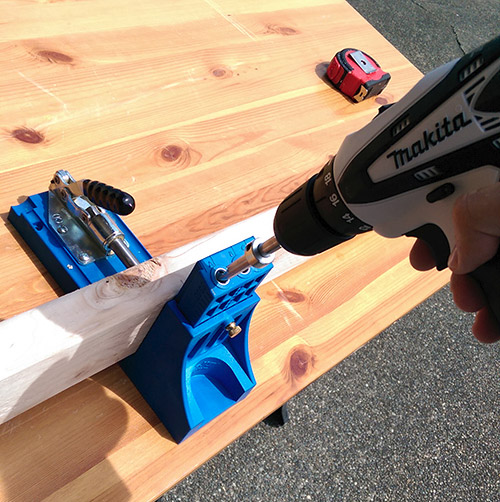
- Kreg Jig kit (angle drill);
- drill;
- glue for wood;
- adjustable measuring square;
- belt grinding machine;
- clamps;
- 30 mm screws;
- 50 mm screws;
- 60 mm screws;
- water-based acrylic varnish;
- stain;
- brushes;
- sandpaper;
- putty on wood.
Cutting lumber
Frame:
- 2 boards 2.5 × 20 × 205 cm
- 2 boards 2.5 × 20 × 148.5 cm
Supports:
- 3 boards 5 × 10 × 202 cm
Legs:
- 6 bars 10 × 10 × 10.5 cm
Rack bottom:
- 19 boards 2.5 × 7.5 × 148 cm
Decorative Finish:
Standard bed.
- 2 boards 2.5 × 5 × 157.5 cm
- 1 board - 2.5 × 5 × 202 cm
Couch (what I will do).
- 2 boards 2.5 × 5 × 150 cm
- 1 board 2.5 × 5 × 209.5 cm
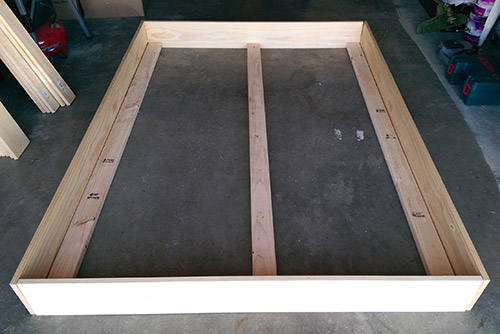
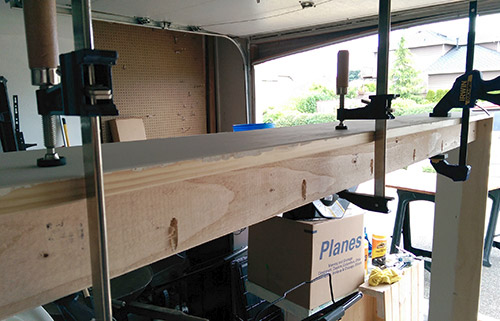
Making a bed frame
To start the work of creating a wooden bed with your own hands should be with the manufacture of the frame.
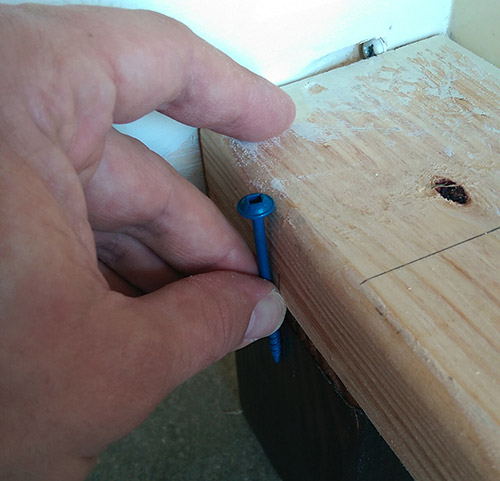
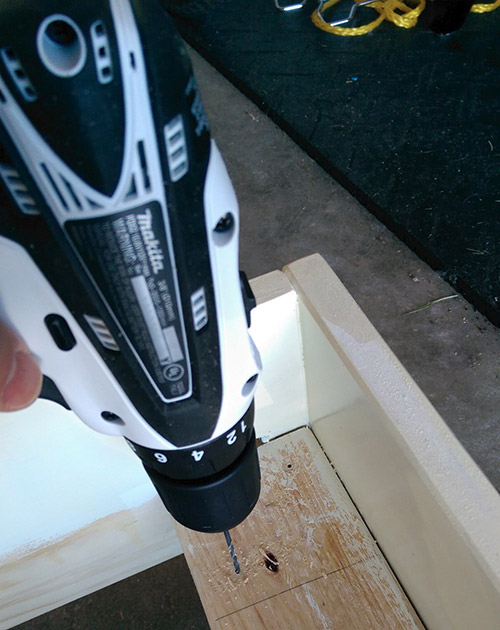
I fastened the components of its board, screwing the screws from the inside at an angle. And for drilling at an angle of the guide holes, Kreg Jig turned out to be indispensable. The tool is very convenient and easy to operate.Try it, you won’t regret it!

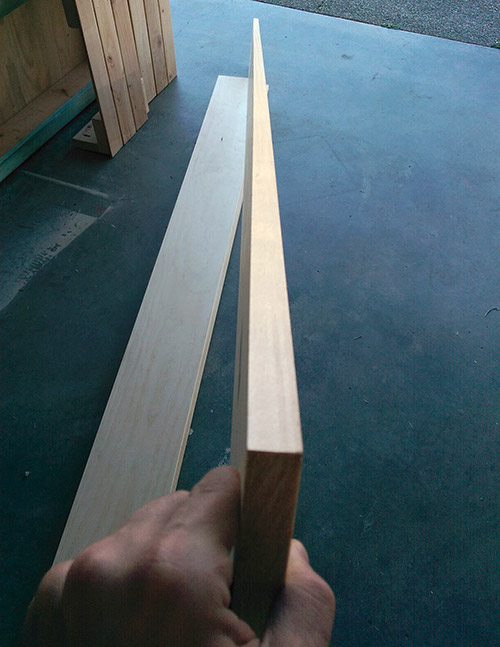
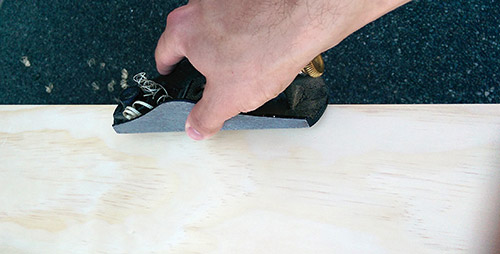
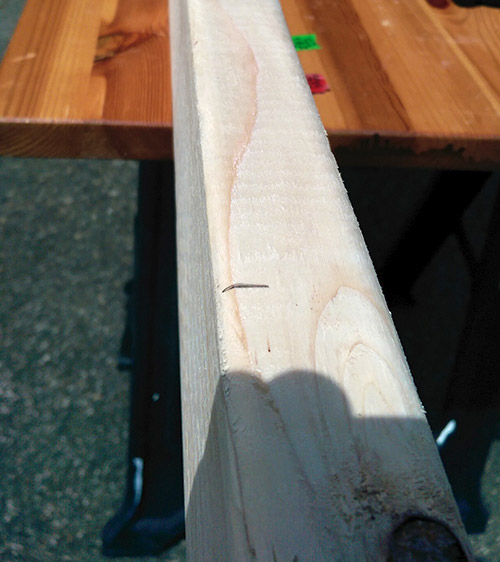
To give the edges of the part a neat appearance, I processed them using a hand plow. If you do not have such a mini planer, you can use a grinding machine for these purposes.
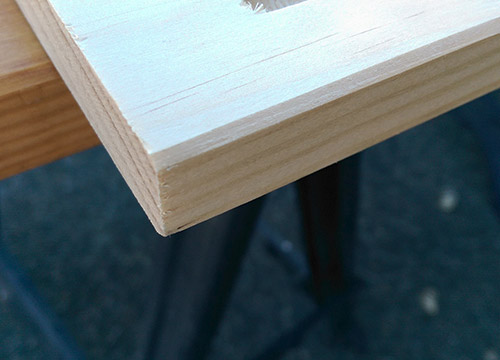
It looks great.

Using a grinding machine, he processed the ends.
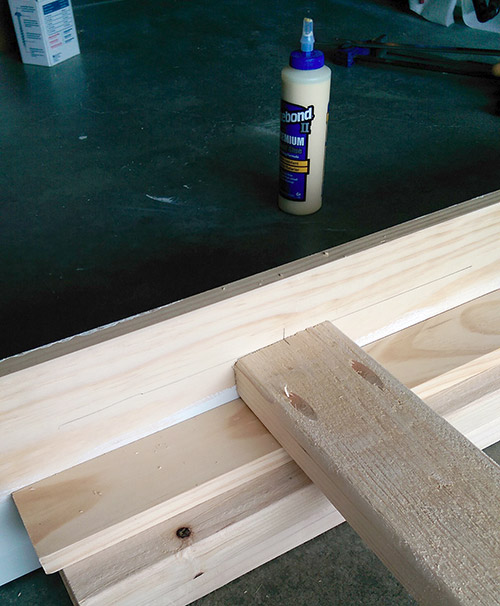
After all the parts were polished and the guide holes were drilled at their ends, I applied some wood glue to the joints and ...
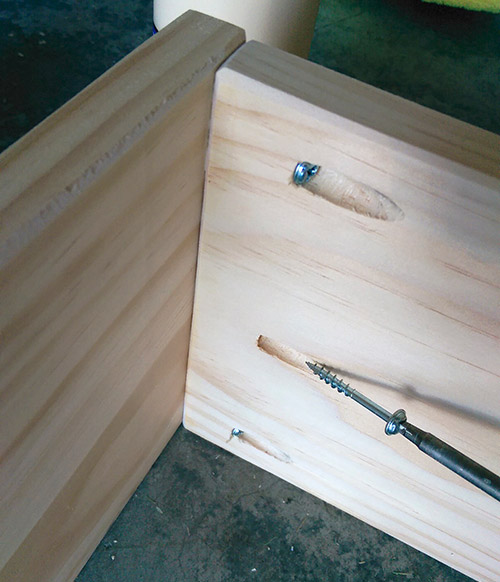
... fastened the boards with 30 mm screws.
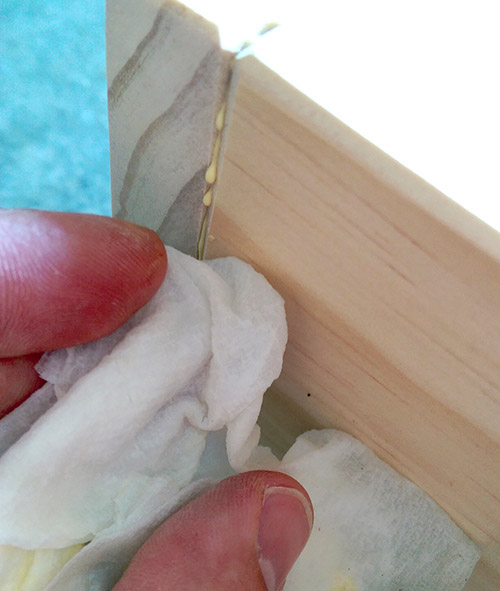
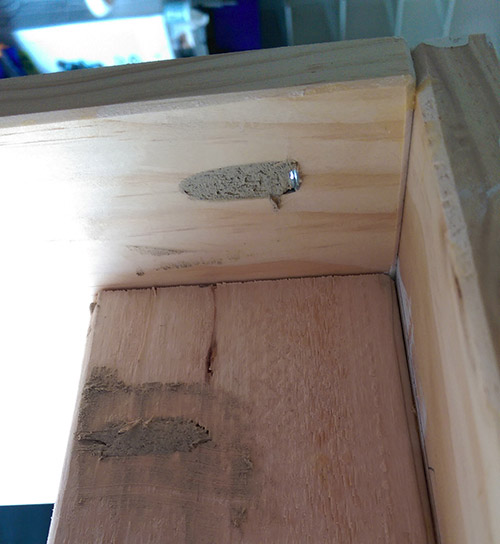
Using a damp cloth, wipe off any excess glue until it is dry.
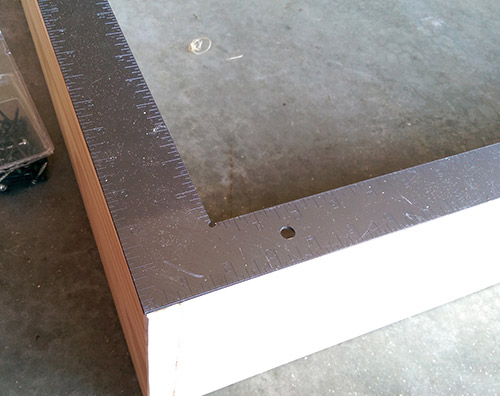
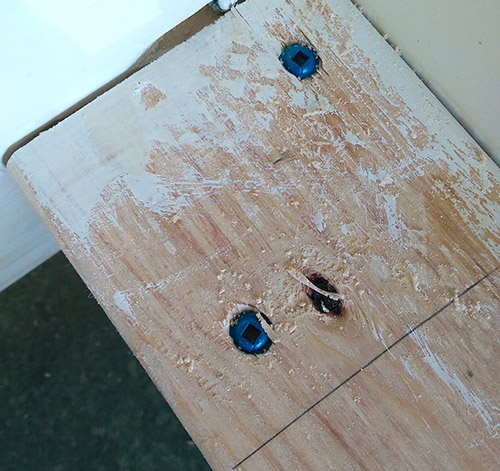
Using a square, I was convinced that all the corners of the assembled structure are straight.

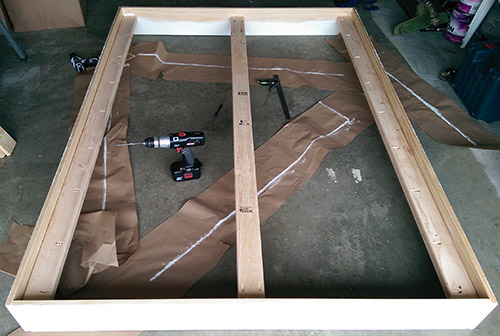
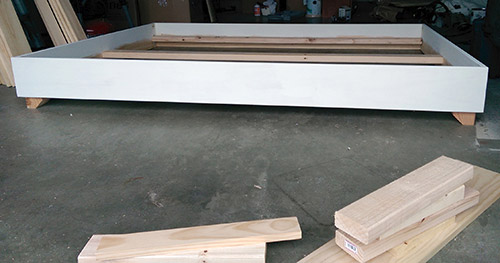
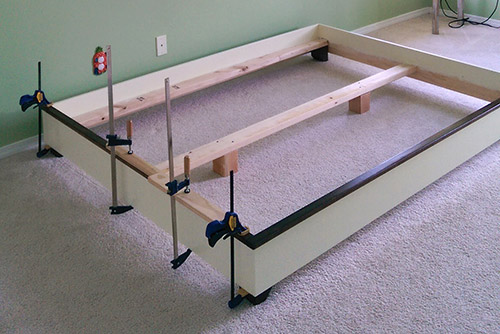
The frame is ready.
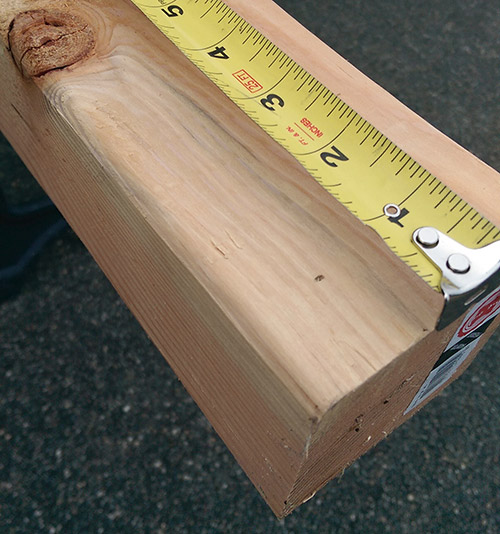
My advice: at all stages of work, take careful measurements to make sure that you are doing everything correctly.


Now is the right time to paint the frame.
And why not make paint based on calcium carbonate powder at home? I borrowed the recipe on this site: hnydt.co/2013/08/06/diy-chalk-paint/. For its preparation, I used Valspar paint of the color bleached oak.
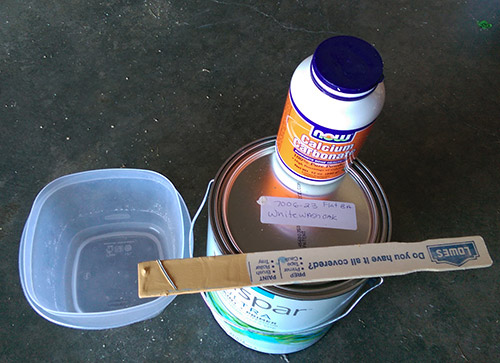
It doesn’t look exactly as I expected ... Well, all right.
We make supports for the rack bottom
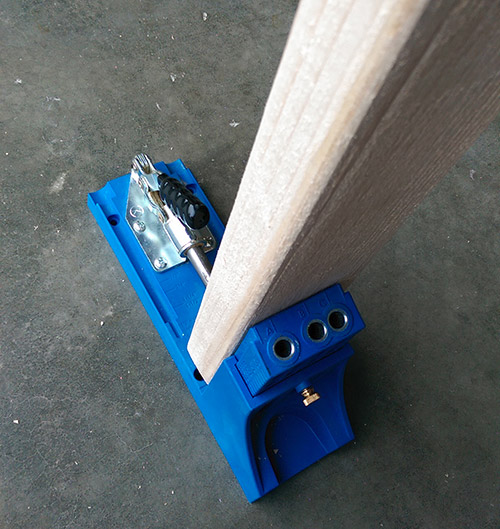
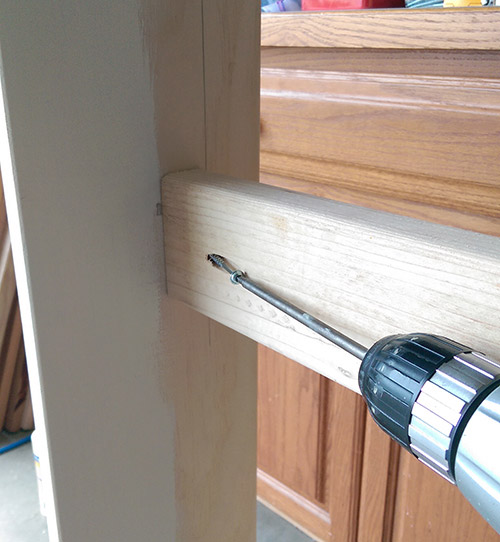
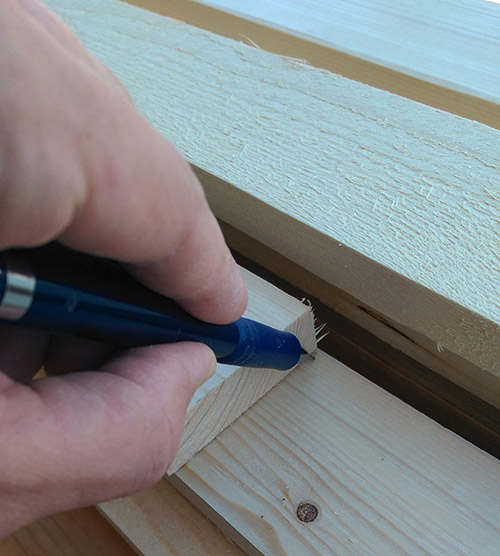
Instead of watching how the paint dries, I drilled guide holes in 5 × 10 cm boards, which will serve as supports for the rack bottom. To do this, I again used Kreg Jig, reconfiguring it to a larger thickness of the board (simple adjustment with a hex key).

To determine the location of the guide holes, I measured 5 cm from the end of the bar, and then applied marks every 25 cm.
As a result, you should get it like in my photo.

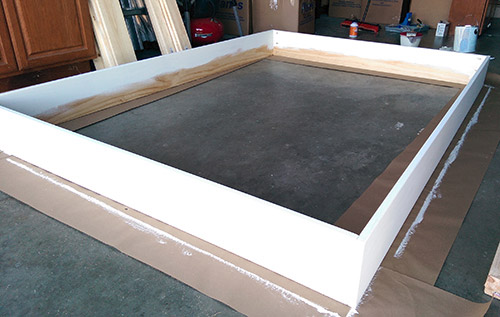
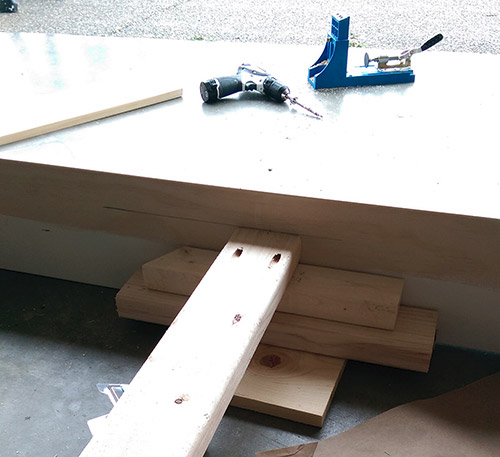
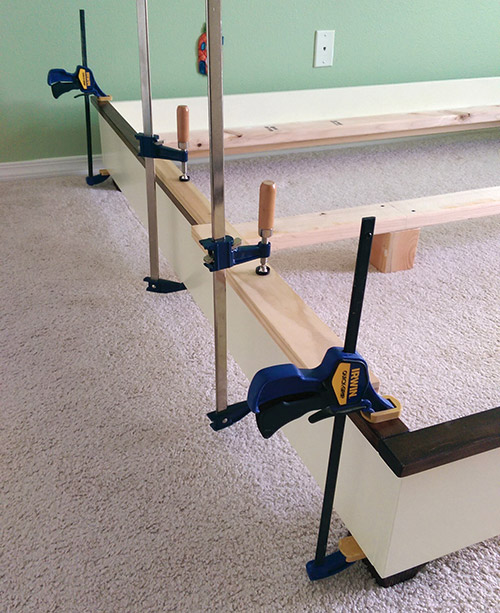
When the paint was dry, I put the frame on its side to attach the prepared bars.

Using an adjustable angle, I drew a line 5 cm from the bottom of the frame.
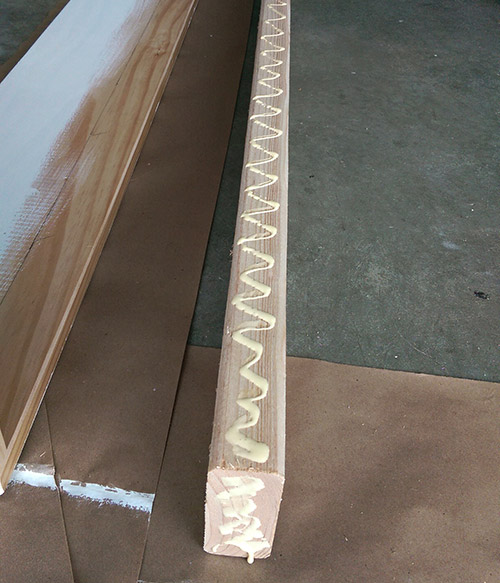
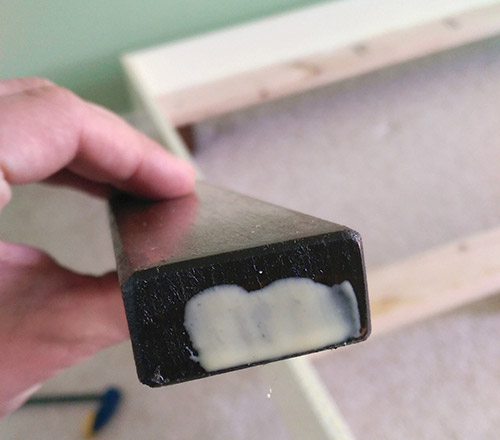
Generously applied carpentry glue along the entire length of the bar and along its ends.
I placed the bar in its intended place and secured it with 50 mm screws at the ends and in the center. Then I turned the frame over and pressed the block along its entire length with clamps. There should be no gaps between the bar and the frame! Now you can screw the screws into all the other pre-drilled holes.
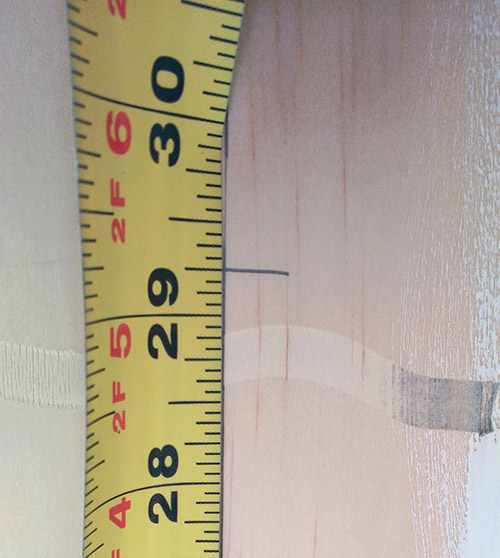
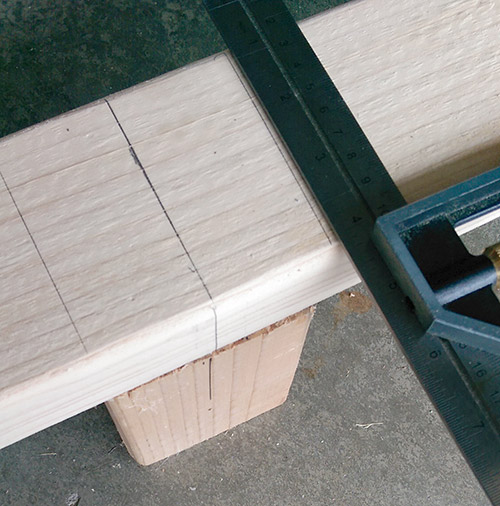
He noted the center of the sides with a length of 148.5 cm (i.e. 74.25 cm from the edge).
Here you see a 5 × 10 cm block from which the central support beam will be made. I make two guide holes at one end and one hole at the other end.
He put a support under the bar so that it was on the same level with a line drawn 5 cm from the floor (and with two other supports). Applied glue and screwed the screws.
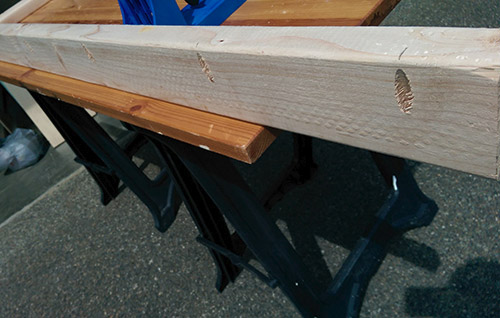
Then I filled all the holes with wood putty. After it dries, you need to polish these places with fine-grained sandpaper.
Making bed legs
For the legs, we need a bar with a cross section of 10 × 10 cm and a length of 10.5 cm. We need to prepare six such bars.
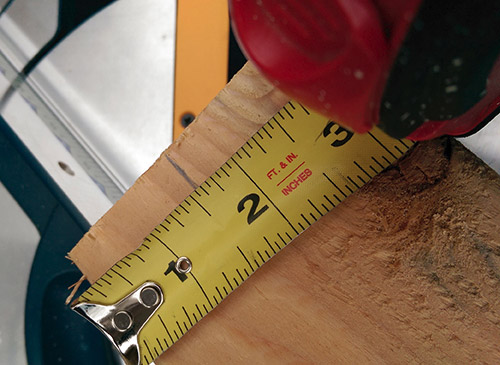
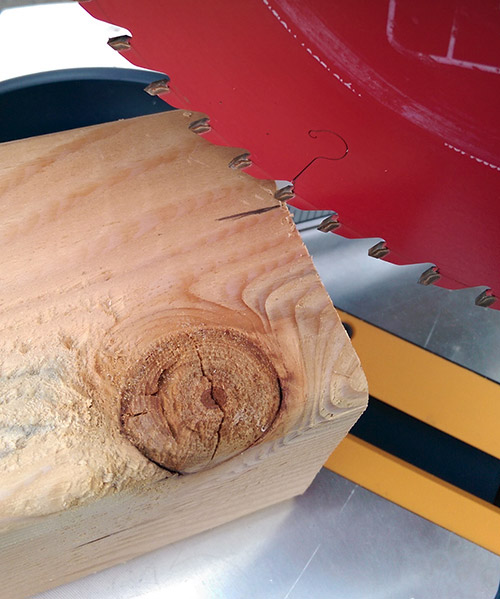
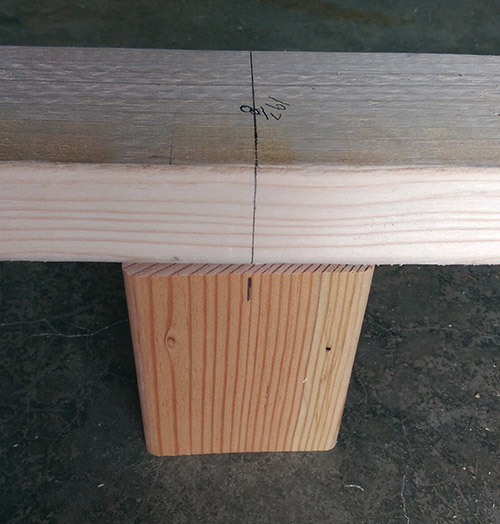
Measured 2.8 cm, set the saw to 45 ° and combined its blade with the mark made ...
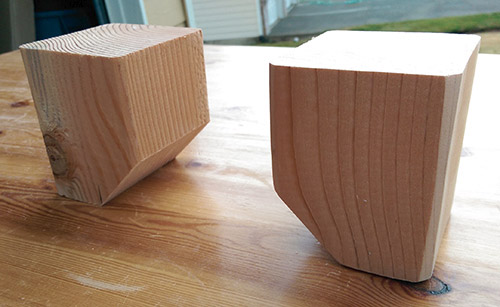
These are my legs. In my opinion, they look good. On the left - just sawn, on the right - already polished. Basically, you can skip this stage completely. It is your choice, after all!

Here's how the beveled legs look under the frame.
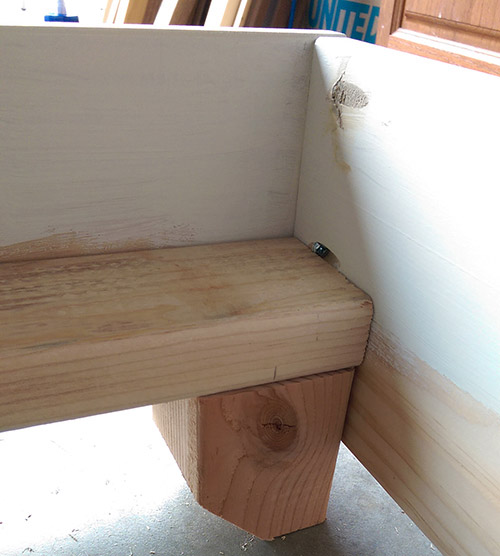
Under 5 × 10 cm supports 10 × 10 cm legs fit perfectly.

Two legs, located under the central support, I did not mow.
To determine the location of the central legs, I measured 50 cm from each end of the support beam (1/4 of its full length). He drew the center lines and the perimeter of the legs. Having done this, I can not worry that the hole to be drilled will be outside the leg.
Creation of decorative elements of the bed
Let's move on to the decoration. Since my bed will function as a couch (it will stand with the long side against the wall), a longer piece of decoration will be frontal. If you are making a standard bed, look at the sizes given at the beginning of the article.


I sanded the trims and legs ... it looks beautiful!
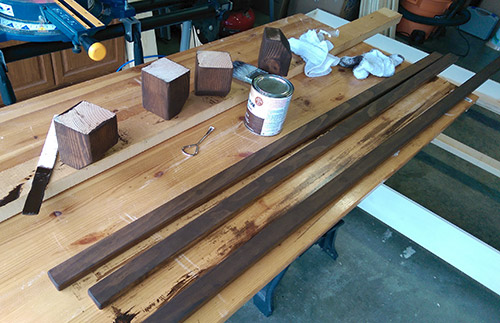
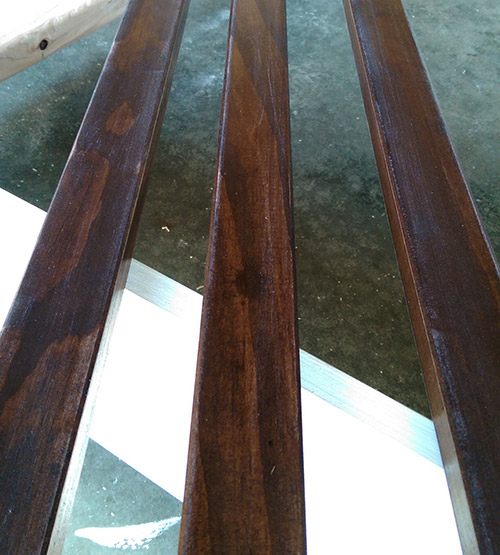
Now that all the details have been polished, you can start painting them! For this, I used a dark walnut stain.
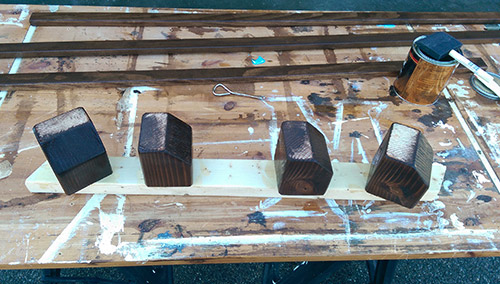
After the stain has dried, I coated the wooden surfaces with Minwax water-based polyacrylic varnish.
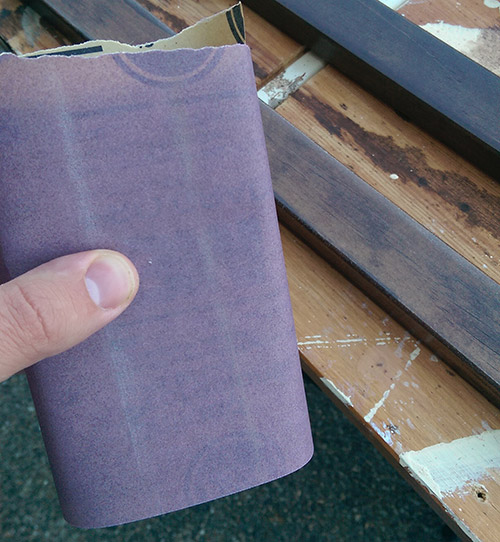
After the first layer of varnish has dried, the surface must be sanded to get rid of any bubbles and inhomogeneities. Use a sanding pad (or a piece of wood) with fine-grained emery paper. Pay attention to the white film on the tree - this is completely normal!
It remains to wipe the dust from the polished surface and apply the second and third layers of varnish.
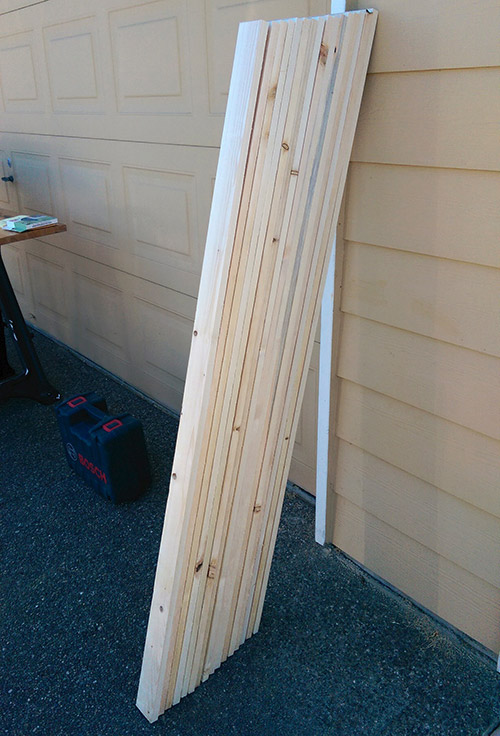
Making slats for the bottom of the bed
Now the decorative trims can be set aside for a while and proceed to sawing the slats for the bottom of the bed. In order not to spend a lot of time on measurements, I sawed out the first rail and used it as a reference. Just aligned the ends of the rails and drew a line.
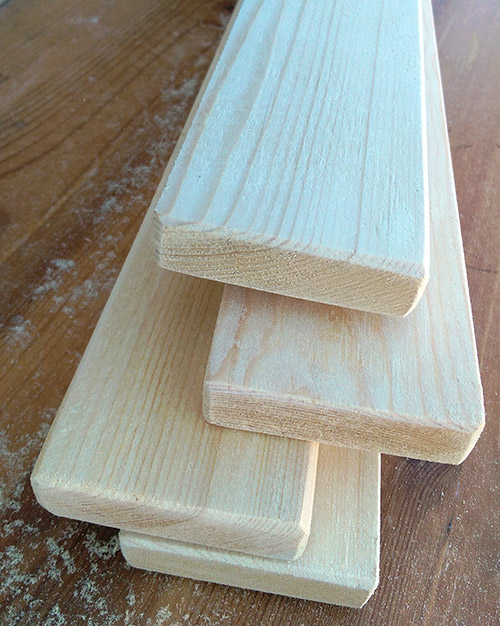
Finished slats must be sanded and wood dust removed with a damp cloth.
Fastening legs and decorative elements
To fix the legs, I used 60 mm screws (two on each leg). Before screwing them, I drilled guide holes with a 2.5 mm drill. Pre-drilling reduces the risk of wood splitting. In addition, the guide holes greatly facilitate the screwing process.


The same goes for the central legs.
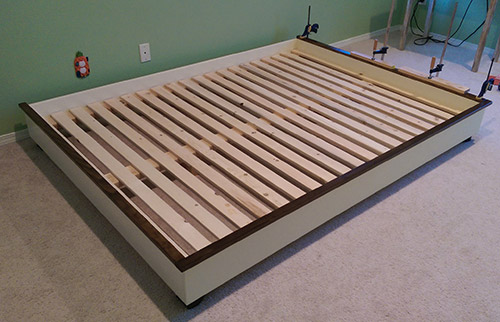
The time has come for decorative finishes. We apply glue to the upper part of the frame (the most effective application is wave-like!) And to the ends of the decorative strips.

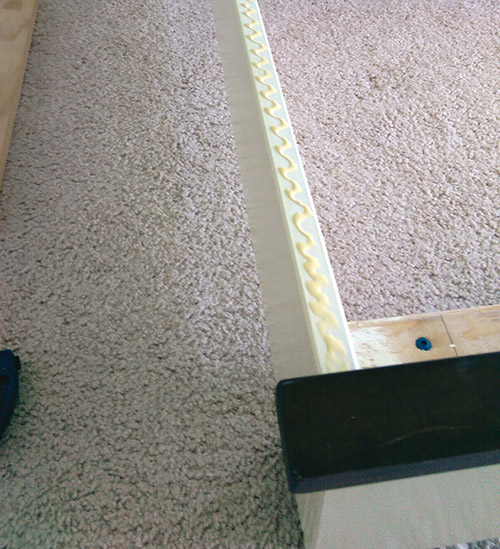
We press decorative strips to the frame with clamps. I used unnecessary trimmed boards as spacers. This allows not only to increase the pressing area, but also to reduce the risk that traces of clamps will remain on the decorative slats.
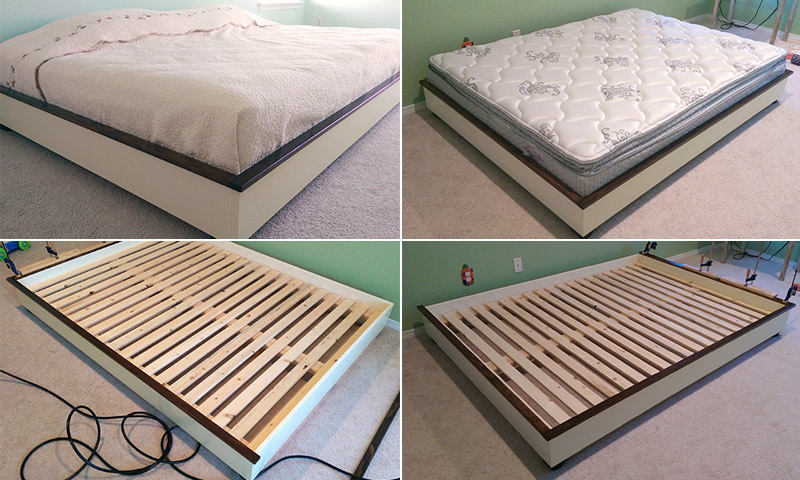
Here we are already close to completing the manufacture of the bed with our own hands, its outlines are clearly visible. It remains to fix the bottom slats. I used a pneumatic hammer and 30 mm nails. You have options! You can use parquet nails and hammer them manually. You can screw in the screws by pre-drilling holes. You could probably even stick the slats to the supports.

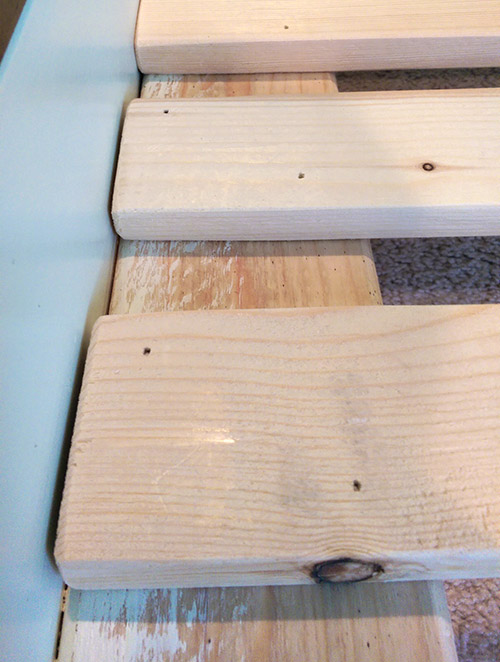
I drove two nails at each end of the rail and two nails into the middle support.
Pay attention to the location of the screws that secure the legs. Do not fall into them!

To ensure that the slats are evenly distributed, you can use the insert from unnecessary trimmed boards. I did not do this, but, nevertheless, all the rails were located at the same distance from each other.
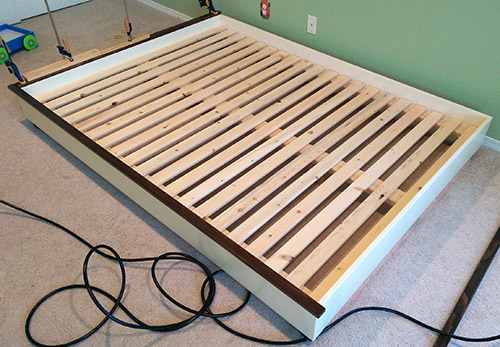
We fix the last fragments of decorative finishes ... In my opinion, it turned out pretty well! And what do you think?
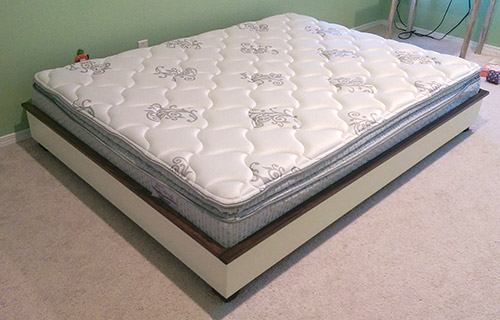
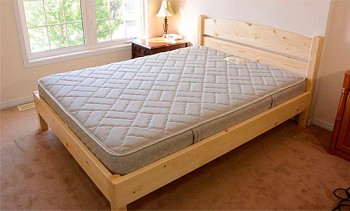
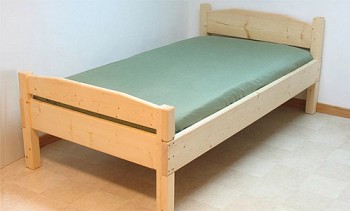
The mattress fits perfectly!
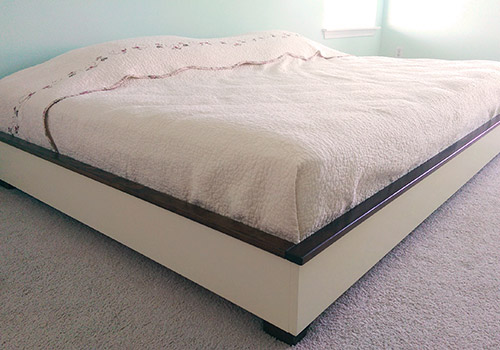
And here are the blankets with pillows ...
Well then, friends. Now you also know how to make a bed out of wood with your own hands. So, a visit to a furniture store is canceled!