In order to make it pleasant to look at the roof of the house from all sides, and all the rafters are reliably protected, it must be carefully trimmed. One of these “cosmetic” operations is the filing of roof overhangs. It will give both the roof and the house itself the necessary completeness, and at the same time it will provide additional protection. Further - in more detail about what such a binder is, what materials it requires and how it is performed.
Content:
The device of roof overhangs, their benefits and purpose
The overhang is called the lower part of the roof protruding beyond the level of the walls of the house. It protects the foundation and walls from rain. Its width can range from 40 centimeters to a meter. In principle, according to the rules of construction, it is not at all necessary to file this part of the building.
However, some troubles may occur. For example, a strong wind, having crept sideways under an unprotected roof overhang, can simply disrupt the roofing. Yes, and I want to hide the inside of the roof, along with all layers of its “pie” - waterproofing, insulation and the ugly lower part of the rafters. According to the rules, the roof is hemmed after all roof installation works. Also, before this, insulation of all external walls of the house and their decoration should be carried out. That is, the binder is a kind of final stage of construction and exterior decoration of your home.
Fronton and eaves overhang and their difference
There are two types of overhangs - horizontal, they are also called cornice and pediment. The eaves overhang is formed by the lower part of the pitched roof, and the gable overhangs are inclined overhangs formed by the lateral part of the slope.
#1.Eaves overhang.
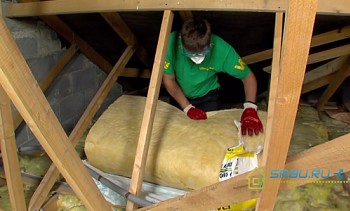
It forms the bottom of the sloping roof, facilitating the passage of air into the attic. This is typical for attic roofs. But at the mansard roofs, the air through the overhang enters the "roofing cake" - where the air gap is. Then the air continues its way up to the ridge. That's how the ventilation of the roof occurs.
Now imagine that the overhang will be tightly clogged, for example, with boards. It will not be good - ventilation will not be carried out. However, if the roof lining is not done at all, then mice can climb under the roof, birds or insects can fly. Rafters will need to be protected with paint, otherwise fog and moisture will damage them.
Attention! From all of the above, we conclude that the filing of the eaves should not be dense, but ventilated.
This ventilation can be done in several ways:
- The most basic option is to leave a gap between the wall of the building and the binder. If corrugated board is used for filing, then this gap should be from 0.6 to 1.2 centimeters, for lining or siding - from 1 to 1.5 centimeters.
- For such options for filing roof eaves, such as metal sheets, plates or lining, you can use ready-made ventilation grilles that are mounted in the material.
- If the overhang is sheathed with boards, for ventilation, make gaps between them, from half a centimeter to a centimeter.
- Using spotlights, you can apply perforated material created specifically for these purposes.
Rule number 1. The volume of ventilation openings may not be less than one five hundredth of the entire area for ventilation. At the same time, a roof based on bitumen, as well as a seam type, requires a larger diameter of these holes than a clay tile roof. After all, the latter still “breathes”.
Rule number 2. All ventilation openings must be covered with grilles. If this is a gap, then use a grid.Such a measure will protect them from dirt, leaves, insects and birds.

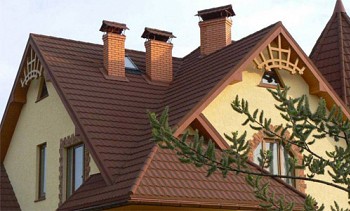
An example of a horizontal eaves overhang. Photo: krovmart.ru
#2.Frontal overhang.
It is formed by the side of the ramp, located at an angle. There is no need to worry about ventilation here, but proper protection from wind and moisture should be taken care of. Otherwise, a strong wind blowing in gusts can drive the rain between the boards of the crates, which protrude outward. And this is already serious, since the insulation can get wet, ceasing to keep heat well.
Attention! Therefore, when working with the decoration of the gable overhang, the tightness comes to the fore.

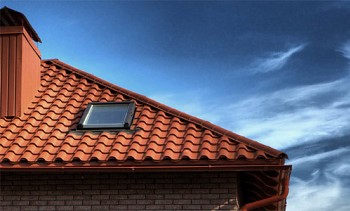
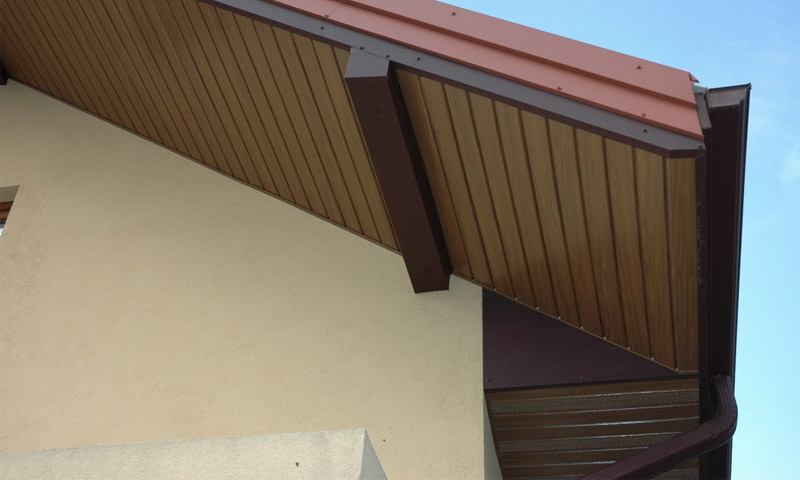
An example of a gable overhang.
Overhang Trim
Both types of overhangs on the ends have open elements. At the eaves overhang, these are the end parts of the rafters, and for the gable overhang, the ends of the rafters. It is necessary to carefully arrange them, while protecting from the weather. In addition, the eaves overhangs require the installation of gutters along them. In general, the finish of the end of the overhang is the edge trim. And what to make of it depends on the roofing material that you used. By the way, often a complete set with a roofing already has a set for decoration and edge sewing.
Before filing the eaves of the roof, it is necessary to cut vertically, in a single line, all the sticking rafters or filly. You need to trim them strictly at the same distance from the wall. Then the ends of the rafters are combined with a strapping board, onto which a windshield (usually a metal one) is nailed. The front board is usually complete with metal, ceramic and bituminous tiles. This item is also made of wood coated with paint or a composition for protection. It is on this board that gutters are subsequently mounted.
The frontal overhang is treated like this. First, the lathing boards protruding beyond the wall are cut. The cut line should be parallel to this wall. The end board (wooden or metal) is nailed to the trimmed edges of the crate and to the end of the ridge beam. Material for the roof, equal in length to the length of the cornice, cover the end part of the board.

Two main ways to file overhangs
The variety of options for filing roof overhangs is great. This can be done perpendicularly and parallel to the overhang, use whole sheets or individual slats, apply various materials and structures for securing parts. However, in fact, there are only two binder technologies.
Overhanging straight over rafters
This is perhaps the easiest. The main thing is that the plane at the lower ends of the rafters be common. This method is suitable primarily for roofs with a small slope, not more than 30 degrees, and the removal of not more than 40 - 50 centimeters. Hemmed on a crate made of boards or bars and screwed to the rafters. Hemming straps can be placed parallel to the wall, at the end of the rafters, and you can also fill perpendicular to the plane of the rafters.

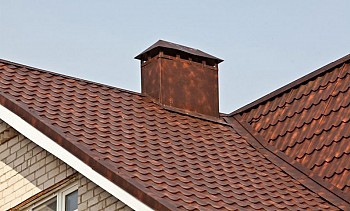
An example of a cornice overhang sheathed on rafters. Photo: dom.germanovich.com
Horizontal binder
It is indispensable when the roof has a steep slope. At the same time, installation is quick, and the material is significantly saved. For work, it is necessary to build a so-called box from the bars, attaching it to the wall and to the rafters (top and bottom). So that water falling on the overhang can easily drain, the beam located on the rafters should be a centimeter below the wall beam. Boards are nailed from the corners of the roof to the corners of the house. When the overhang is more than 45 centimeters, you will need another longitudinal beam in the middle. The remaining longitudinal bars reinforce the bars, stuffing them perpendicular to the wall.

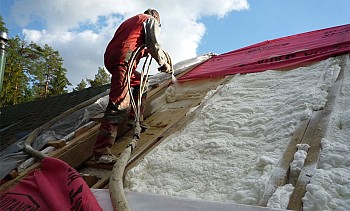
An example of mounting a battens for horizontal overhang cladding.
Filing of the gable overhang - always on the crate
At the same time, we do not pay attention to the method of filing the eaves overhang. A beam or boards are mounted directly on the crate. To these boards or boards running along the pediment, trim panels are attached.
Binder Materials
When choosing a material for covering the overhang, you need to coordinate this with the style of the house.You must admit that the roof lining in white plastic will not look particularly aesthetically pleasing if the house is wooden and even dark.
The board is better planed, but edged is also suitable
It is better to take boards of coniferous wood, with a width of 5 to 25 centimeters, and a thickness of 1.7 to 2.2 centimeters. Before installation, treatment with an antiseptic, varnish or paint is needed. Before work, you must let the board lie for a month on the street under a canopy - otherwise if it is too dry or wet, then it will warp.
Sheathing the overhang, between the boards make slots in a centimeter or a half for ventilation. When mounting boards perpendicular to the walls, they are fixed on both sides (if the overhang is wide, then in third place - in the center of the board). If the boards are mounted parallel to the walls, fix them through each meter.
It costs a lot, from $ 120 per cubic meter, or from $ 2.2 per square meter.

Lining wooden
This material is good in that it has already been processed (unlike boards), and therefore is in great demand. To cover the overhang, it is necessary to take a moisture-proof lining, designed to work in these conditions. Like a board, this material must also be held outdoors for a month before installation. The installation methods are the same as for the board, only the slots do not need to be left. Instead, ready-made ventilation grilles are used, at a distance of 1.5 meters from each other.
Cost - from $ 6 per square meter.

Photo: hibara.net
Polyvinyl chloride (PVC) siding
For binder, siding is required, which has moisture protection. Everything necessary is purchased for it: it includes strips in the form of the letter “P” for finishing the edge, and corners for fixing the joints of the strips, and grilles for ventilation. Mount the strips perpendicular to the walls, fixing them in two, three or four places. The number of attachment points depends on how wide the overhang is. Fastening PVC panels along the roof overhang is not recommended since it is not as rigid as wooden planks and requires a large number of fasteners and can bend.
Cost - from $ 4 per square meter.
Professional flooring (professional sheet)
This material is easy to install - because it can be laid in large planes, and fastened with the same distance as the board. Its profile height can be from 0.8 to 2 centimeters. When filing roof overhangs with a profiled sheet, they leave a gap of 0.6 to 1.2 centimeters (depending on thermal expansion). Ventilation is done using special grilles.
Cost - from $ 9 per square meter.

Photo: www.ruspolekb.ru
Sheet metal
It can be galvanized or polymer coated steel, as well as aluminum or copper. The thickness of the sheets is from 0.6 to 0.8 millimeters, and the length is up to 6 meters. For ventilation, you can either grilles ready to insert, or perforated pieces of sheets. Where the cut line passes, the steel sheets are treated against corrosion (this is not necessary for aluminum and copper). The disadvantage of using such materials is that a special tool is needed for cutting.
Cost - from $ 5 per square meter.
Plywood and OSB
For filing overhangs, take brands of materials that are waterproof. These plates are quite rigid, can be mounted in large pieces. To do this, make a box of wooden blocks - the plates are screwed to it. They are fastened every 1 - 1.2 meters. For ventilation, ready-made grills are embedded. An overhang from this material must be painted, otherwise it does not look very beautiful.
Plywood costs about $ 6.5 per square meter, OSB - about 2 times cheaper.

Spotting of a roof - quickly, simply and reliably
Spotlights are slats specially designed for overhanging files. They can be made from a wide variety of materials. In particular, from such as PVC, steel, copper, aluminum. Having a large palette of colors and various textures, spotlights can be matched to the design of any home.
The following main parts are included with them:
- Soffit panels;
- frontal slats (otherwise, chamfers);
- J-shaped profiles having grooves;
- finish laths.

The appearance of spotlights and additional elements may vary depending on the manufacturer and the material of manufacture.
Soffit panels are triple, double and single, solid (for gables) and perforated (for cornices).
It should be noted that the filing of the overhangs of the roof with spotlights greatly simplifies the work. This does not require the involvement of experienced builders - and you can handle it yourself. Cut the strips according to the width of the overhang and fix them perpendicular to the walls on the profiles with grooves - that's the whole trick of installation.
PVC strips cost from $ 10 - 12 per square meter, and fixing strips and chamfers are 5 times cheaper.
Comparison of prices for materials for filing roof eaves, the price is for 1 m2:

Instructions for filing overhangs with spotlights
Depending on the manufacturer's company and the material for the manufacture of spotlights and additional elements, the rules for installing spotlights may differ. Therefore, always read the manufacturer's instructions. In this case, the filing of the roof overhangs using vinyl spotlights will be considered.
There are several design features for fixing soffit panels:

Most often, spotlights are mounted horizontally, although in some cases fastenings along rafters are also used. For horizontal fastening, a special crate is made, how to do it is described above or in the video instruction below. Then all the necessary elements are attached to this crate.

1. First, measure the J-profile of the required size, for this, apply a profile across the overhang and apply a mark.

2. You can cut the profile to size using the "grinder", everything is cut quickly, and the cut remains flat.

3. After this, the profile is attached to the wooden frame using self-tapping screws.

4. After all the profiles are fixed, measure the distance between the two profiles to find out the size of the soffit strip. After that, the soffit strips of the required size are cut.

5. To install the plank, it is brought first into the wall, and then into the eaves overhang and fastened with screws to a wooden crate.

6. If the J-chamfer is not used for filing, then the frontal part of the overhang is also sewn up with spotlights.
For more details on the installation of the crate and spotlights, see the video below.
Video: Detailed installation instructions spotlights
Material preparedtechno.techinfus.com/en/