This article is about how to install a power outlet. There is a huge selection of electrical outlets on the market; they vary in shape, size and type of connection. CEE 7/4 (Type F) sockets are most commonly used in Europe, and NEMA 5-15 sockets with holes for two flat parallel pins and for grounding are common in North America. Nevertheless, there is a universal classification of electrical outlets: with grounding and without grounding. In this step-by-step instruction, we will show you how to install a European standard socket.
Tools:
- screwdriver;
- pliers;
- knife;
- voltage indicator;
- level;
- safety glasses and gloves.
Tips:
- Before starting work, turn off the power in the apartment;
- Before touching any of the wires, using a voltage indicator, make sure that no voltage is applied to it;
- If you do not want to take risks, contact a professional electrician for help.
Preparatory work
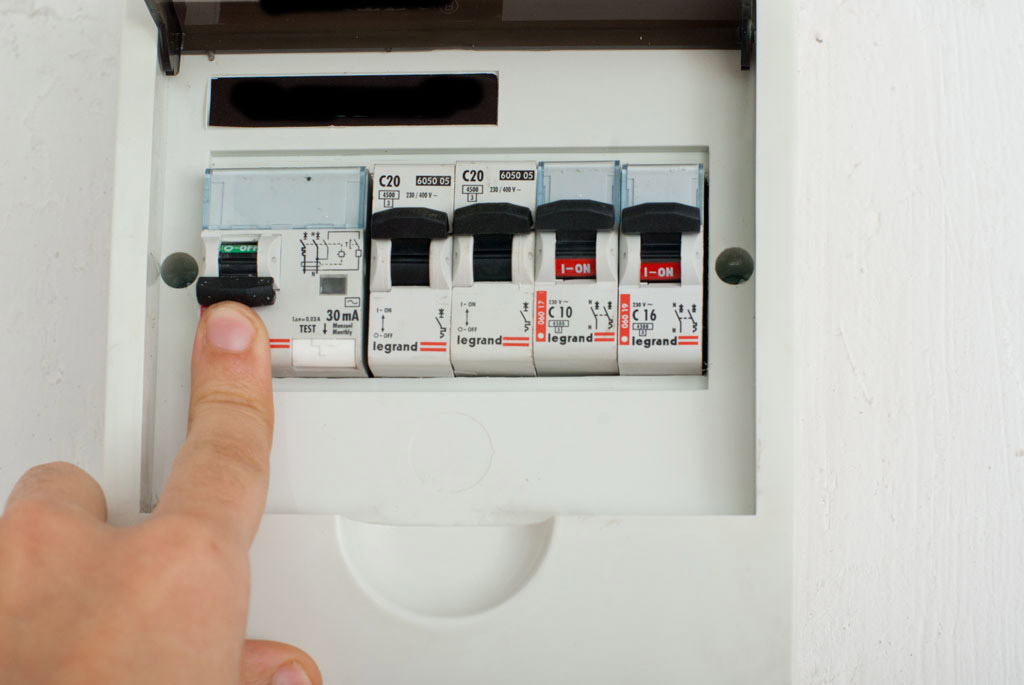
If you are going to install a power outlet in the apartment, you should start by turning off the power. Some people believe that it is enough to de-energize only the circuit on which you are going to mount the socket, however we strongly recommend that you turn off the power to all circuits in your apartment. When it comes to electricity, it is better to show excessive than insufficient vigilance.
Using the voltage indicator on each wire, make sure that you can touch them without risk to health and life.
Power outage.
Now you need to clean the undergrowth from the remnants of paint, putty, other construction debris and dust. This operation is especially important when it comes to installing outlets in a new building.
However, even if you are replacing an old outlet, you should make sure in advance that the socket is in good condition so that there are no problems when installing and leveling the device.
Preparing the installation location for the outlet.
In the image below you can see a typical European standard socket with grounding. Such sockets are characterized by a high degree of safety. They are installed in all new homes in Germany and in most EU countries.
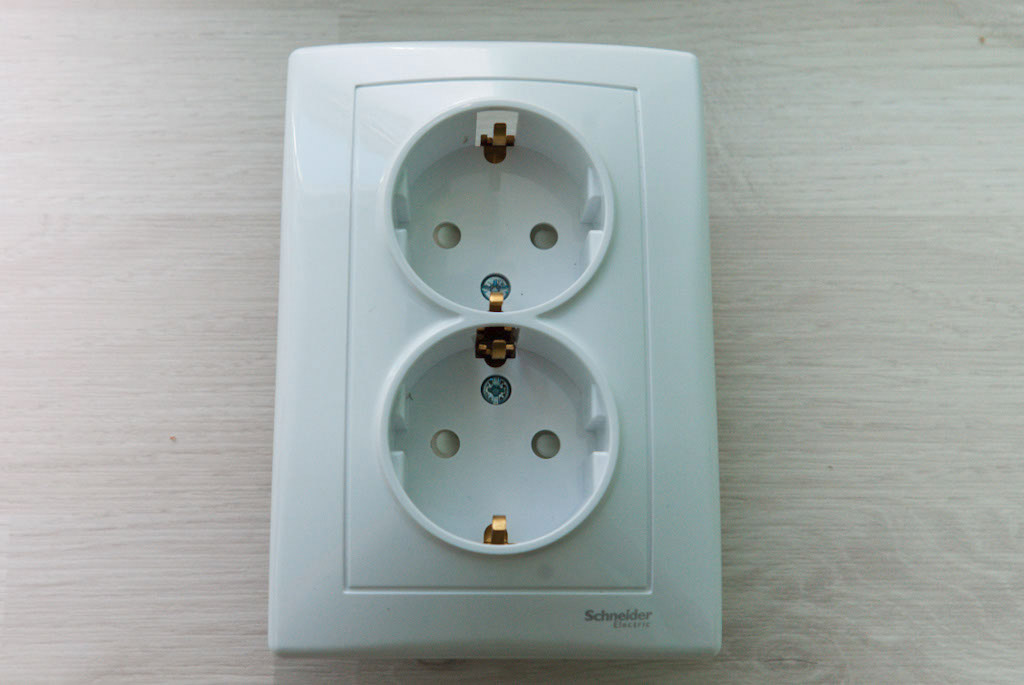
Euro socket (socket standard CEE 7/4).
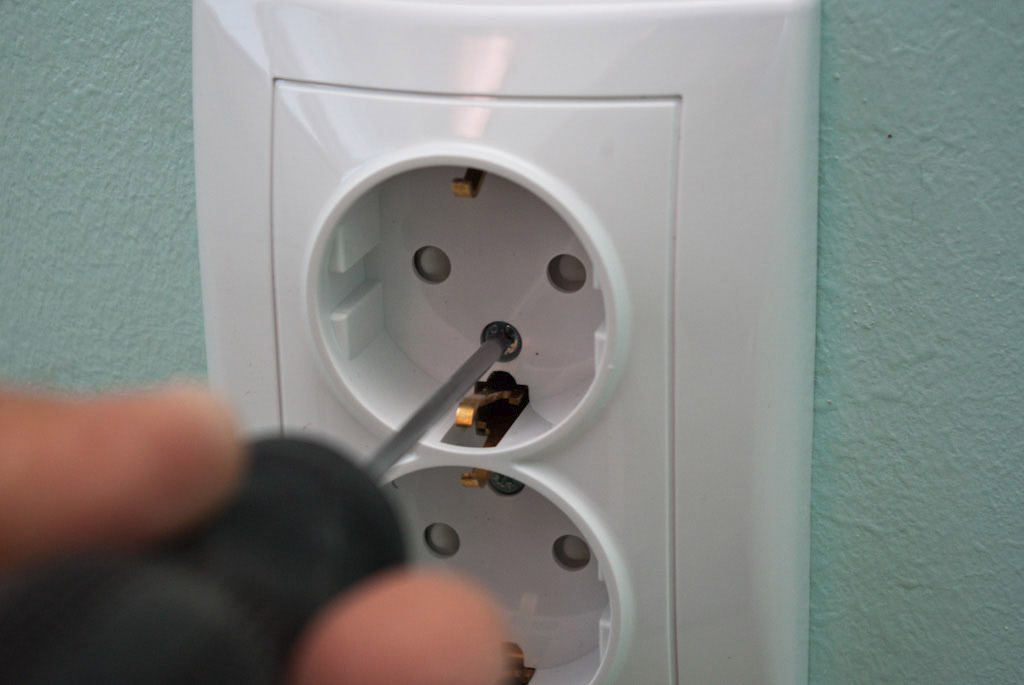
After you bought a new outlet, you will have to disassemble it with a screwdriver. This is necessary because you have to connect the electrical wires to the inside of the outlet. Using a screwdriver, unscrew all the screws holding the plastic cover of the outlet.
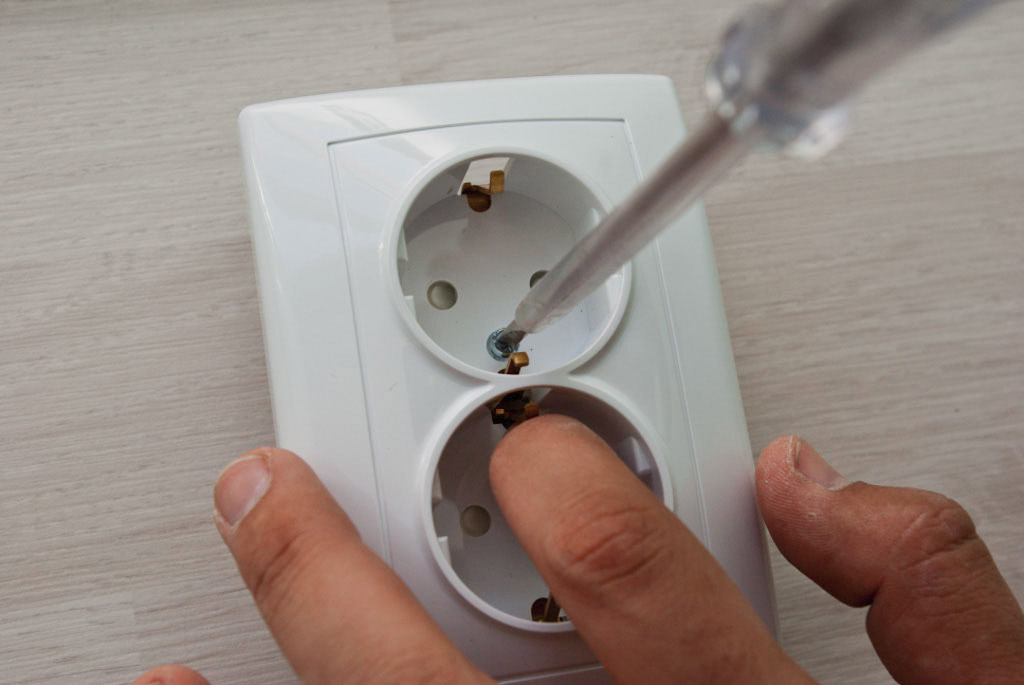
Removing the outlet cover.
As a result of this operation, you should get two parts - the actual socket and its cover. We will need the socket in the subsequent stages, but you can put the lid aside for a while.
Tip: Leave the fixing screws in the holes in the cover so that they are not lost.
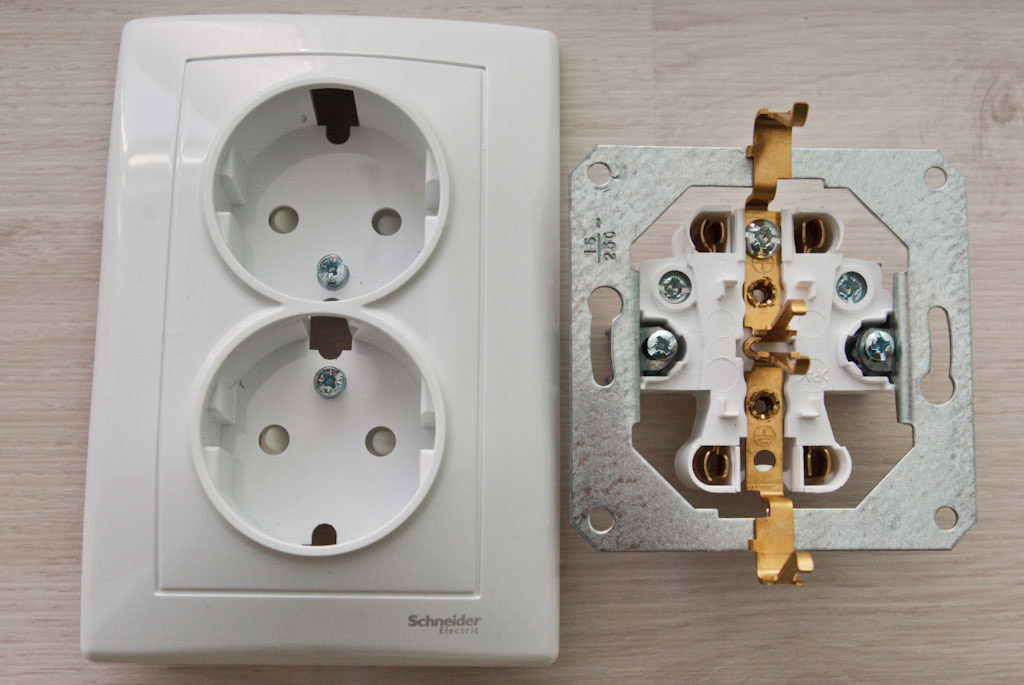
Outlet device.
Connecting wires and installing an outlet
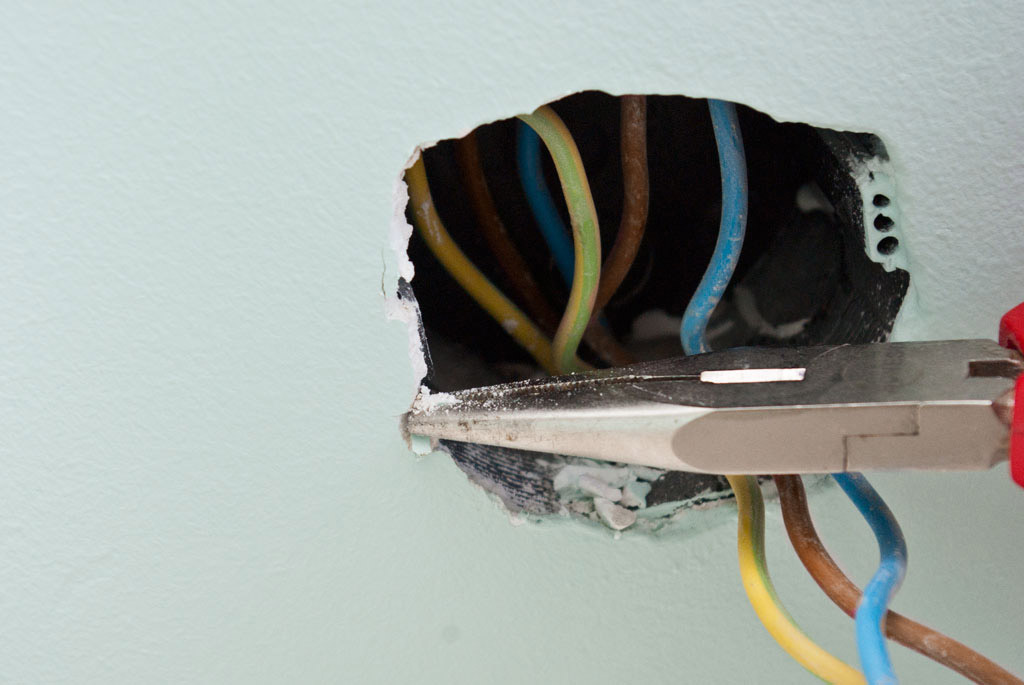
It is time to start plugging in the outlet. Using pliers, cut the wires so that they protrude from the wall by no more than 15 cm. This length should be enough to easily connect the wires to the outlet. The ends of the wires should not be left too long, as they may not fit in the socket, and you will subsequently have to return to this stage and repeat all subsequent operations.
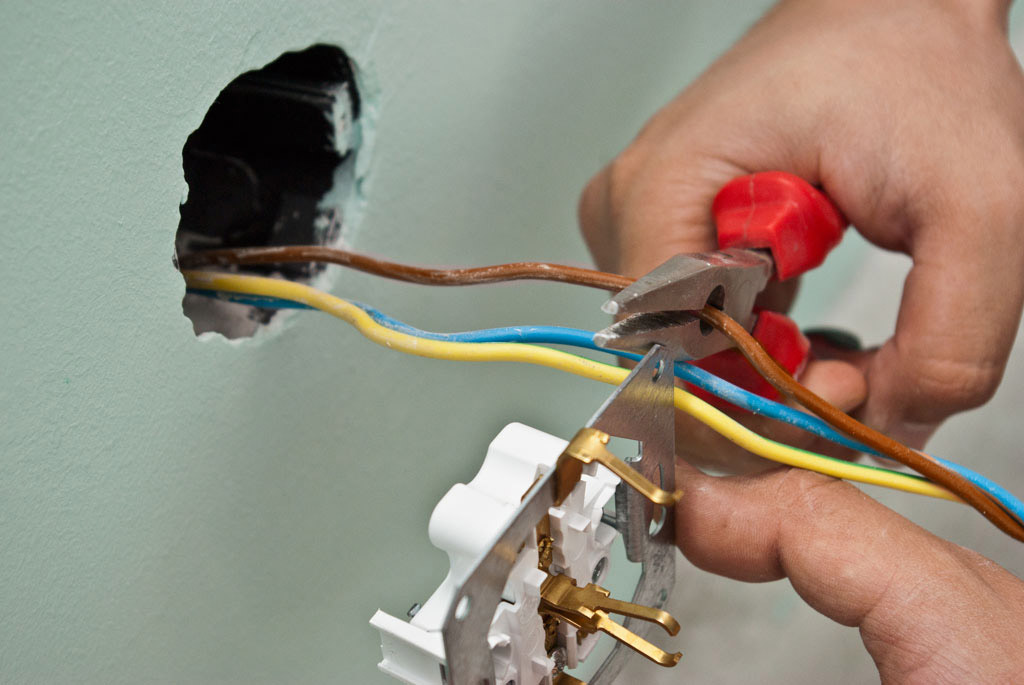
Wire trimming.
After trimming the wires, clean their ends from insulation by 1.5-2 cm. To do this, you need pliers or a knife.
Tip: The easiest way to strip the ends of wires is to use special pliers to remove the insulation.
Using pliers, attach the ends of the wires to the L-shape (or C-shape, depending on the locking system), as shown in the figure.
Connect the wires to the outlet.
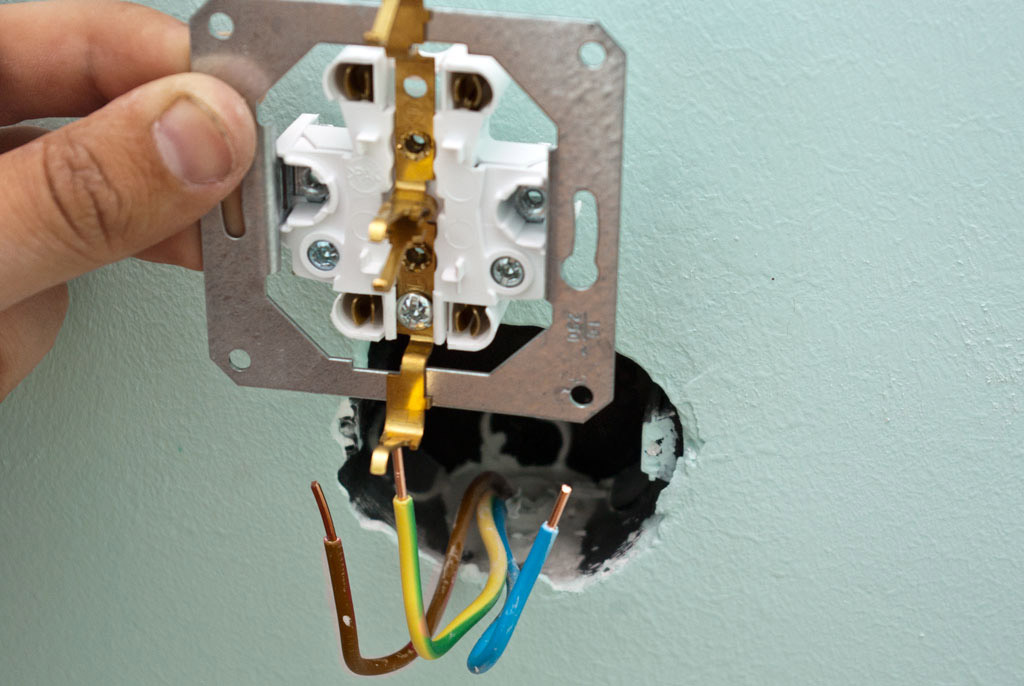
You probably noticed that the insulation of the wires is colored differently: brown wire is phase, blue is neutral and yellow-green is grounding. Color coding of wires in different countries may vary. Each of these wires must be connected to its own connector.

Wire connection.
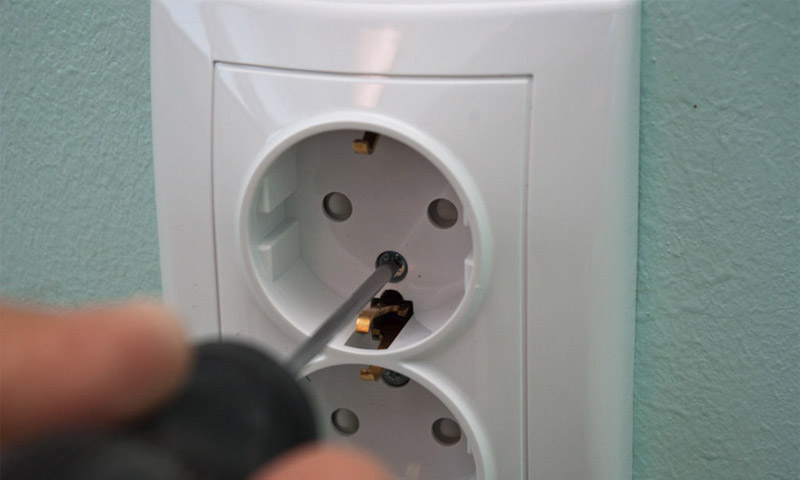
The ground wire is connected to the socket in the middle of the outlet, usually in its lower part. The connection point of the "zero" wire may vary depending on the brand and type of outlet. As a rule, it does not matter if you plug it into the left or right side of the outlet. The phase wire is connected on the opposite side from the "neutral". After you have placed the ends of the wires in the slots intended for them, fix them with the screws.
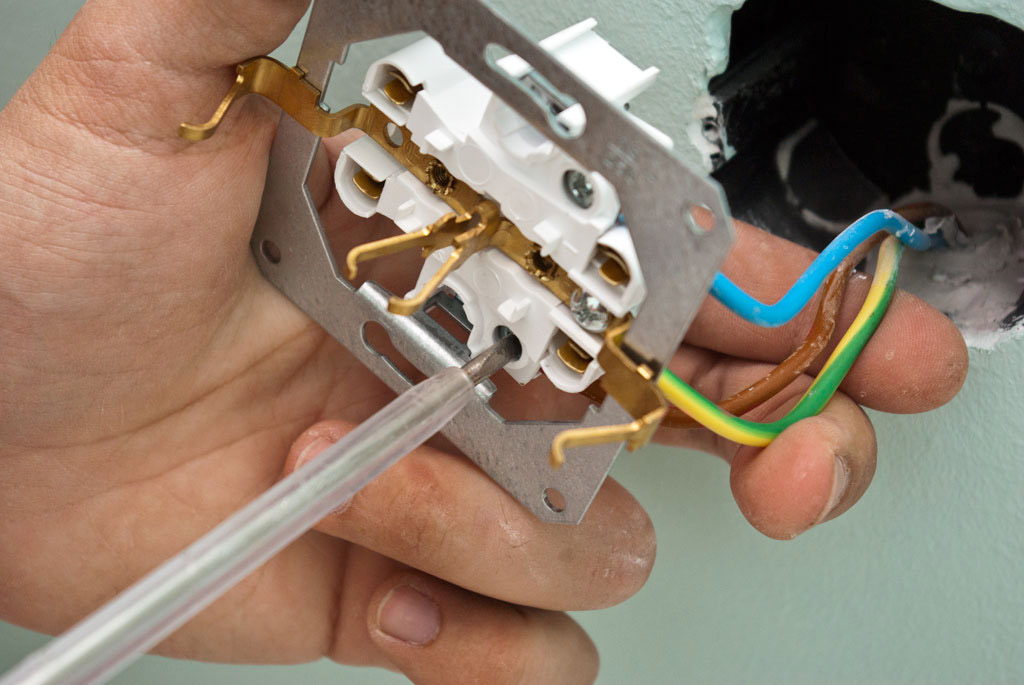
Connect the brown phase wire.
After connecting the outlet, it is necessary to bend the wires so that they fit well in the socket. Make sure there is enough space left to place and mount the outlet itself. If everything is in order, you can fix the socket in the socket. Do not rush to tighten the fixing screws - first make sure that the socket is well aligned.
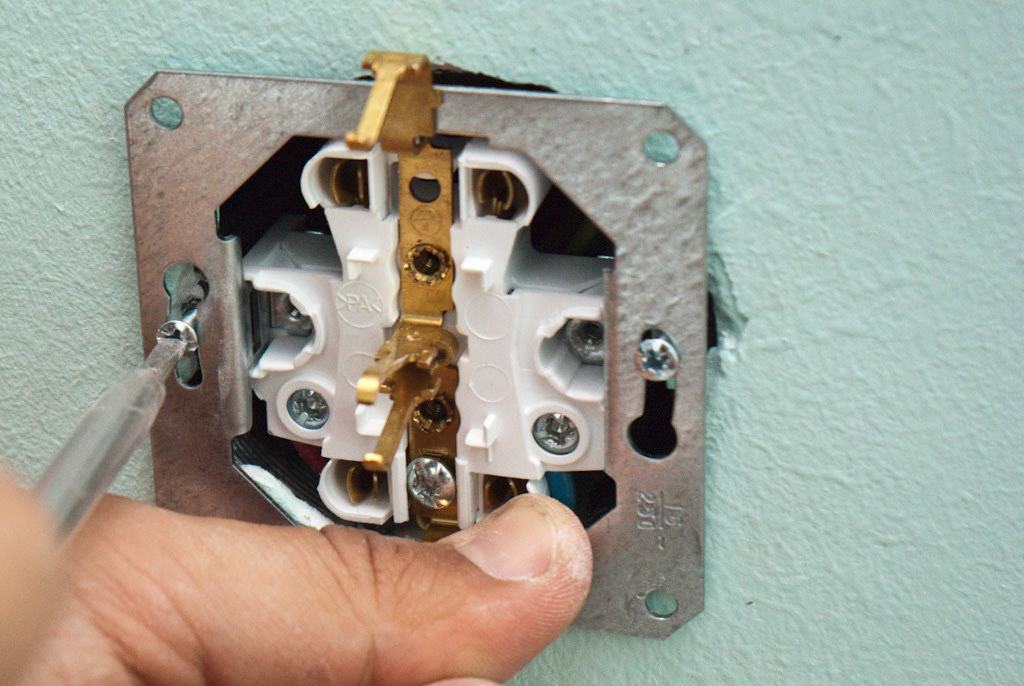
Securing the socket in the socket.
To align the outlet, you will need a laser level. If you don’t have a laser level on hand, you can use alcohol, but this will complicate the process a bit, especially for beginners.
Use the level to make sure that the top face is parallel to the horizon line. Correct the location of the outlet if necessary. Then firmly fix the socket in the socket to the screws.
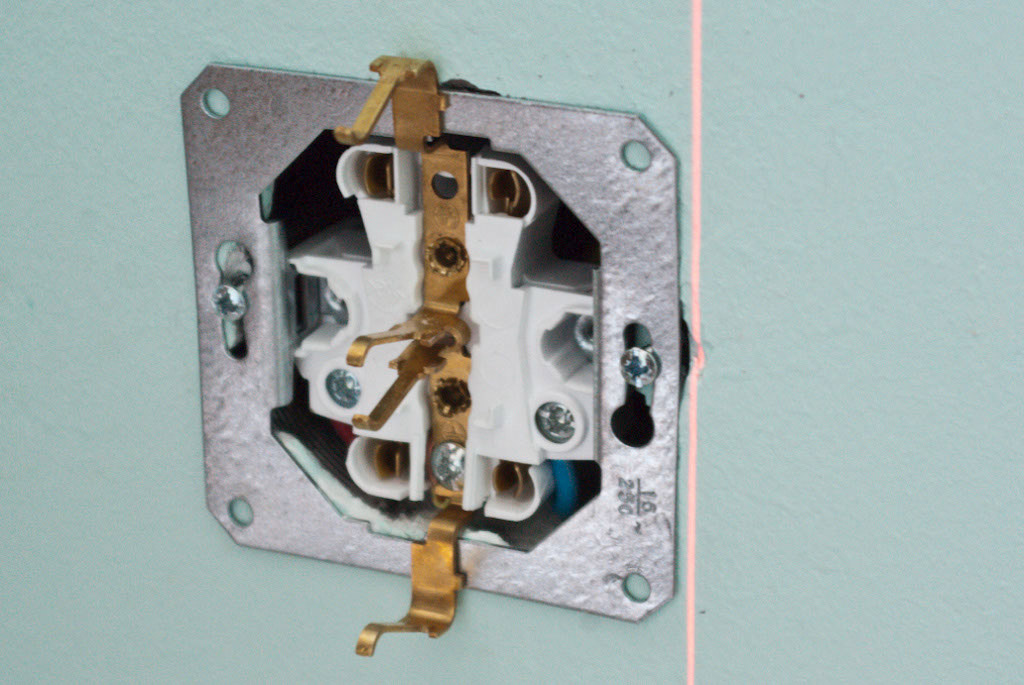
Aligning the outlet with a laser level.
The next step that needs to be done is to fix the plastic cover of the switch with a screwdriver. Fortunately, this operation is quite simple and requires no more than a few minutes.
Installing the outlet cover.
Be careful not to tighten the screws too much, otherwise the cover may crack. Make sure that the cover fits snugly against the wall.
After you have finished installing the outlet, turn on the power to the electrical panel. Using a tester, verify that there is voltage between the “phase” and “zero” and between the “phase” and “ground”.
Screw fixing of the socket cover.
Plug any household appliance into a power outlet. Are you sure that it is functioning? So now you know how to install the outlet.