From this article, which is, in fact, a detailed step-by-step instruction, you will learn how to make a dog house with your own hands. And not a simple booth, but insulated. Insulation material placed between the two-layer walls of the booth will help protect your dog not only from frost in the winter, but also from the scorching sun in the hot summer. Use 7-8 cm thick polystyrene sheets or rigid insulation foam for this purpose. If you want to reduce costs, you can reduce the thickness of the insulating material to 4 cm.
Preparatory work
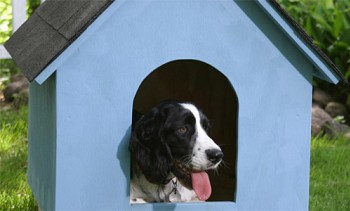
Before starting construction, you should determine the size of the booth. The dog should be able to easily turn around inside. Before making your final decision, explore the various design options and choose the one you like best. Buy high-quality materials if you want the result of your work to meet a high professional level.
Before starting the description of the project, we will give you some useful tips. Align the structural elements at both ends before fastening them with screws. Before screwing in the screws, drill guide holes in the lumber, this will help prevent wood splitting. Make sure that the walls of the booth are vertical, and the floor and upper beams are perpendicular to them. If you live in a region with a cold climate, use insulation material with a thickness of 7.5–9 mm, otherwise a thickness of 3-4 cm will be enough.
To build a booth you will need:
Materials:
- bars with a section of 5 × 10 cm - load-bearing structural elements, rafters;
- 18 mm plywood - flooring, wall cladding, roofing;
- 5 × 5 cm bars - load-bearing elements of the canopy;
- nails / screws 5 cm and 8 cm long;
- ruberoid roofing tile.
Tools:
- protective gloves, glasses;
- Circular Saw;
- saw for cutting at an angle of 45 °;
- hammer;
- spirit level;
- roulette;
- pencil.
Tips:
- Before picking up cutting / sawing materials, make sure the measurements are correct;
- as a heater, use sheet polystyrene, not mineral wool;
- all dimensions in figures are in inches; to convert to centimeters, use the formula: 1 inch = 2.5 cm.
Making the base and walls of the booth
The first stage of the project is to create the foundation of the booth. Make a frame of 5 × 10 cm bars as shown. Fasten the bars with 8 cm screws, having previously drilled the guide holes. Use the joiner's square to make sure that the corners of the base are really straight.
Attach the 18 mm plywood to the frame, which will serve as the floor of the booth, and fasten it with 5 cm nails / screws every 15 cm along the bars of the frame. The edges of the plywood should not protrude beyond the borders of the frame.
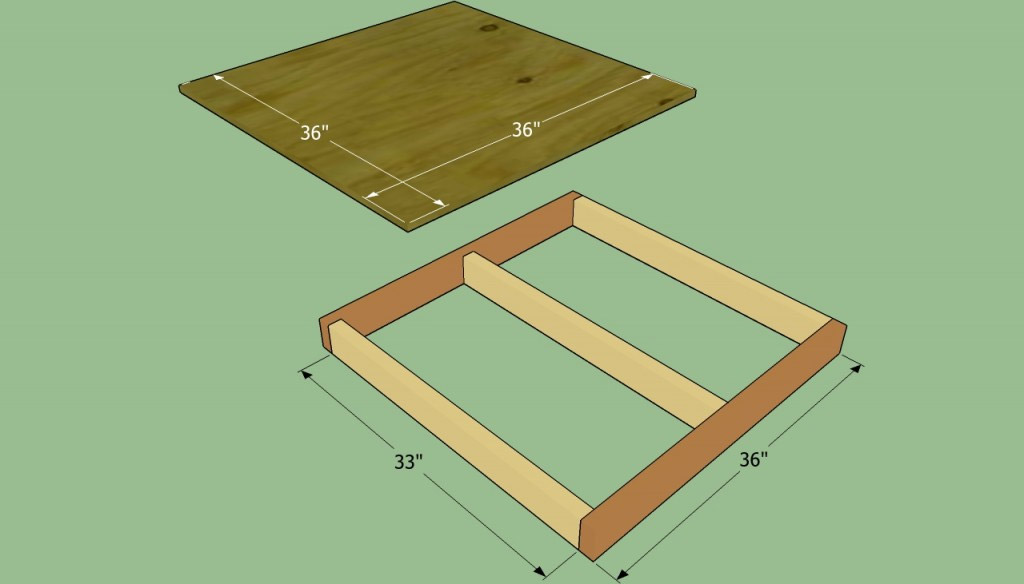
Making the base of the booth.
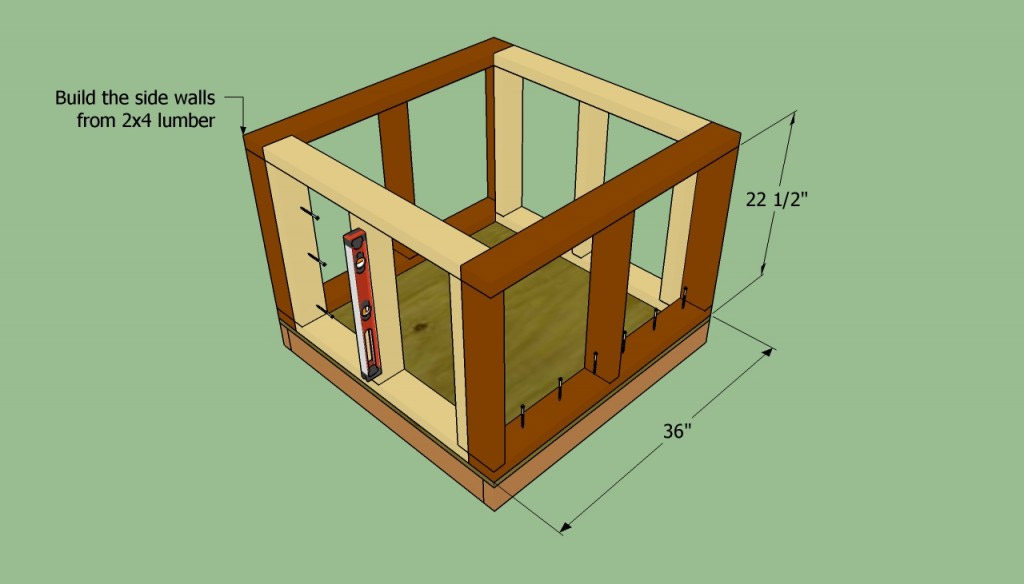
Paul is ready, it’s the turn of erecting the walls. We recommend that you make frames of 5 × 10 cm bars. It is more convenient to work on a flat surface. Fasten the frames of the walls with the base of the booth and with each other 8 cm screws. Do not forget to pre-check their verticality using an alcohol level.
Installation of a lathing for walls.
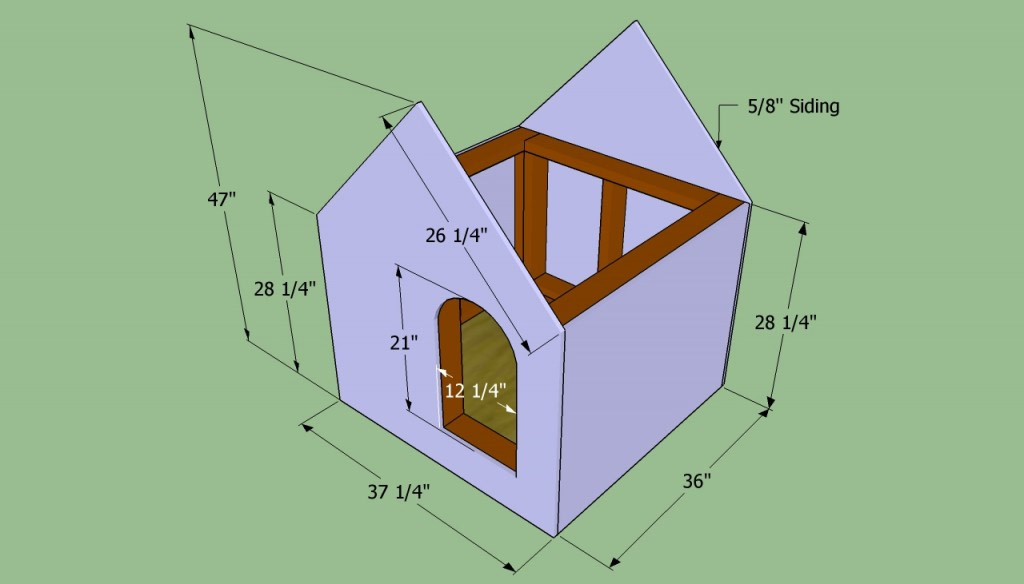
The next stage of the project is the exterior cladding of the walls of the booth with plywood. Cut the sheets to the right size with a thin blade circular saw. Do not forget to make a doorway, for this you need a jigsaw. Fix the plywood sheets on the frame with 5 cm nails every 20 cm along the bars of the frame.
The outer lining of the lathing.
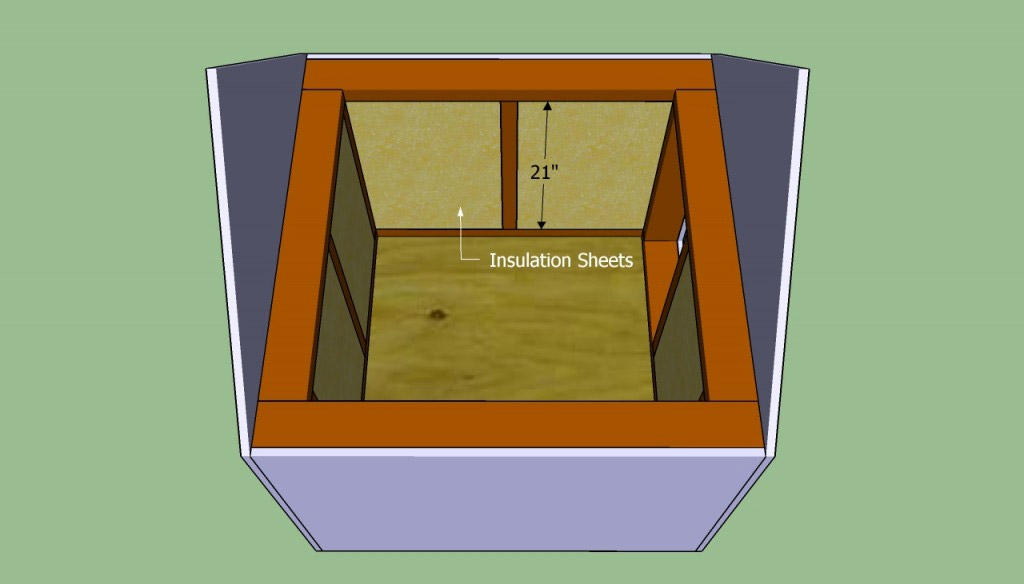
Now we have to fix the sheets of insulating material.Based on our own experience, we recommend that you use sheet polystyrene with a thickness of 7-8 cm, and not mineral wool (glass wool). Regardless of which insulation material you prefer, make sure that there are no gaps between the wooden blocks and the insulation, otherwise the insulation will not be effective. Using a hacksaw, adjust the size of the polystyrene sheets if necessary.
Fastening insulating material.
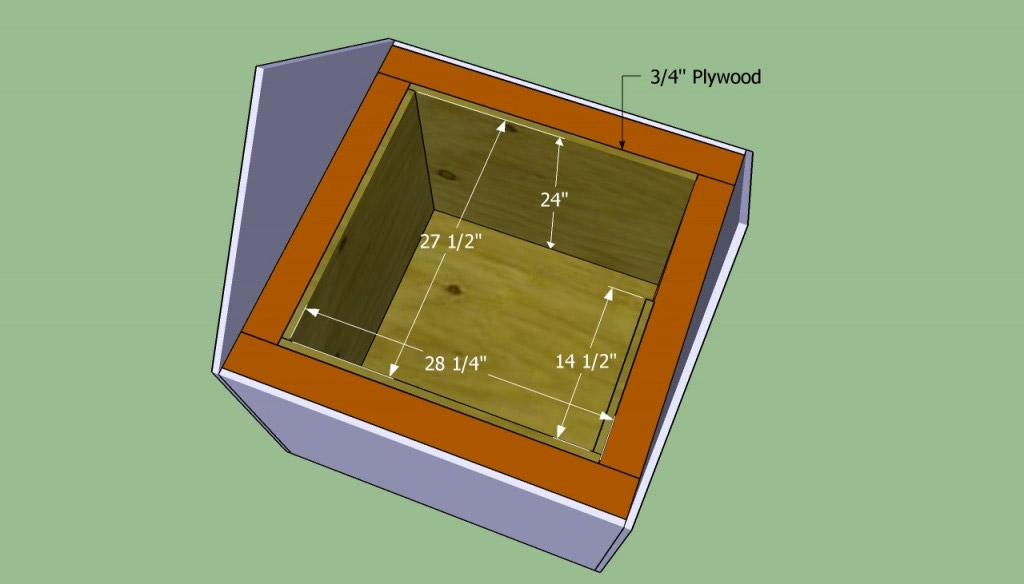
After placing the insulation, you must sheathe the walls of the booth from the inside. Cut sheets of plywood of the right size using a circular saw or cutting machine, being careful not to damage the edges. Replace the plywood and secure it with 5 cm screws. It is important to finish all the work on the internal casing at this stage, since in the future you will practically lose access here.
Internal wall cladding.
Roof and canopy manufacturing
The next step is to install the rafters on the doghouse. For their manufacture, use 5 × 10 cm bars, the ends of which must be cut at an angle of 45º. Make sure that all rafters are completely equal. Align the upper ends of the rafters in pairs and fasten them with 8 cm nails or self-tapping screws. Place the connected pairs of rafters at the same distance from each other, as shown in the figure.

Installation of roof rafters.
After the roof frame is ready, it is necessary to sheathe it with sheets of plywood, attaching them to the rafters of 5 cm with nails every 15 cm.
Tip: the second sheet of plywood should be slightly larger, since it should overlap a slice of the first sheet.

Roof sheathing.
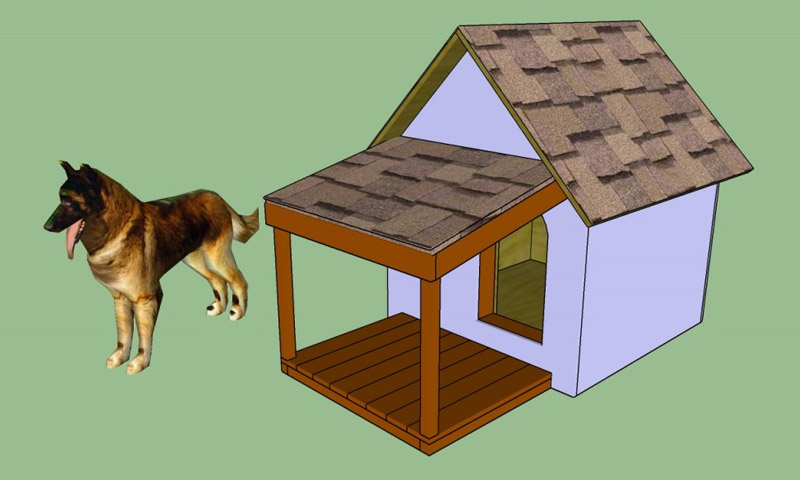
If you want to improve the appearance of the doghouse, you can consider building a canopy in front of the entrance. Start your work by making a floor frame of 5 × 5 cm bars. Gathering them together, make sure that all angles are straight and the diagonals are equal.
Lay the floor using 2.5x10 cm boards. Shade the heads of the screws holding them in order to get a neat appearance.
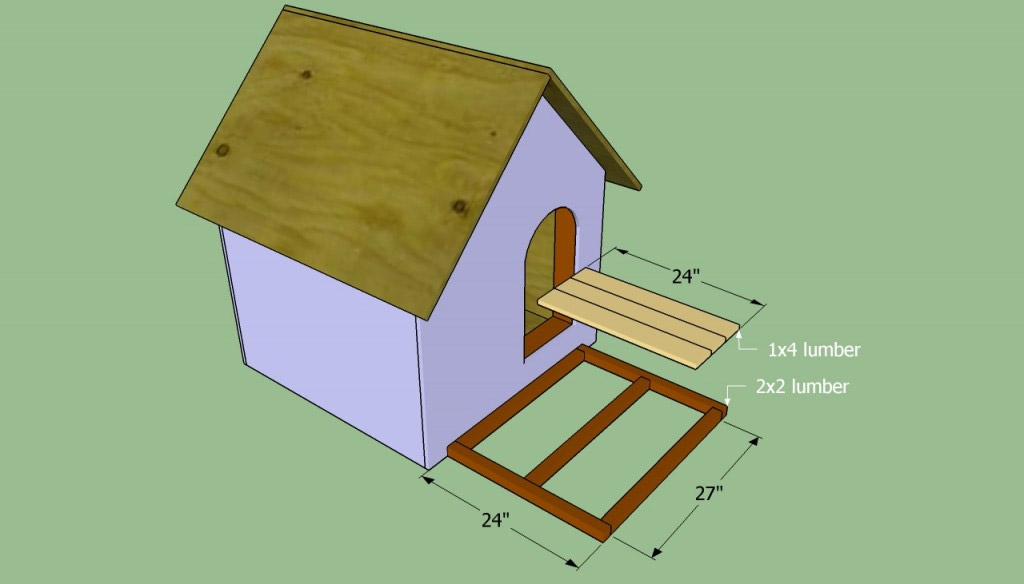
Making the base of the canopy.
Now you need to build a canopy frame. Install the racks of their 5 × 5 cm bars, fix them in place using self-tapping screws. Then build the wireframe - how to do this is shown in the figure. Make sure that all structural elements are well aligned and securely fastened.
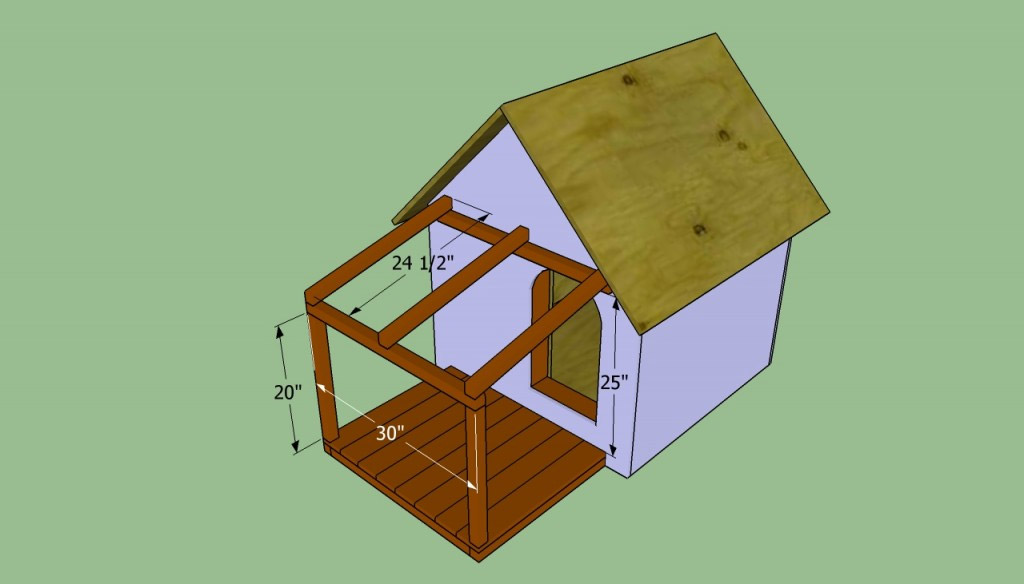
Building a frame for the walls of the canopy.
Cover the roof of the booth and canopy with roofing material, securing it with brackets, and then with roofing tiles. Start laying tiles from the bottom of the roof. If you want to add decorative trims, you must do this before laying the roof tiles.
Tip: Draw a line with chalk that will serve as a guide when laying roofing tiles.
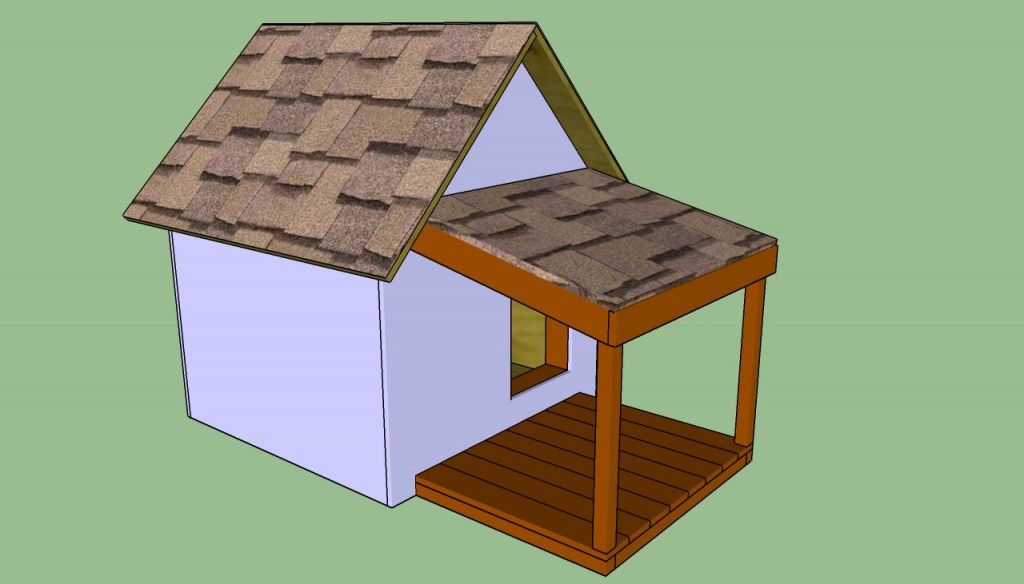
Roofing with flexible tiles.
The construction of the booth is almost complete, it remains to take care of the small touches. Fill all cracks and openings with wood putty and then with silicone sealant. After the mass has dried, sand the surface with 120 grit sandpaper.
Tip: Coat wooden surfaces with several coats of paint to protect them from damage by atmospheric moisture. Make sure that the heads of the nails and screws are recessed deep enough, otherwise the dog may be injured.
The work is completed. Now, thanks to our instructions on how to make a dog house, you can be proud of the result of the work of your hands, and your pet will sincerely thank you.
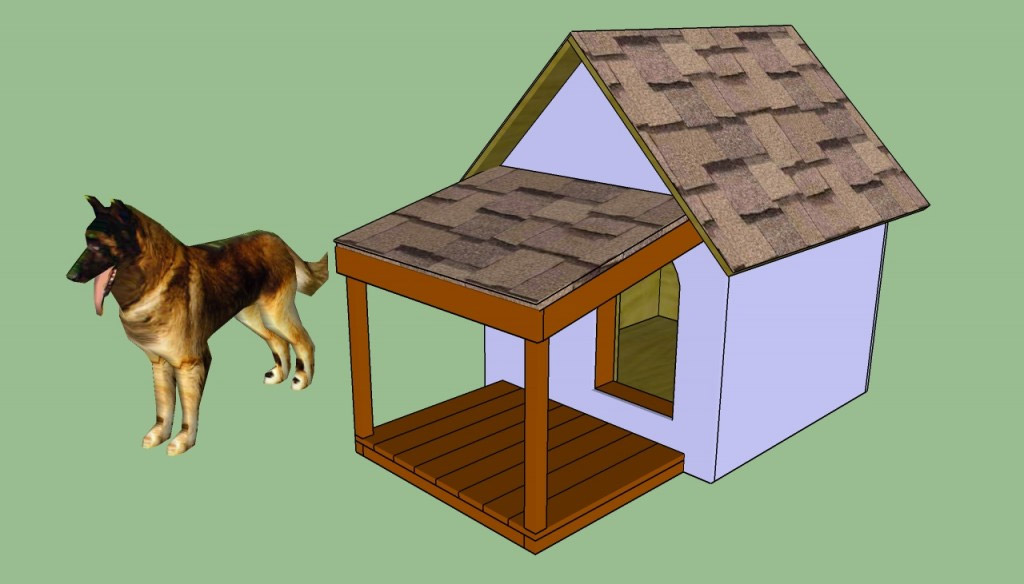
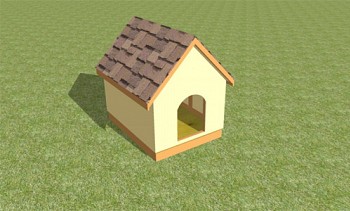
Ready booth.