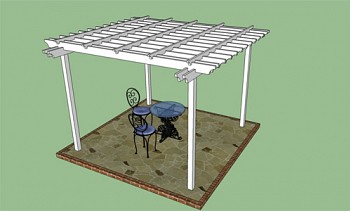
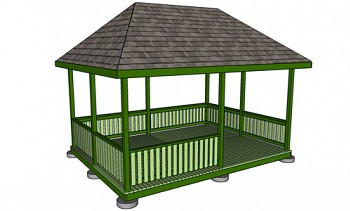
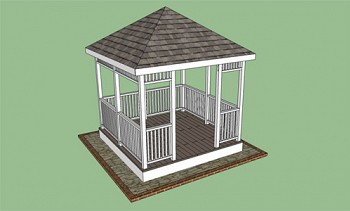
This step-by-step instruction is intended for those who decided to make their own hands an open octagonal wooden arbor. If you have a large garden and want to personally participate in its design, we recommend that you think about creating such an arbor. The octagonal gazebo is able to transform the look of your suburban area. This is a great place for privacy or for a family dinner on a hot summer day. Just imagine yourself in a gazebo reading a book and watching the kids having fun in the garden.

Content:
Preparatory work, necessary materials and tools
The construction of such a gazebo is a simple project, but provided that you have some woodworking skills, use the right tools and materials, and you have a clear work plan. Our step-by-step instructions will help you cope with this task.
The proper location of an open gazebo is a very important aspect, and you should pay close attention to it, otherwise you will not be able to take full advantage of all the advantages of your building. In addition, we advise you to make sure that the construction you started does not violate any legal norms.
Building a gazebo is a great opportunity not only to improve the appearance of your garden, but also to improve your skills in carpentry. Carefully plan everything from the very beginning, starting with the size of the gazebo and ending with the necessary materials. As in the case of any other project related to woodworking, you must be extremely accurate when taking measurements, otherwise you will either spend extra money due to lumber rejected as a result of your carelessness, or the appearance of your building will be too far from ideal.
It is very important to choose the right materials for work, otherwise your open gazebo will soon become unusable under the influence of rain and snow. We recommend using mahogany, cedar, or lumber, which has been pressurized with antifungal impregnations, as they are intended for outdoor use. Make sure you buy fasteners made of stainless steel, as ordinary screws and nails can cause rust stains on adjacent surfaces.
To build an octagonal gazebo, you will need the following:
| Materials: | Tools: |
|---|---|
| A - Foundation: tubular formwork, concrete; | A circular saw; |
| B - Racks: bars 10 × 10 cm long 270 cm; | Drill and drill; |
| C - Logs of the floor: bars 5 × 15 cm; | Hammer, level, carpentry pencil, tape measure; |
| D - Flooring: boards 10 cm wide; | Drill for digging pits under the pillars; |
| E - Rafters: bars 5 × 10 cm; | Stairs; |
| F - Roofing material: 20 mm plywood, tile; | Protective gloves, glasses. |
| G- Guides for fencing and frieze: bars 5 × 10 cm; | |
| H - Balusters: bars 5 × 5 cm. | |
| I - Fasteners: nails or screws with a length of 5 to 10 cm. | |
Tips:
- Before starting work, outline the contour of the future gazebo with a rope stretched over the pegs.
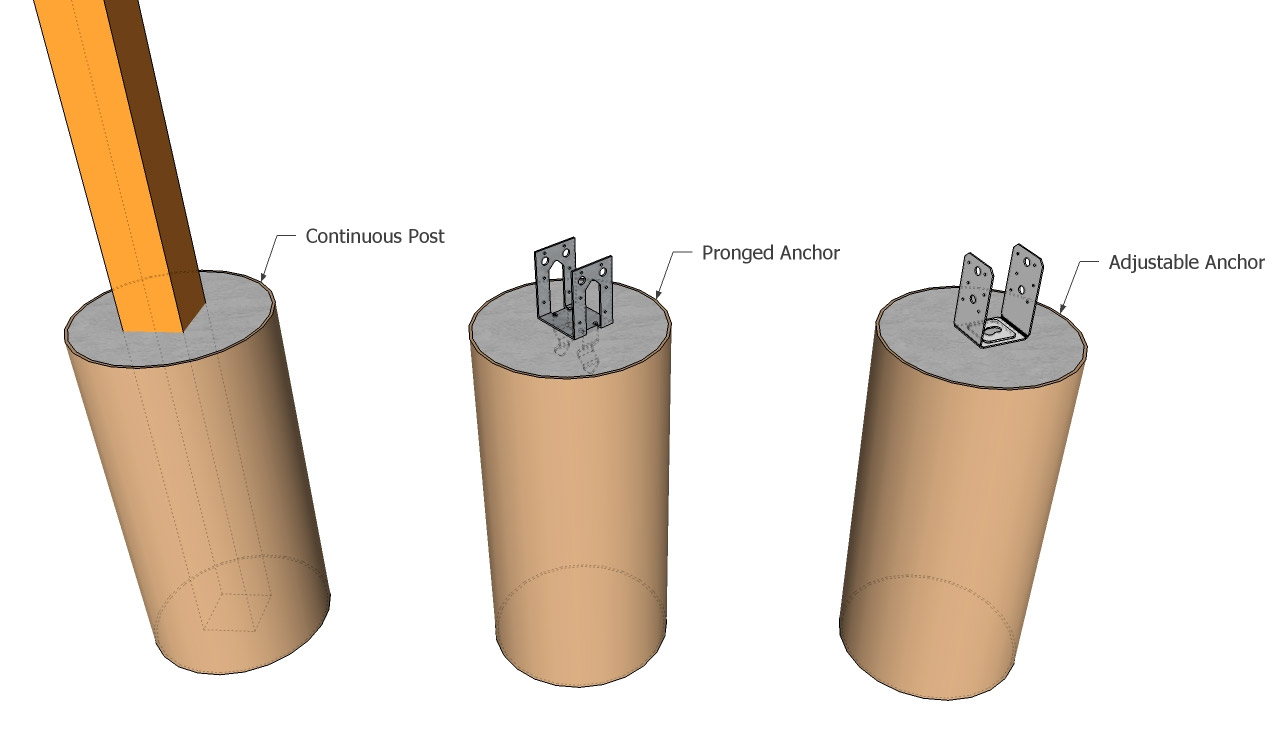
- Use adjustable anchors to secure the posts.
- When installing racks, use a level that allows you to simultaneously control two directions.
- Use screws and stainless steel fasteners only.
Time:
Two days off.
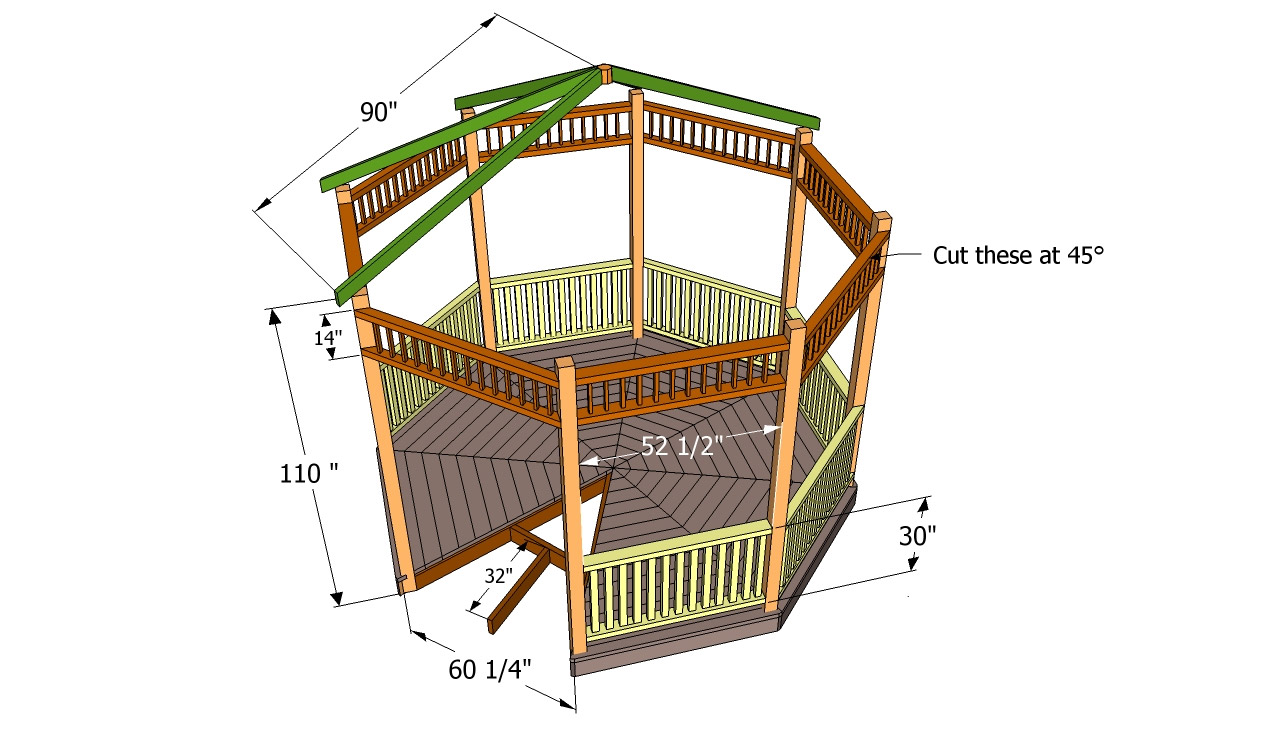
Drawing of an 8-sided gazebo.
First of all, you must determine the location of the gazebo.To visualize the plan on the ground, we recommend using pegs and a rope stretched over them. It’s actually easier to do than you might think at first.
Imagine an octagon as a square with cut corners. Use the “3-4-5” rule (according to a theorem that everyone will probably remember from school, the hypotenuse of a right triangle with legs 3 m and 4 m should be 5 m (32 + 42 = 52)) to make sure that all corners of the square are straight. Do not forget to make sure that the diagonals of the figure are equal.
Installation of wooden racks
Suitable for the gazebo can be considered various types of foundations, starting with concrete slabs and ending with skids from timber. The first option is ideal for permanent, fundamental structures, the second is recommended if you want to move your building over time. Wooden beams are placed on concrete supports, as shown in the figure.
The base of the gazebo.
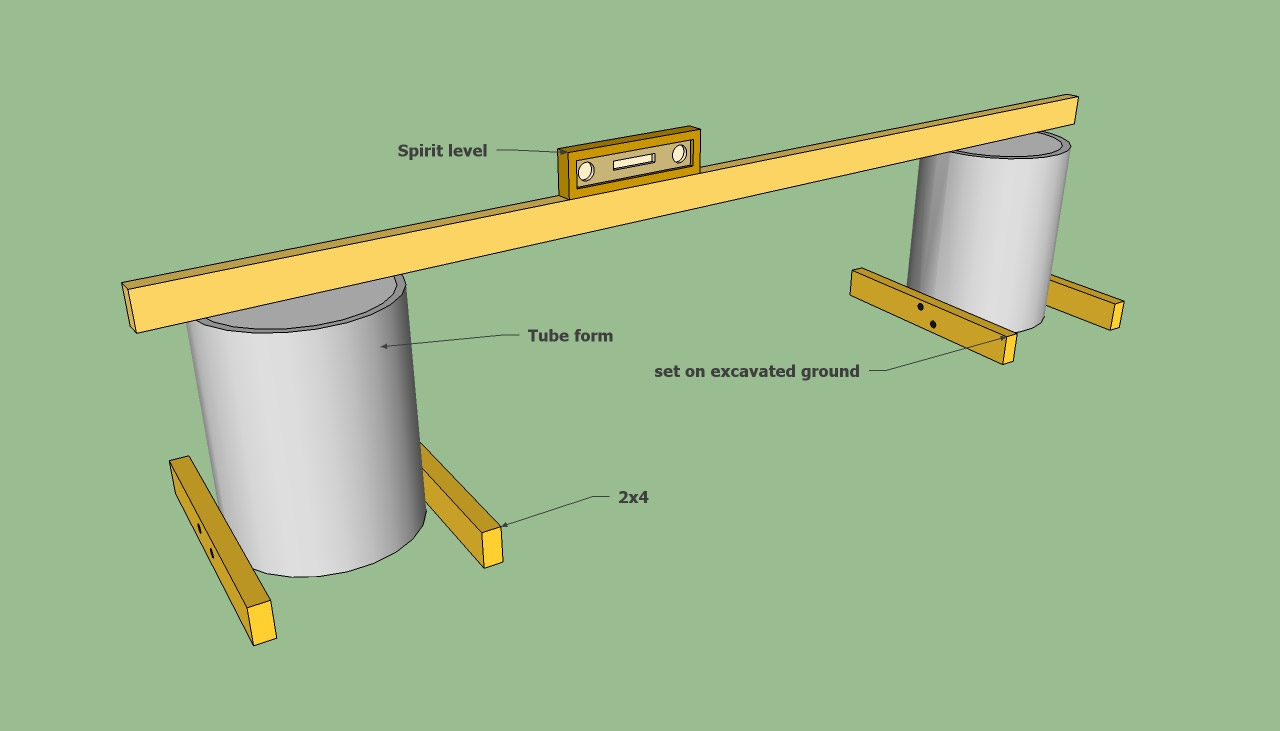
We advise you to dig holes at least 60 cm deep (at least 7-15 cm below the freezing boundary of the soil), fill up and tamp a 7 cm layer of gravel and install tubular formwork. Then you should prepare a small amount of concrete and fill it with molds, without forgetting to install adjustable anchors. Use a ruler and spirit level to make sure the foundation is even.
Mounting racks on a concrete foundation.
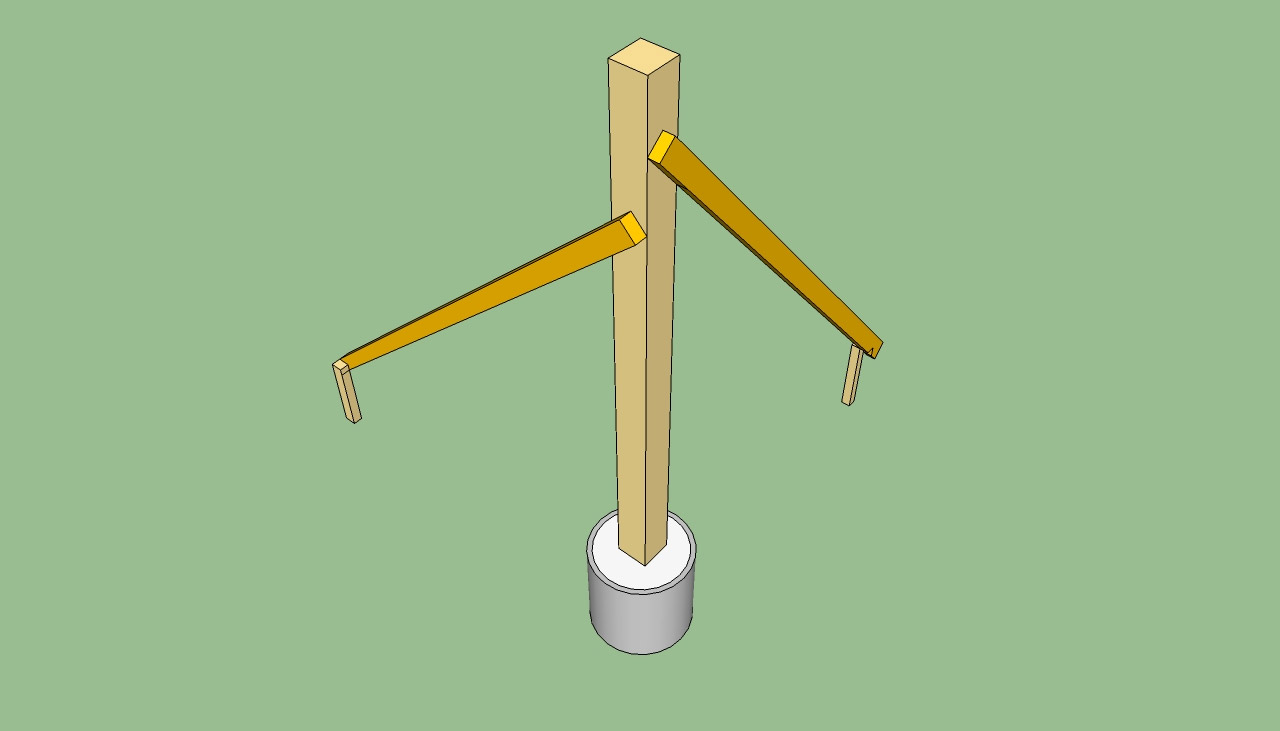
Before fastening the racks, align them vertically, using the spirit level for this, and fix in two directions until the concrete hardens. It is important to fix the racks properly, otherwise the gazebo will not be too reliable.
Vertical alignment and fastening of wooden racks.
To ensure that all racks are on the same level, use adjustable anchors to fasten them - this is the best solution to this problem.
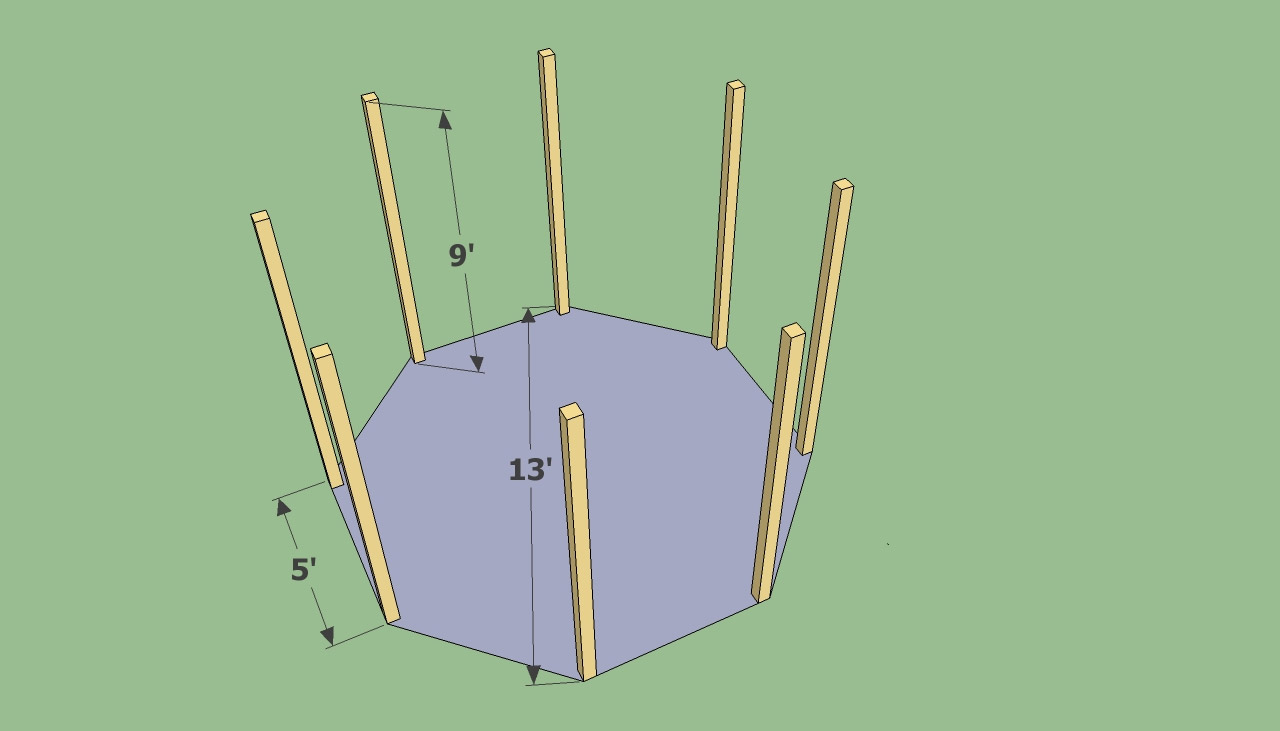
The layout of the racks of the octagonal gazebo.
Arbor floor and fencing
Making the floor of the gazebo is easy if you use the right plan. To begin with, you have to lay the floor logs 5 × 15 cm, as shown in the figure. Use metal clamps to secure the lag in position. If you do not have suitable fasteners, simply hammer the nails at an angle, after drilling the guide holes.
Tip: Install a concrete support in the center of the gazebo that can support the weight of the floor. Using a level will guarantee strict horizontal flooring.
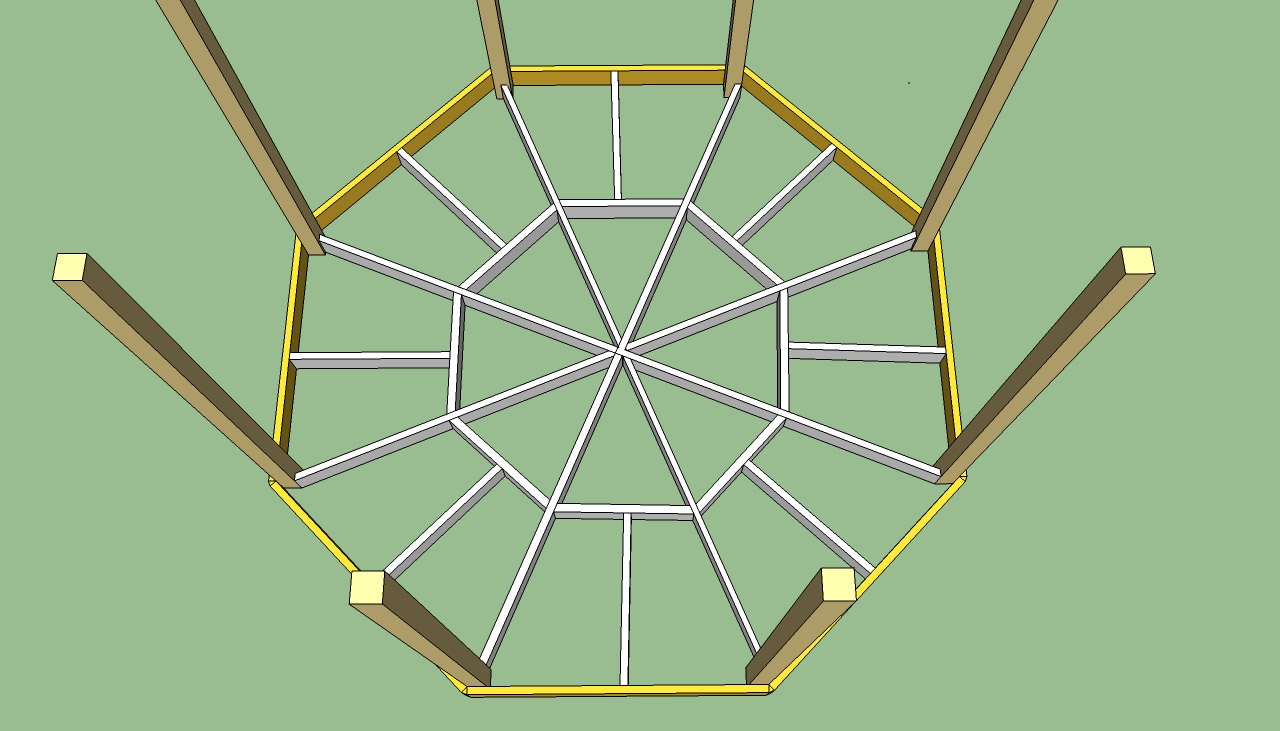
Installation of a log of a floor.
The main lags of the overlap are not enough to hold the flooring, so we recommend that you make the lower harness and fix the cross-beams in the middle of the main beams, as shown in the figure.
Tip: Drill guide holes in structural members before screwing in to prevent wood splitting. To connect perpendicular bars to each other, use metal staples.
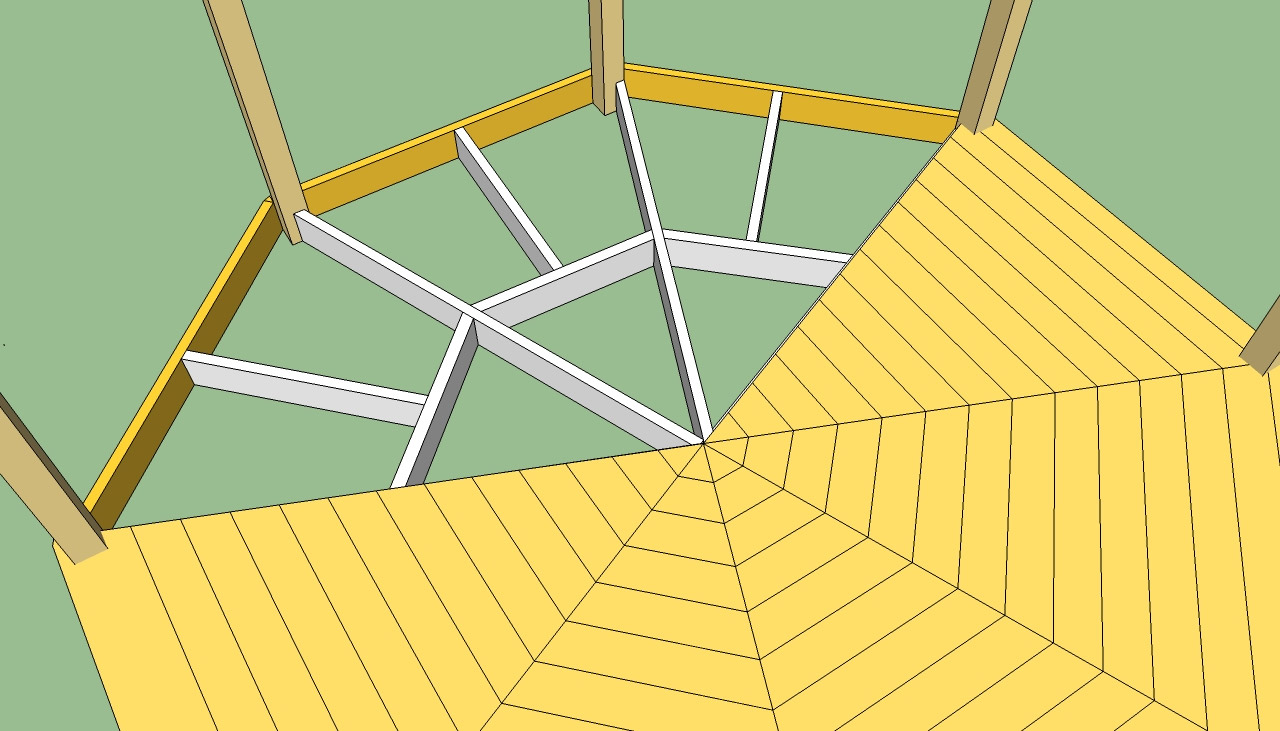
Flooring.
Now the floor frame has to be covered with boards. Fasten each end of the floorboard with two nails / screws. Remember that the joint of the boards should be exactly in the middle of the supporting beam, as shown in the figure.
Tip: The first row of boards should border the wooden racks of the gazebo. Leave a gap of 2-3 mm between the stacked boards so that water does not accumulate on the floor of the gazebo.
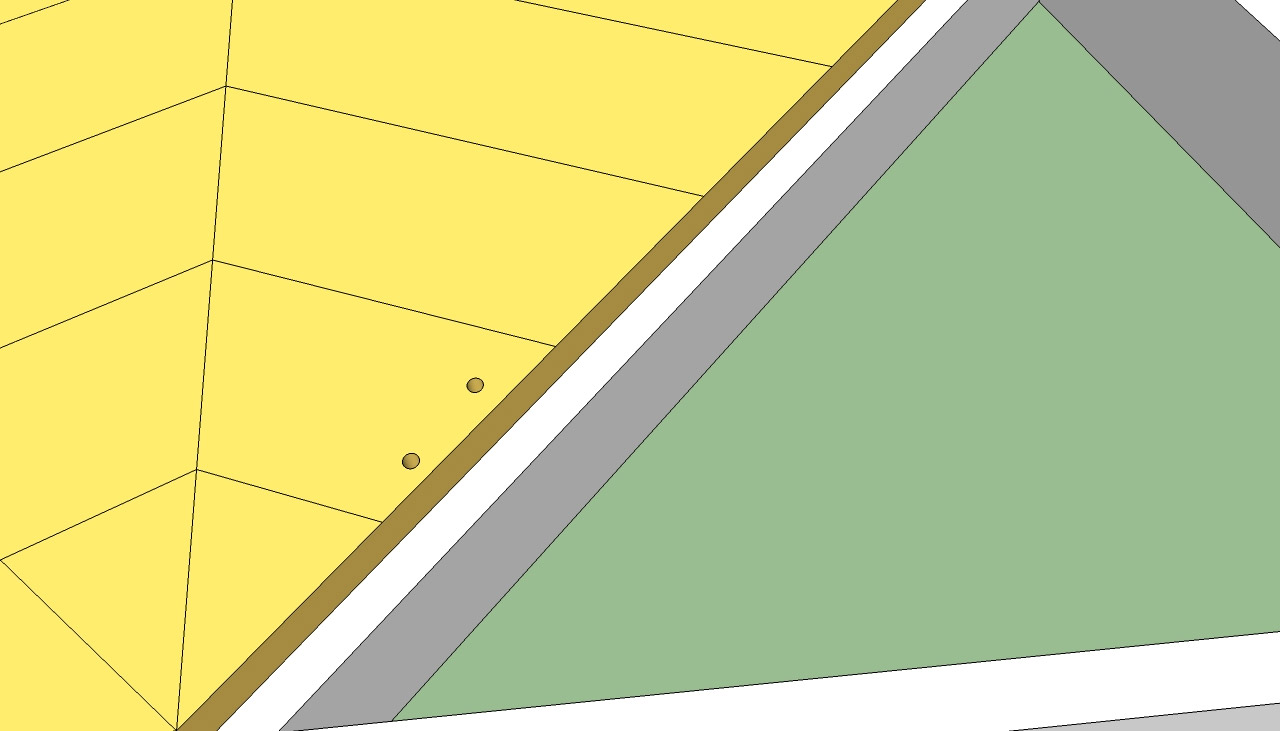
Fixing floor boards.
After you have laid the floor, start creating a frieze. This decorative element is optional, but we strongly advise you not to refuse it if you want your arbor to have a unique look.
Tip: When designing a frieze, you should consider the design of the lower fence and the elements of nearby buildings, in particular your home.
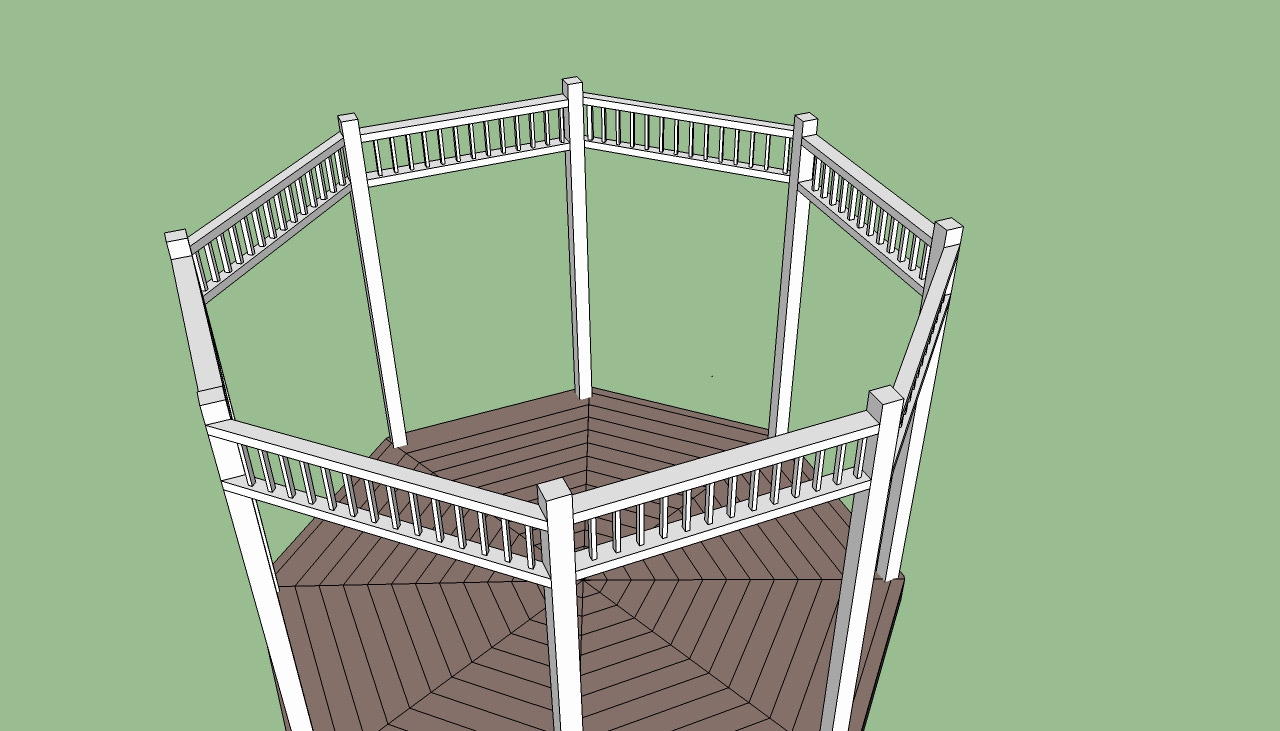
Creating a frieze arbor.
For the lower and upper guides of the frieze, use wooden blocks of 5 × 10 cm, and for balusters - 2.5 × 2.5 cm. The thoroughness of the work ensures that all elements fit perfectly in their place and will have a neat appearance.
For fastening balusters, you must hammer nails through the lower and upper guides. You can hammer nails into balusters and at an angle, but in this case, do not forget to fill the holes with wood putty at the end of the work.
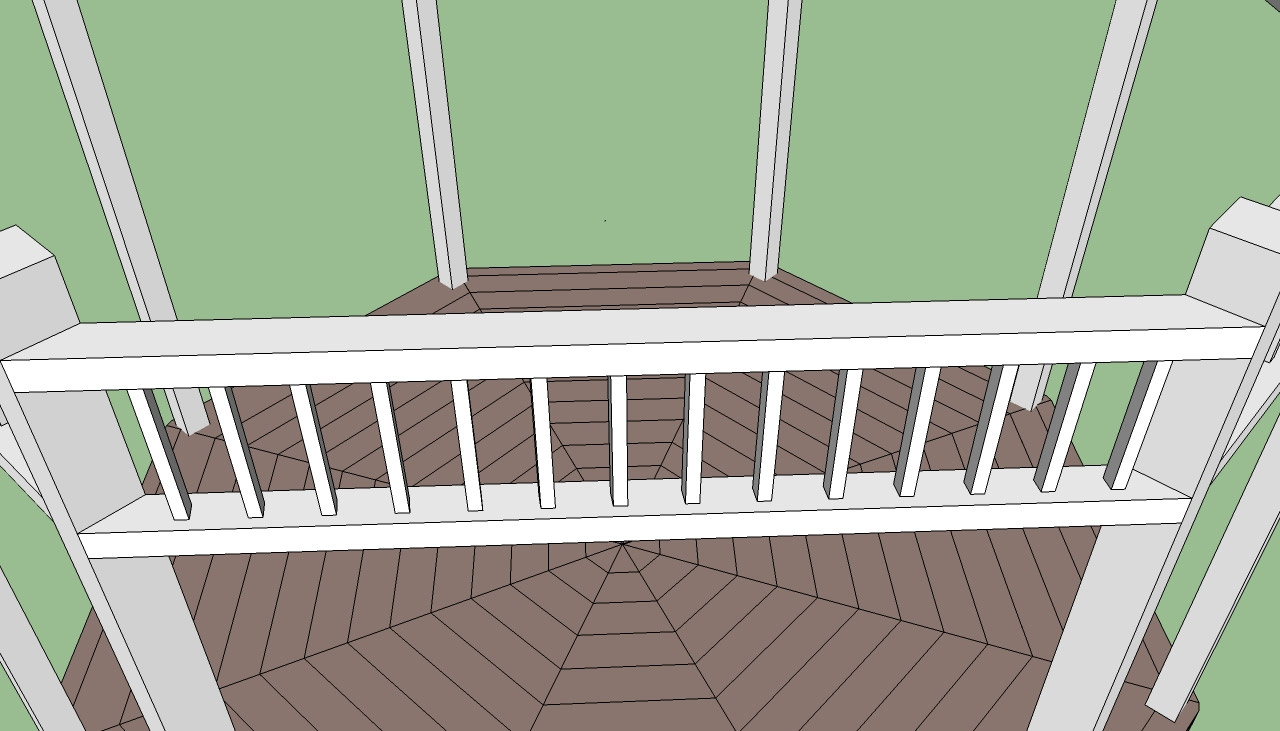
Frieze arbor.
To do the job quickly and efficiently, we recommend that you assemble the frieze on the ground (of course, after making accurate measurements), and then install it in place, securing its upper and lower rails to the racks.
The design of the frieze can be the most varied (variation of shapes, sizes, etc. is allowed), you should choose the one that best suits your needs and tastes.
General view of the frieze of the gazebo.
Roof gazebo
Make blanks for rafters from 5 × 10 cm bars, the ends of which are beveled at an angle of about 25 °. Install the rafters in pairs - on racks opposite to the center of the gazebo. The rafters are fastened with 10 cm self-tapping screws.
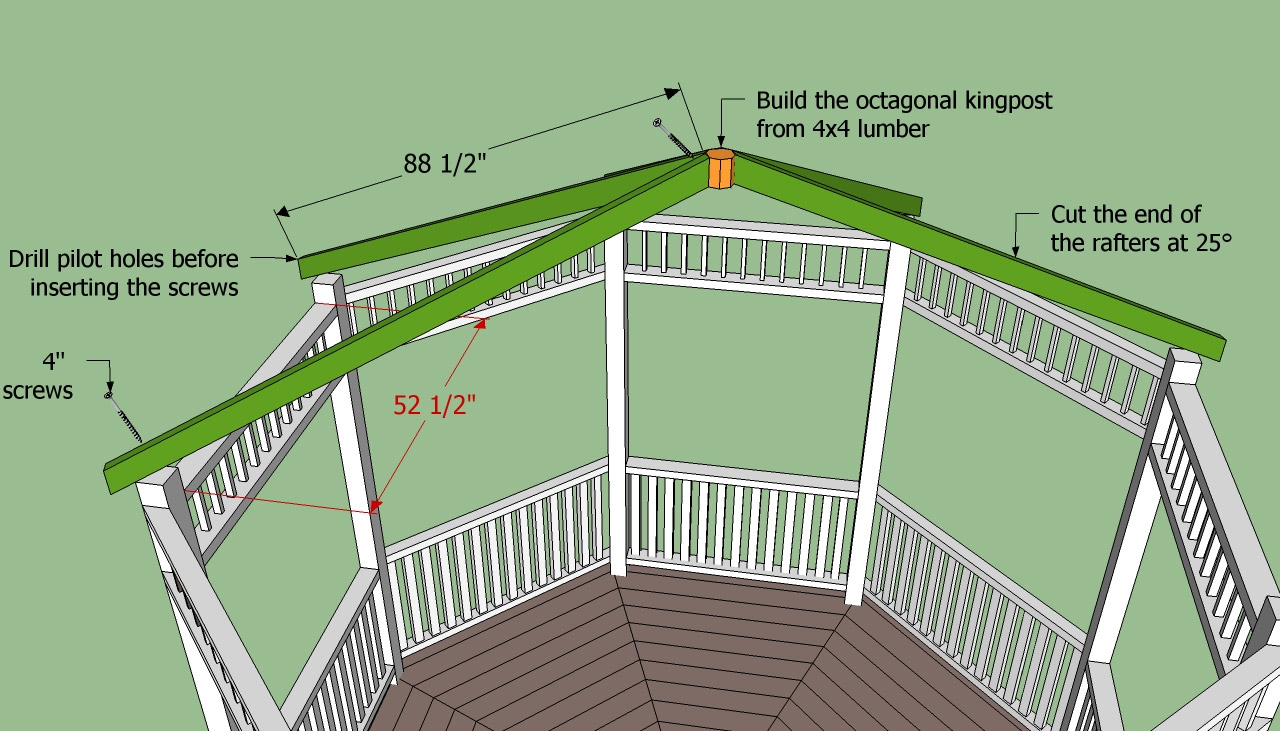
Drawing of the roof of an octagonal gazebo.
To fix the rafters in the center, at the place of their convergence, you will need a short octagonal block, which can easily be made from a regular square section of 10 × 10 cm. As you can see in the picture, the rafters should protrude from the arbor by 15-25 cm .
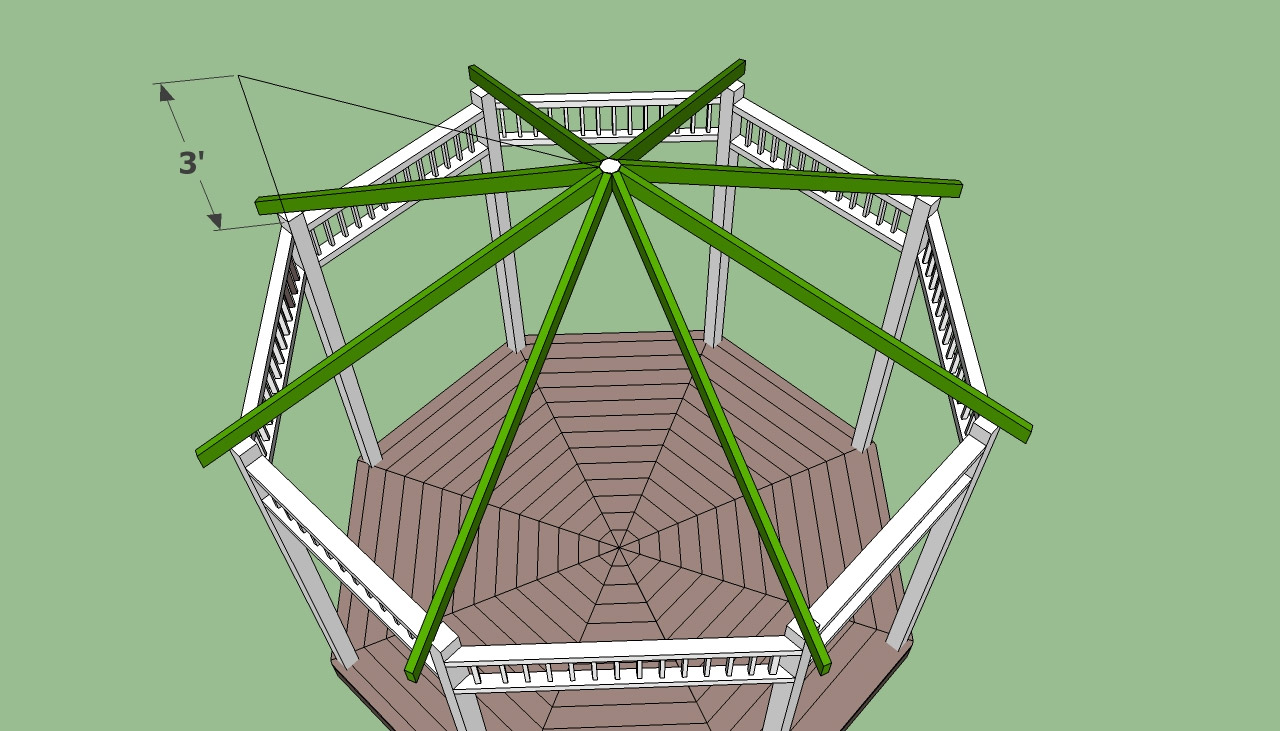
Rafters of the roof.
The roof frame is ready and now you can proceed with its lining with 20 mm plywood. Use a good circular saw to cut pieces of the required size (use a blade with small teeth). Fasten plywood to the rafters with 5 cm self-tapping screws every 15 cm.
Instead of plywood for roof sheathing, you can use boards. If you choose this option, you can not lay tiles on top - just cover the surface with a composition that prevents rotting of wood.
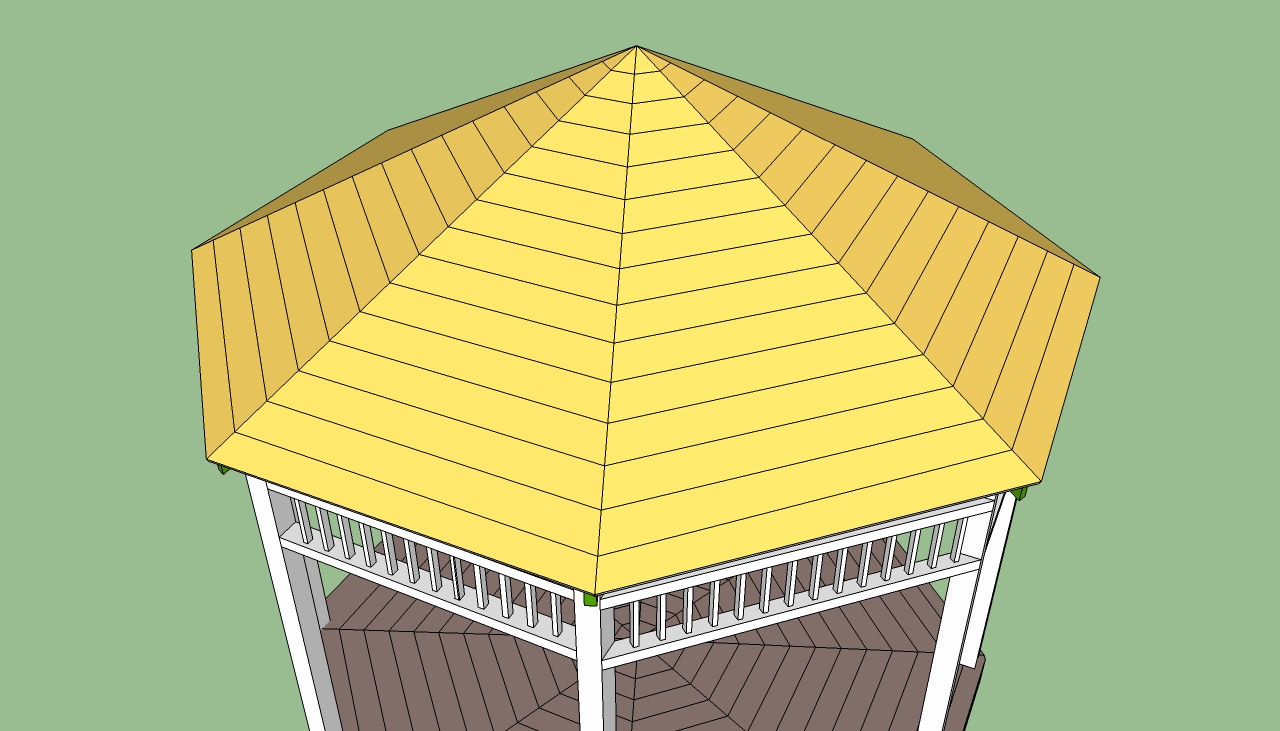
Sheathing rafters.
After this stage is completed, you should cover the plywood with bituminous tiles. It is necessary to start this work from the bottom of the roof after installing the drip. Fix the tiles with roofing nails, backing 2-3 cm from the edge.
Pay special attention to the installation of the ridge template, since poorly performed work in this case will lead to the fact that rainwater will sooner or later damage the base and the rafter system.
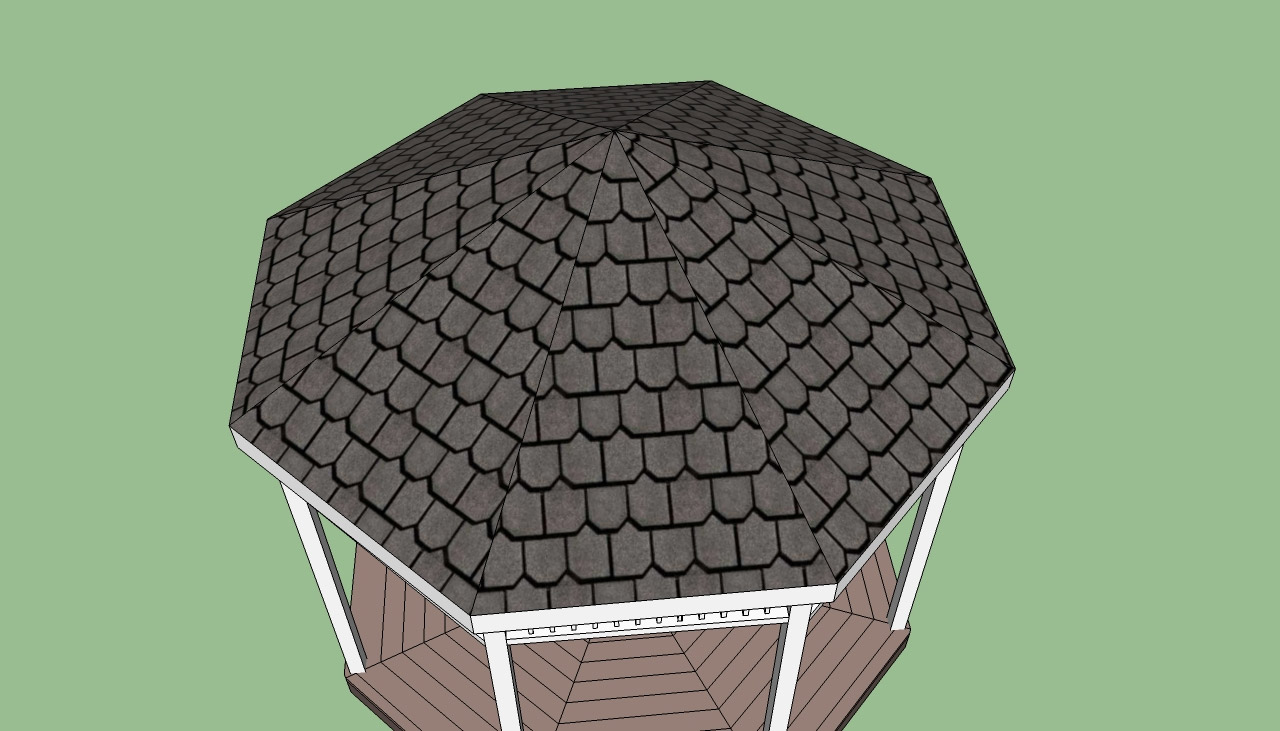
Tiling the roof.
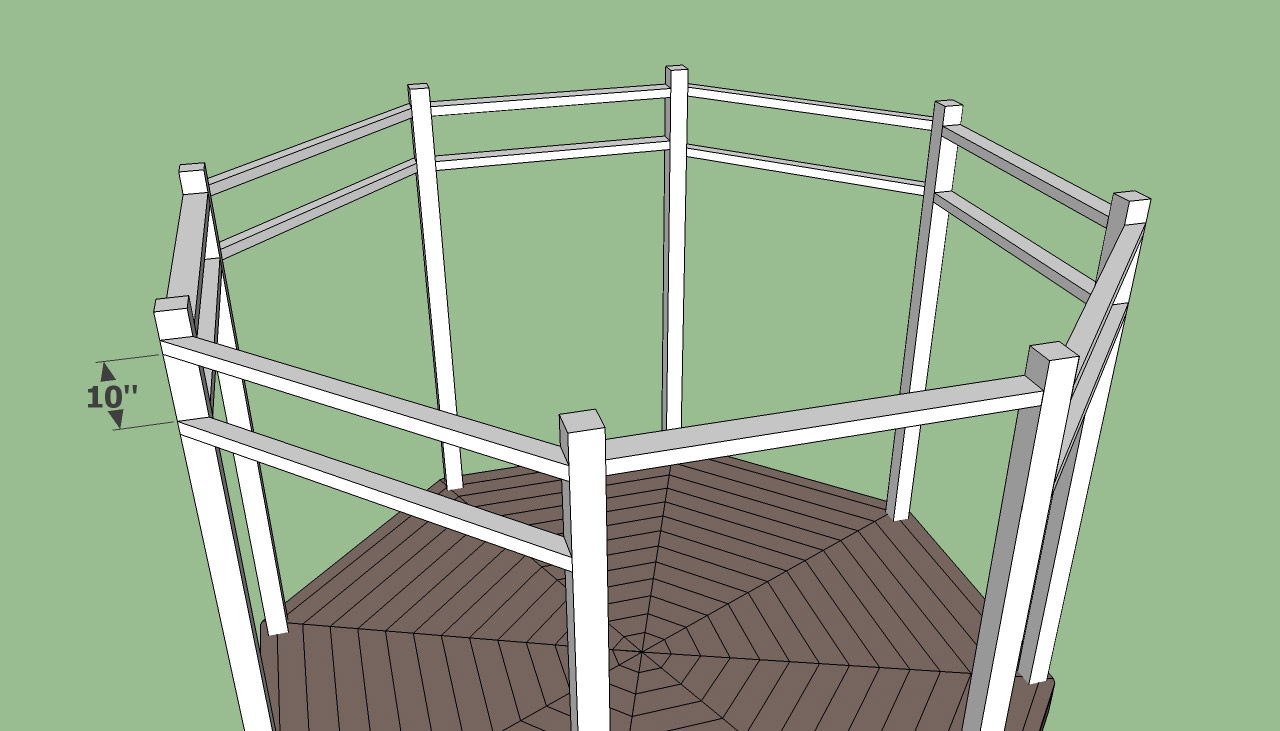
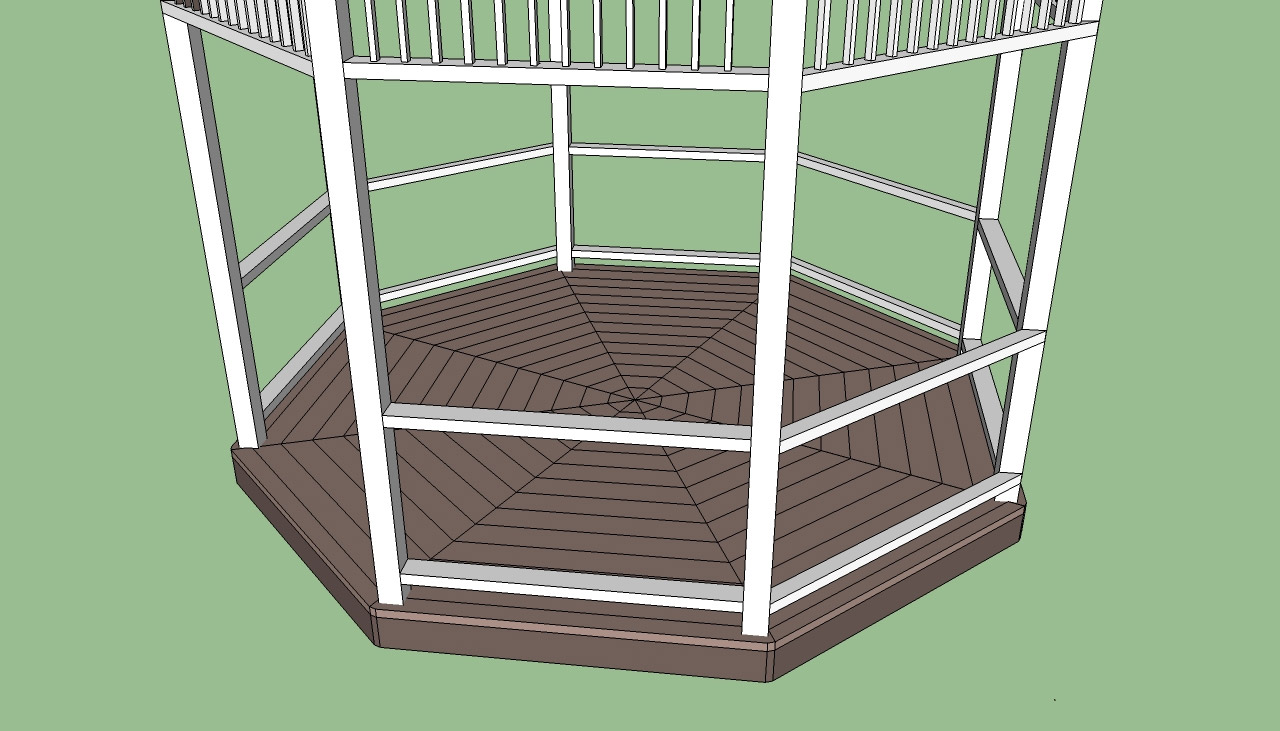
The roof is ready, it is the turn of the lower fence. Like the upper decorative frieze, the fence can be given a wide variety of shapes and sizes. You need to think about this issue in advance so that the outcome of your work does not disappoint you.
First, install the lower guide, using 5 × 10 cm bars for these purposes. To fix them in the right position, you can either screw the screws at an angle of 10 cm or use metal angle brackets.
Lower guide fence arbor.
The upper guide is similarly made. Install it 70-80 cm above the bottom, however, the height of the fence depends solely on your needs and tastes.
Tip: When installing the guides, be sure to use the spirit level, otherwise the gazebo fence will be inaccurate.
The upper guide fence of the gazebo.
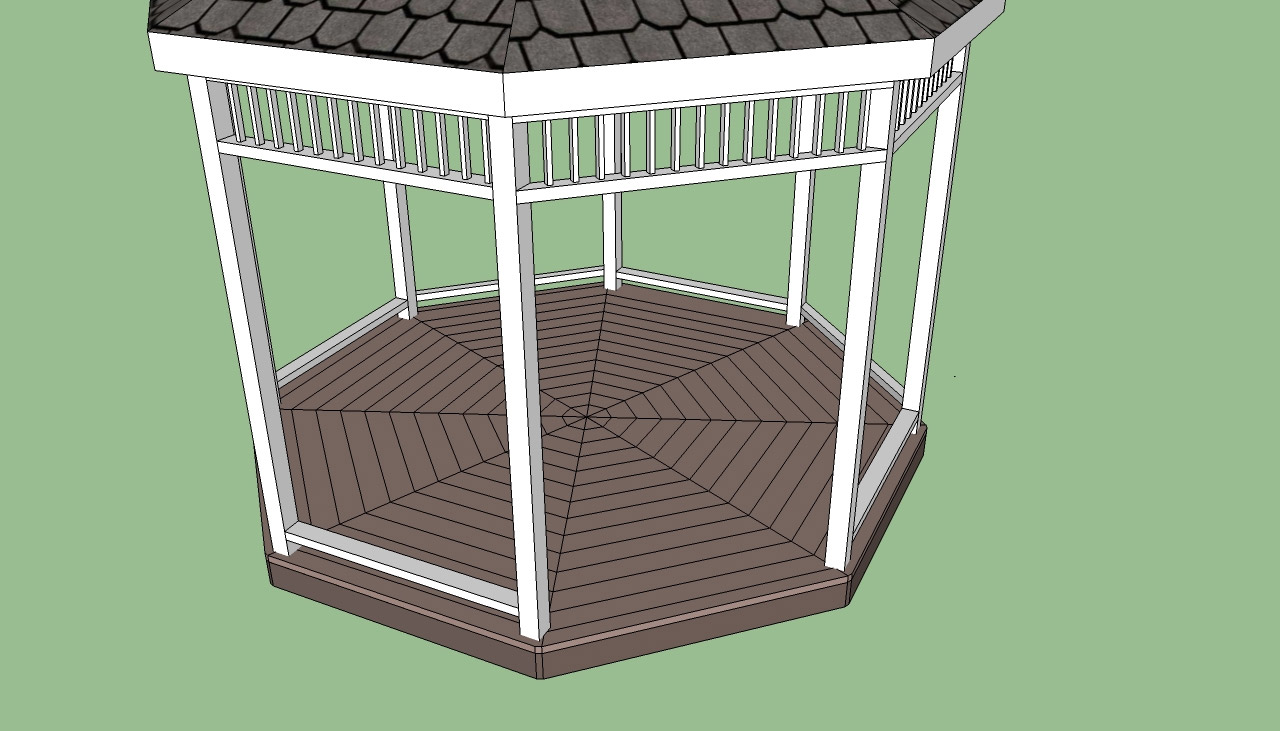
For the manufacture of balusters, use bars 5 × 5 cm. They should be placed every 5-10 cm. Of course, they should be distributed evenly (so that the distances between the balusters are the same, use the insert from the trimmed bar).
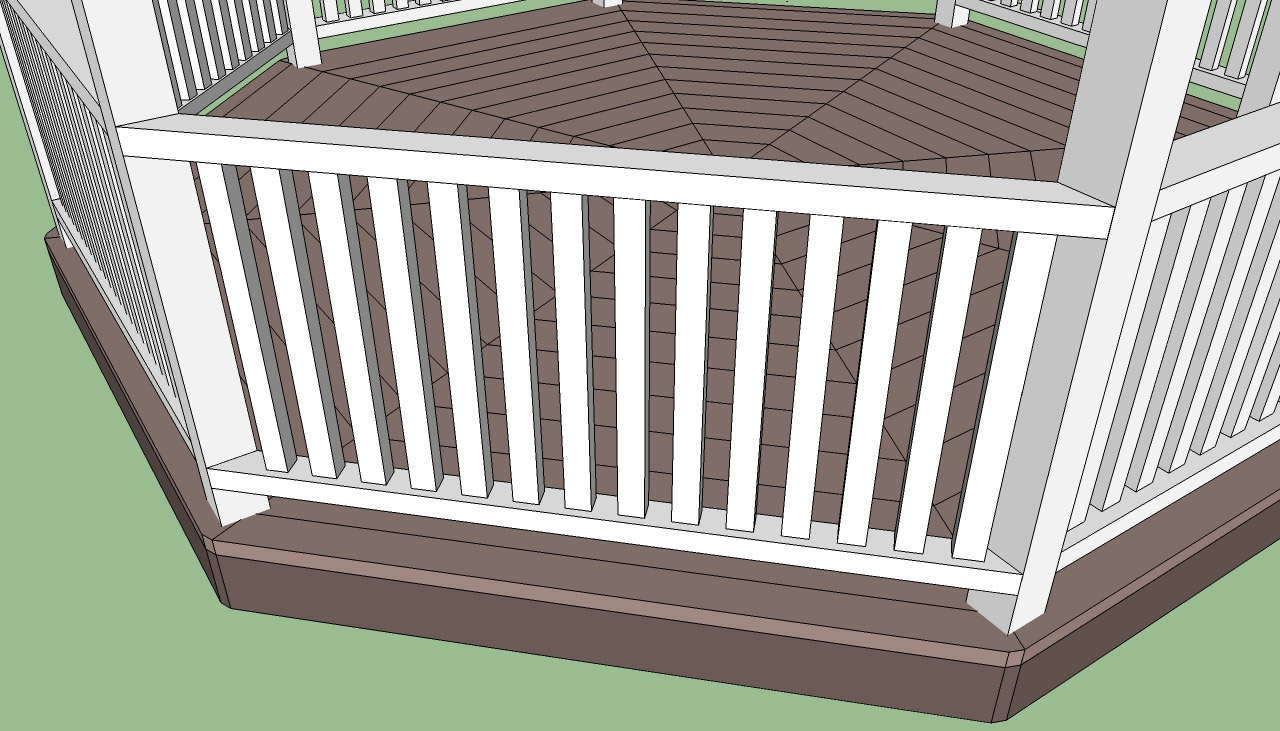
Fencing arbor.
Instead of square bars, you can use wide rails as balusters, but remember that the design of the lower fence should match the design of the upper decorative frieze, otherwise the arbor will lack grace.
If you want the fence of your gazebo to look aesthetically pleasing, do not hammer nails into the upper ends of the balusters through the railing - in this place it is better to use hidden connections, for example, dowels (pins).
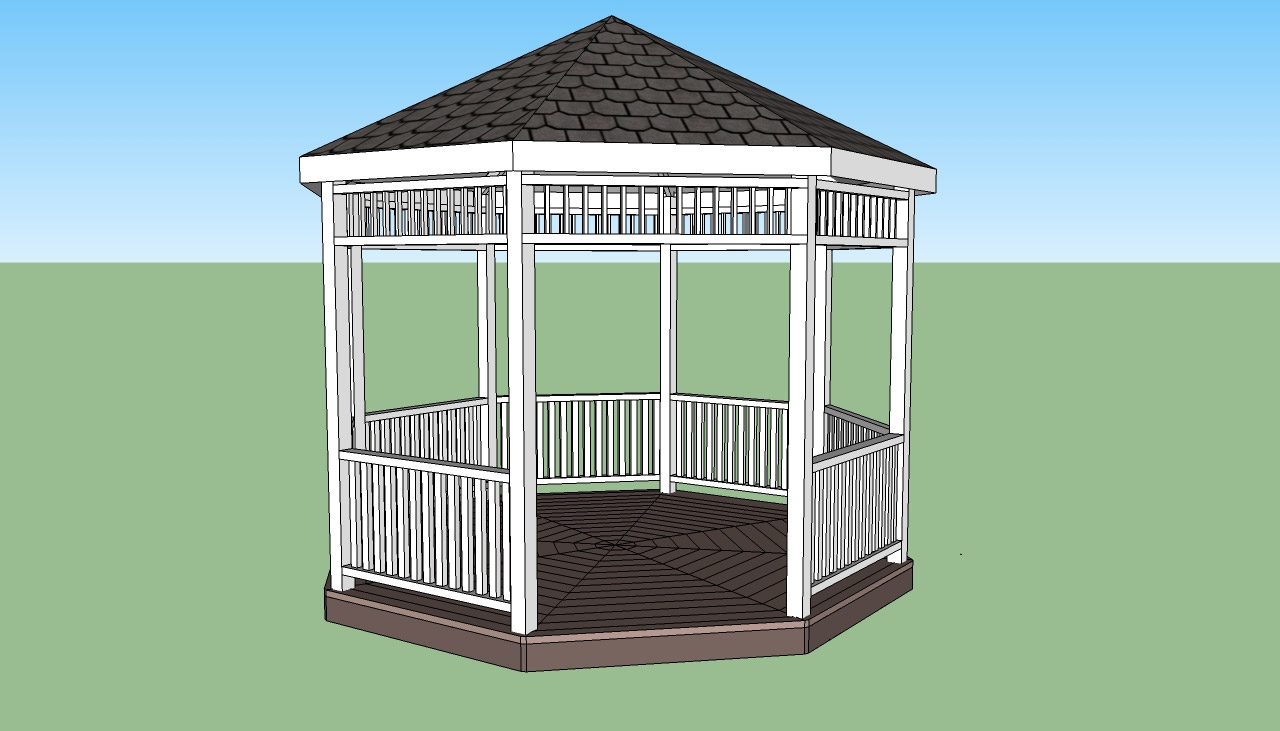
Ready arbor.
Upon completion of construction work, do not forget to fill all the excess holes with wood putty.Allow the composition to dry, and then sand the wood surfaces.
Tip: To protect the gazebo from rotting, cover all wooden surfaces with several layers of stain.
Be extremely careful and do not forget about common sense, this will allow you to avoid costly mistakes. Do your best, and then you can be proud of the do-it-yourself octagonal gazebo.